
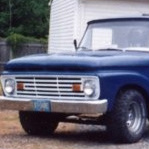
64 project "Money Pit"
-
Alan Mclennan

- Posts: 9324
- Joined: October 14, 2006, 6:16 pm
- Location: In the shed... Cranebrook NSW

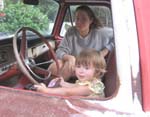
Nice going Red!, who`s steering wheel is that?
Honey, If I say I`ll fix something I will, there`s no need to remind me every 6 months!!
66 f100 tabletop swb 351 Clevo C6 "Beryl"
Slick Stock 3 KCMO
Slick Stock 4 Altoona
Slick Stock 5 KCMO
Slick Stock 6 Altoona
Slick Stock 7 Salina KS
Slick Stock 8..............................
66 f100 tabletop swb 351 Clevo C6 "Beryl"
Slick Stock 3 KCMO
Slick Stock 4 Altoona
Slick Stock 5 KCMO
Slick Stock 6 Altoona
Slick Stock 7 Salina KS
Slick Stock 8..............................
-
Reds Rod Shop
- Posts: 317
- Joined: January 11, 2009, 6:43 pm
- Location: Anderson, SC
Its a Grant wheel. Its older. A buddy of mine picked it up at a swap meet for $20.00 a couple of years ago. He donated it to the cause. lol
Red
My 1964 Restomod Project http://fordtruk.com/forums/viewtopic.ph ... sc&start=0
My 1964 Restomod Project http://fordtruk.com/forums/viewtopic.ph ... sc&start=0
-
Reds Rod Shop
- Posts: 317
- Joined: January 11, 2009, 6:43 pm
- Location: Anderson, SC
It's not much but I got the truck back from the muffler shop. It turned out good and It's all tucked between the frame rails. I reaized when we got it back to the shop that it's been over a year since "Money Pit" has seen the great out doors. Man time flieswhen you're having fun. Well, now time for disassembly, some touch up welding and then paint for the frame.


Red
My 1964 Restomod Project http://fordtruk.com/forums/viewtopic.ph ... sc&start=0
My 1964 Restomod Project http://fordtruk.com/forums/viewtopic.ph ... sc&start=0
-
blackagatha
- Posts: 2582
- Joined: March 10, 2007, 12:49 am
- Location: Arizona
freakin sick.....
the raised bed floor really presents a world of opportunity doesnt it?!?! wow . I may have to do something like that.
Did the pumpkin intrude into the floor, or just by choice? in any case, cool.
the beer bucket is a winner....
I like the rear suspension, how you used the tubes for upper mounts to the frame. I wonder though. It seems you either went severe overkill on the lower links, or underkill on the uppers.... The tabs on top of the pumpkin look like they would like a wee bit of gusset.
Or maybe I don't know Mister Jack Schit, and I'm just paranoid!
oh yeah, and the double differential gasket concerns me a wee bit. Maybe that too doesnt mean jack.... I suppose I do run Without the gasket, and just silicone, so I have introduced the same distance out of whack.... But it seems like moving it out of center would put some weird forces on your axles, bearing, and diff bearings.
How thick is the gasket??
it's kinda funny they put 2 exhaust hangars on thee left, and one on the right. If I needed something on one side, like that, I like to put it on both, regardless of whether it looks like it needs it. My left pipe recently ripped a chunk out of the pipe, and left it hanging on the hangar because it didnt have the extra hangar they put on the right. Turns out it really DID need it...
'63 with 390 & lots of juice. But never enough. Always want more.


It has to do with geometry and if the link is in tension or compression.blackagatha wrote:freakin sick...I like the rear suspension, how you used the tubes for upper mounts to the frame. I wonder though. It seems you either went severe overkill on the lower links, or underkill on the uppers.... The tabs on top of the pumpkin look like they would like a wee bit of gusset.
...
I think I am going to do a separate post on the details…Don’t want to hijack this thread.
Hi Red, you have some really good ideas and your workmanship is fantastic,well done,i have 20x8.5 with 265/50X20 tyres under the front of mine i made the fornt end using jag spindles and control arms to get gaurd clearance i made new hubs and that brought the wheels in towards the chassis for more steering .keep up the photo's,\
Darren
Darren
-
blackagatha
- Posts: 2582
- Joined: March 10, 2007, 12:49 am
- Location: Arizona
well, I would really like to understand this bit of geometry physics.
I can understand the tension/ compression making skinny links on top OK, wondering how much is really necessary on bottom. It looks cool though, and I LOVE to overkill things...
I just get funny when I think about what could happen when a small weld cuts loose. I like to gusset the hell out of everything. I dont understand the actual physics, so I make a good guess as to what it needs, and give it a little extra!
'63 with 390 & lots of juice. But never enough. Always want more.
I figured he did the lower links the way he did to take advantage of the front leaf spring mounts... the coolio flange dangling down likely adds a lot of strength, but feels decorative.
I like what you've done with it! On my next build (or if I get the bug to replace my rear suspension on this build) I may just follow your lead. My take would be to extend the lower link about 6" past the rear, & mount the coil-over to the end.
On the uppers, i'd place the mounts on the axle tubes so that they'd smack the underside of the bed at the same time (+/-) as the pumpkin.
I love a lowered stance, but prefer a full bed floor.
Not knockin' your choice to do the raised floor - it's awesome & imho a much more appealing choice than the typical "bridge" arrangement.
It's just that for me, as a builder, my trucks will always be trucks - and I need a bed floor that lines up with the gate. Now if I were to raise the floor and build a custom gate... LOL
Great work - keep sharing!
Ya I like the custome talegate thing. Something that pivots higher and the lower portion would swing under the floor.
Got very crazy at work so I didn't get the diagram done to help visualize the forces.
*** EDIT ***
It is not to detailed, but it works.
http://fordtruk.com/forums/viewtopic.ph ... 285#140285
Got very crazy at work so I didn't get the diagram done to help visualize the forces.
*** EDIT ***
It is not to detailed, but it works.
http://fordtruk.com/forums/viewtopic.ph ... 285#140285

-
Reds Rod Shop
- Posts: 317
- Joined: January 11, 2009, 6:43 pm
- Location: Anderson, SC
The pumpkin did intrude into the floor along with the upper arms. That's what you get when going low with big rims. The upper tubes are pretty strong, they are actually DOM tubing and it is 3/16" wall. The ears on top of the pumpkin are not going anywhere, they are notched into the housing. The housing may tear but the welds are there to stay. The lower links, well, I wanted to add a little strength and some flair also, thus the holes in it. I had the same concern with the double gasket, but a buddy of mine has had a double in his 67 F100 for the past 20 years and has never had any issues. The double hangers on the left exhaust, well, its not really 2 hangers. Both sides are the same. What you are seeing is the old parking brake hanger.blackagatha wrote:freakin sick.....
the raised bed floor really presents a world of opportunity doesnt it?!?! wow . I may have to do something like that.
Did the pumpkin intrude into the floor, or just by choice? in any case, cool.
I like the rear suspension, how you used the tubes for upper mounts to the frame. I wonder though. It seems you either went severe overkill on the lower links, or underkill on the uppers.... The tabs on top of the pumpkin look like they would like a wee bit of gusset.
oh yeah, and the double differential gasket concerns me a wee bit. Maybe that too doesnt mean jack.... I suppose I do run Without the gasket, and just silicone, so I have introduced the same distance out of whack.... But it seems like moving it out of center would put some weird forces on your axles, bearing, and diff bearings.
How thick is the gasket??
it's kinda funny they put 2 exhaust hangars on thee left, and one on the right. If I needed something on one side, like that, I like to put it on both, regardless of whether it looks like it needs it. My left pipe recently ripped a chunk out of the pipe, and left it hanging on the hangar because it didnt have the extra hangar they put on the right. Turns out it really DID need it...
I am still debating what to do with the tail gate. I like the original look but my gate is pretty rough. I'm debating on just making a gate from scratch. Only time will tell and that'll depend on how well my imagination works with it. We'll, I've just about got everything on the chassis ready to prime and spray. So, its back to the shop for the afternoon. Hopefully I'll make some progress and get some pics up before the weekend is over.
Red
My 1964 Restomod Project http://fordtruk.com/forums/viewtopic.ph ... sc&start=0
My 1964 Restomod Project http://fordtruk.com/forums/viewtopic.ph ... sc&start=0
-
dotcentral
- Posts: 1341
- Joined: August 18, 2006, 5:13 pm
- Location: Charlotte, NC
If I have to replace my tailgate, I am thinking about cutting out the old center section panel to get the right lettering/font of the F O R D, and weld it into a newer tailgate. Unless I run across a nice 64-66 tailgate cheap.Reds Rod Shop wrote: I am still debating what to do with the tail gate. I like the original look but my gate is pretty rough. I'm debating on just making a gate from scratch. Only time will tell and that'll depend on how well my imagination works with it.
Driver: 71 F100 Shortbed: Disc swap, 5.0 HO EFI & AOD
Project Vehicle/Mild Custom: 66 F100 CC longbed: Sold
Project Vehicle/Mild Custom: 66 F100 CC longbed: Sold
-
Reds Rod Shop
- Posts: 317
- Joined: January 11, 2009, 6:43 pm
- Location: Anderson, SC
Well I got the frame painted saturday. Started reassembly tonight. I got everything on except for the steering rack, the spindles and brakes. Hopefully I'll get to work on it again on Wednesday evening, if the Boss (Wife) don't have my evening already planned out for me. Leaving out Thursday for the F100 Nationals.  .... I'd love to have it back rolling before then. I'll post some pics as soon as I get it back rolling.
Red
My 1964 Restomod Project http://fordtruk.com/forums/viewtopic.ph ... sc&start=0
My 1964 Restomod Project http://fordtruk.com/forums/viewtopic.ph ... sc&start=0
-
Reds Rod Shop
- Posts: 317
- Joined: January 11, 2009, 6:43 pm
- Location: Anderson, SC
Well, I got all of the suspension back together except for the rack. Now that I have it completely off of the rotisserie, I've got to touch up the frame where it was attached. Other than that, I'm satisfied with it. Learned a lot about safety wiring the rotors but finally became proficient at it.


Red
My 1964 Restomod Project http://fordtruk.com/forums/viewtopic.ph ... sc&start=0
My 1964 Restomod Project http://fordtruk.com/forums/viewtopic.ph ... sc&start=0
-
thenephilm
- Posts: 543
- Joined: June 25, 2009, 9:06 pm
- Location: Cincinnati

-
Reds Rod Shop
- Posts: 317
- Joined: January 11, 2009, 6:43 pm
- Location: Anderson, SC
Primed it with epoxy then used Urathane, gun metal gray. All of the black is just chassis black. The scout is another project. I've got way too many projects......
Red
My 1964 Restomod Project http://fordtruk.com/forums/viewtopic.ph ... sc&start=0
My 1964 Restomod Project http://fordtruk.com/forums/viewtopic.ph ... sc&start=0