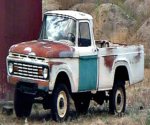
'66 F100 Custom Cab Short/Styleside Factory Correct Resto

A place just for our project & build threads.

Moderators: Kid, Casey 65

Post Reply
MadMaxetc
Posts: 2600
Joined: July 10, 2006, 12:00 pm
Location: Wichita, KS
Contact:
United States of America

Re: '66 F100 Custom Cab Short/Styleside Factory Correct Rest

Post by MadMaxetc »

Holy crap...Laser Straight! Nice work! :shock: :clap: :clap: :clap:
Dan
Project: '63 F-100 LWB / 460 / C6 / 2x4
My Build Thread
User avatar
theastronaut
Posts: 439
Joined: August 7, 2013, 10:43 am
Location: Upstate SC

Re: '66 F100 Custom Cab Short/Styleside Factory Correct Rest

Post by theastronaut »

MadMaxetc wrote:Holy crap...Laser Straight! Nice work! :shock: :clap: :clap: :clap:
That's just the rough bodywork... Haven't long blocked it yet or detail sanded the seam at the back. Still need to long-block the high build, fix any high/low spots that show up, and reprime/block again. This was the easy side, the passenger side was crumpled in so it'll take more work. Then we start inside the bed, lots of time consuming detail sanding in there.
User avatar
HiBoy63
Posts: 1235
Joined: March 12, 2007, 1:48 pm
Location: Colbert Wa
Ireland

Re: '66 F100 Custom Cab Short/Styleside Factory Correct Rest

Post by HiBoy63 »

Its fun watching you do this immaculate restore. I wont be going that deep into my 2 4wd trucks as I enjoy driving them around too much. Its just great seeing someone go this deep into the detail as I am learning a lot just watching.
1963 F250 4x4x292
1965 F100 4x4x352
1998 F150 4x4x4.6
2001 Sport Track 4x4x4.0

In case you are wondering thats Ireland......Freedom is not Free!!!!!!!!

Heritage country Flag
User avatar
theastronaut
Posts: 439
Joined: August 7, 2013, 10:43 am
Location: Upstate SC

Re: '66 F100 Custom Cab Short/Styleside Factory Correct Rest

Post by theastronaut »

HiBoy63 wrote:Its fun watching you do this immaculate restore. I wont be going that deep into my 2 4wd trucks as I enjoy driving them around too much. Its just great seeing someone go this deep into the detail as I am learning a lot just watching.
Thanks, glad you're enjoying the build thread! I feel the same way with my own truck, I'm not even going to paint it. It'll be driven and enjoyed without having to worry about getting it dirty or where I park it. After being around a couple of trucks we've restored like this, I realized that I didn't want that much upkeep!
User avatar
theastronaut
Posts: 439
Joined: August 7, 2013, 10:43 am
Location: Upstate SC

Re: '66 F100 Custom Cab Short/Styleside Factory Correct Rest

Post by theastronaut »

Mud time, my favorite part of the restoration process!! :boohoo:


Skimmed across the seam to get both side dead even.

Image

Image


Then skimmed and blocked the whole side.

Image

Image


Started blocking the left side.

Image


Rodney started working the inside of the bed.

Image

Image

Image

Image

Image
MadMaxetc
Posts: 2600
Joined: July 10, 2006, 12:00 pm
Location: Wichita, KS
Contact:
United States of America

Re: '66 F100 Custom Cab Short/Styleside Factory Correct Rest

Post by MadMaxetc »

I am not a fan of filler inside the bed, but on a restoration I guess you have to to get it really smooth.

Nice work in any case! :clap:
Dan
Project: '63 F-100 LWB / 460 / C6 / 2x4
My Build Thread
rickairmedic
Posts: 1394
Joined: July 19, 2006, 9:27 pm
Location: Louisville,Ky

Re: '66 F100 Custom Cab Short/Styleside Factory Correct Rest

Post by rickairmedic »

Max I would bet most of that filler is between a 32nd and a 64th of an inch thick if its that thick :D.


Rick
if it aint broke fix it till it is :D
User avatar
theastronaut
Posts: 439
Joined: August 7, 2013, 10:43 am
Location: Upstate SC

Re: '66 F100 Custom Cab Short/Styleside Factory Correct Rest

Post by theastronaut »

MadMaxetc wrote:I am not a fan of filler inside the bed, but on a restoration I guess you have to to get it really smooth.

Nice work in any case! :clap:
rickairmedic wrote:Max I would bet most of that filler is between a 32nd and a 64th of an inch thick if its that thick :D.


Rick
Yeah it's not thick at all, not over 1/16" anywhere. I can spread at about a 1/16", so it's thinner than that after sanding. We check any are that needs to be skim coated with a straight edge while straightening the metal for two reasons- one to get the metal as close as possible, and two, to make sure that the filler won't be too thick. The Slick Sand won't build that thick, but even if it did we don't need that much build thickness everywhere so we use filler. The wrecked bedside was 5/16 thick and it took years before it ever cracked... the newer fillers are way better than the old stuff and we're working the metal out so it doesn't go on thick; there shouldn't ever be any problems with it later.
User avatar
theastronaut
Posts: 439
Joined: August 7, 2013, 10:43 am
Location: Upstate SC

Re: '66 F100 Custom Cab Short/Styleside Factory Correct Rest

Post by theastronaut »

Some details of sanding the primer. I sand the flat areas first, then hit the edges with guidecoat so I can see how much primer I'm taking off the edge, and also how evenly I'm blocking the edge. This keeps the diameter and shape of the edge even front to back.

Image


Roll above the edge and the flat area below sanded first.

Image


Shot with guide coat.

Image


Edge blocked. You can see how far the new edge shape comes over into the upper roll and lower flat panel.

Image


Sanding/shaping the bed side seam using a 1/8" welding rod wrapped in sandpaper.

Image

Image


Ready to shape the lower edge of the upper bed panel.

Image


After sanding.

Image


Left side blocked, a couple spots touched up, seams/edges detail sanded. Ready for blocking with 180 and shot with more Slick Sand.

Image
MadMaxetc
Posts: 2600
Joined: July 10, 2006, 12:00 pm
Location: Wichita, KS
Contact:
United States of America

Re: '66 F100 Custom Cab Short/Styleside Factory Correct Rest

Post by MadMaxetc »

So much better than factory! Again...nice job.

Thanks for the details and steps too.
Dan
Project: '63 F-100 LWB / 460 / C6 / 2x4
My Build Thread
User avatar
theastronaut
Posts: 439
Joined: August 7, 2013, 10:43 am
Location: Upstate SC

Re: '66 F100 Custom Cab Short/Styleside Factory Correct Rest

Post by theastronaut »

MadMaxetc wrote:So much better than factory! Again...nice job.

Thanks for the details and steps too.

Thanks, here's a "how-to" post I did on detail sanding.

http://67-72chevytrucks.com/vboard/show ... p?t=592011
User avatar
JOSHF100
Posts: 86
Joined: December 2, 2012, 8:06 pm
Location: Birmingham Al
United States of America

Re: '66 F100 Custom Cab Short/Styleside Factory Correct Rest

Post by JOSHF100 »

Very nice work! ...But you already know that. :) :)
Question... Would you do a post on how you grind/smooth your welds? Yours look like the don't even need any skim coat of filler. :thumright:
Type of tools, grits and technique. If you have a post on this already would you please provide a link?
Thanks
Randall
User avatar
theastronaut
Posts: 439
Joined: August 7, 2013, 10:43 am
Location: Upstate SC

Re: '66 F100 Custom Cab Short/Styleside Factory Correct Rest

Post by theastronaut »

scbolt wrote:Very nice work! ...But you already know that. :) :)
Question... Would you do a post on how you grind/smooth your welds? Yours look like the don't even need any skim coat of filler. :thumright:
Type of tools, grits and technique. If you have a post on this already would you please provide a link?
Thanks
Randall
I don't have a "how-to" post on grinding, but a guy on 67-72chevytrucks.com has a great write up that explains the process very well. It's pretty much the same technique we use. We use the 4.5" grinder with a hard stone to knock just the top of the welds down if we're working on a lot of welds, smaller areas we use a 3" cut-off wheel with 2-3 wheels stacked to cut the tops of the weld beads off. We level out the remaining weld bead with a 3" air angle grinder with a 36 grit disc, taking care to not dig into the base metal. Then finish up with a D/A sander with 60 or 80 grit to take out the grinding marks. The biggest thing with making weld seams disappear is getting both pieces of metal exactly aligned before tacking them together. If the joint is off, no amount of welding/grinding will make it look right after the weld is smoothed.


Here's Nuke1's how-to thread:

http://67-72chevytrucks.com/vboard/show ... p?t=392824
User avatar
theastronaut
Posts: 439
Joined: August 7, 2013, 10:43 am
Location: Upstate SC

Re: '66 F100 Custom Cab Short/Styleside Factory Correct Rest

Post by theastronaut »

Sprayed inside the bed, the header panel, and the left bedside sprayed with Slick Sand today.


Shaped a piece of foam to fit the bed floor ridges and glued it to a jitterbug sander to prep the bed floor before primer.

Image


Some shots of the primer. This part of the resto gets kinda repetitive...

Image

Image

Image

Image

Image

Image

Image


Some shots while it was still wet.

Image

Image

Image

Image

Image
User avatar
Shadow
Posts: 1173
Joined: January 6, 2011, 7:19 pm
Location: Topeka Kansas

Re: '66 F100 Custom Cab Short/Styleside Factory Correct Rest

Post by Shadow »

I'm Blown Away! Looks Like This Truck Will Be About As Close To Perfect As Is Humanly Possible. How Many Hours Will You Have Into This Project By The Time Its Completed?
User avatar
theastronaut
Posts: 439
Joined: August 7, 2013, 10:43 am
Location: Upstate SC

Re: '66 F100 Custom Cab Short/Styleside Factory Correct Rest

Post by theastronaut »

Shadow wrote:I'm Blown Away! Looks Like This Truck Will Be About As Close To Perfect As Is Humanly Possible. How Many Hours Will You Have Into This Project By The Time Its Completed?
Thanks, that's what we're shooting for! I'm guessing 1500-1700, we're over 500 already. Still have a ton of work ahead of us!
rickairmedic
Posts: 1394
Joined: July 19, 2006, 9:27 pm
Location: Louisville,Ky

Re: '66 F100 Custom Cab Short/Styleside Factory Correct Rest

Post by rickairmedic »

I know a lot of us really appreciate the insight into what it takes to get one as straight as possible . This may very well be the cleanest straightest slick out there when you get done with it :D.

Rick
if it aint broke fix it till it is :D
User avatar
bird55
Posts: 558
Joined: February 16, 2009, 11:56 am
Location: Tulsa, Oklahoma
United States of America

Re: '66 F100 Custom Cab Short/Styleside Factory Correct Rest

Post by bird55 »

Those last shots look like they have orange peel in them? Is that just some kind of high build primer or what is going on there? I know you know what you're are doing so can you explain? Does it flow out as it cures?
Post Reply