Plan your build. But just know everything is going to change along the way.
Whatever your budget is, add 40%
Don't listen to the haters in some of the other forums. This is your build, do it how you want.
Invest in a good step drill bit. Spend the money. Trust me, it will make all the frame holes you need to drill a lot easier.
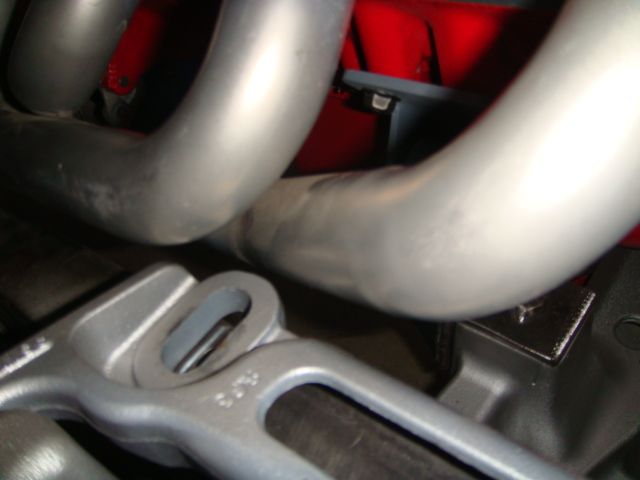
The crown vic motor mount pedestals are not centered. They are offset to the passenger side. (I scratched my head quite a bit on this until I actually measured it)
Remember that this swap changes everything - Motor location, exhaust, steering, drive shaft, brakes
This swap took me about a month. I know the pros are faster but I'm a nights and weekends type guy.
If you are changing to power brakes... two words ---> PEDAL RATIO! This kicked my ass for a week.
Try to keep your truck on the road. If it's running, you'll drive it. Otherwise, it might sit in that garage for years.
Here goes:
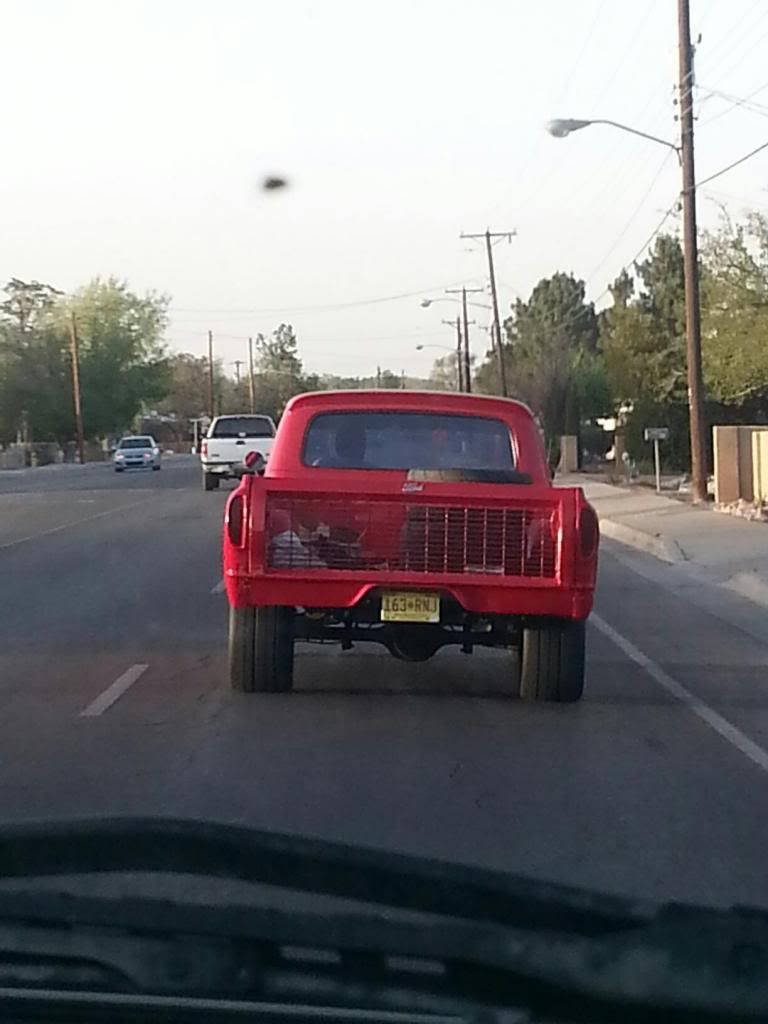
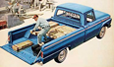
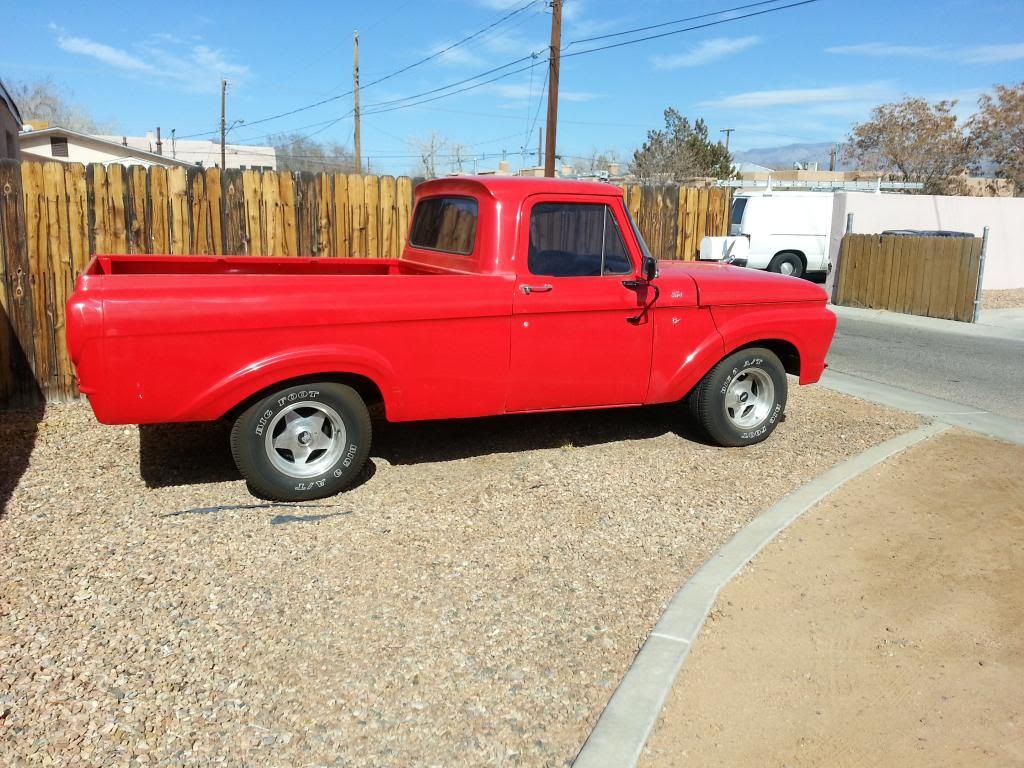
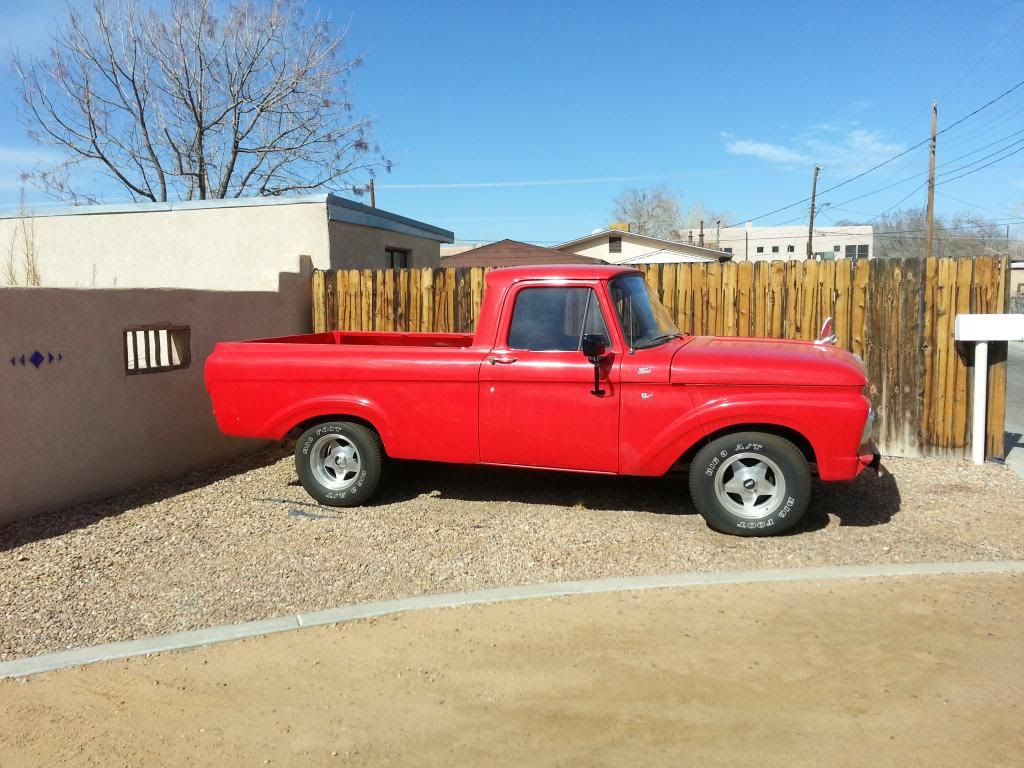
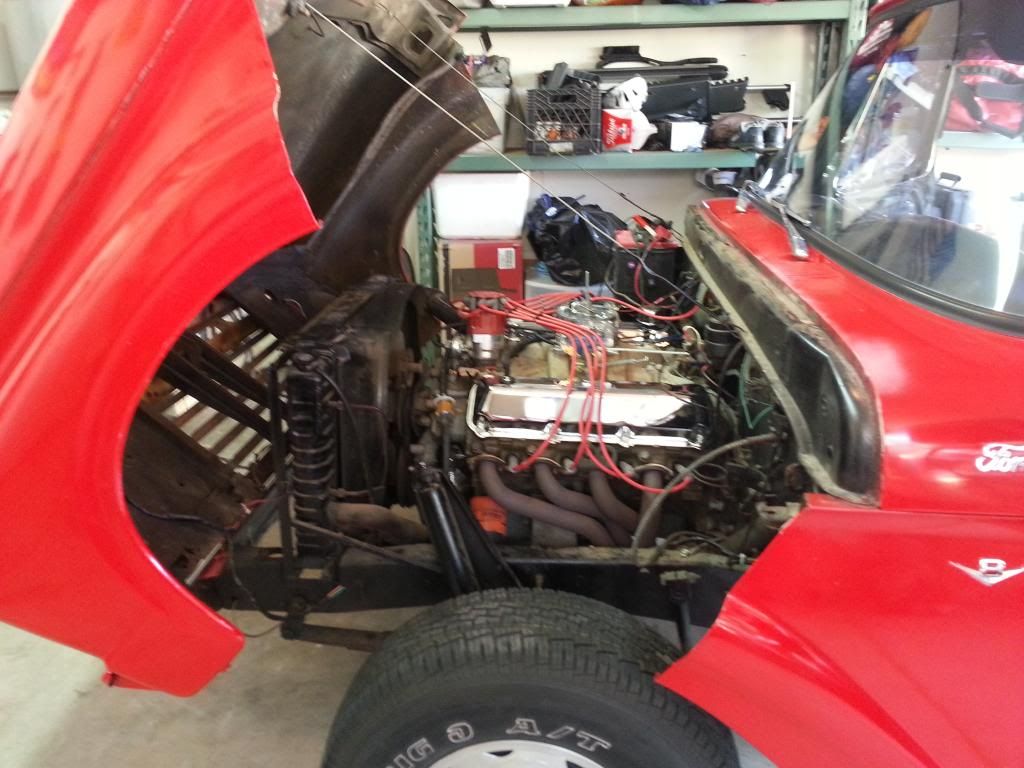
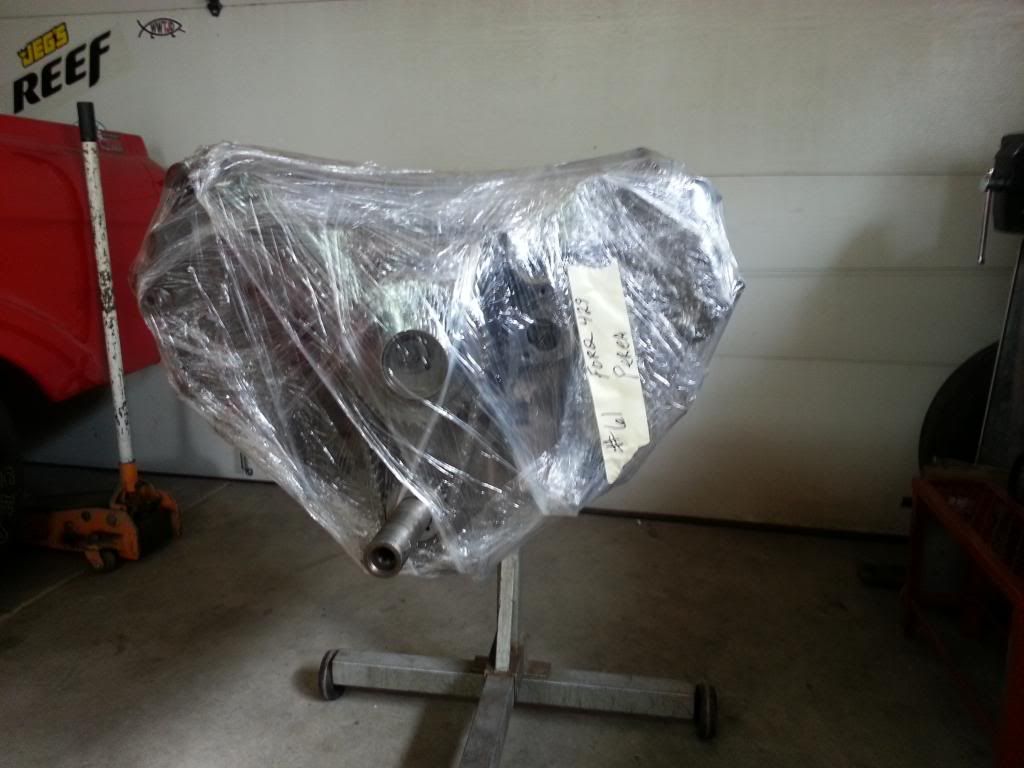
Here's a couple pics from early on after I bought her. I bought this truck from a backwoods hillbilly who had some big aspirations but not much skill. He put a 429 out of a 73 Gran Torino into the truck. Good motor and trans choice but execution of the swap left something to be desired. I do like the filp hood. Makes it easy to work on.
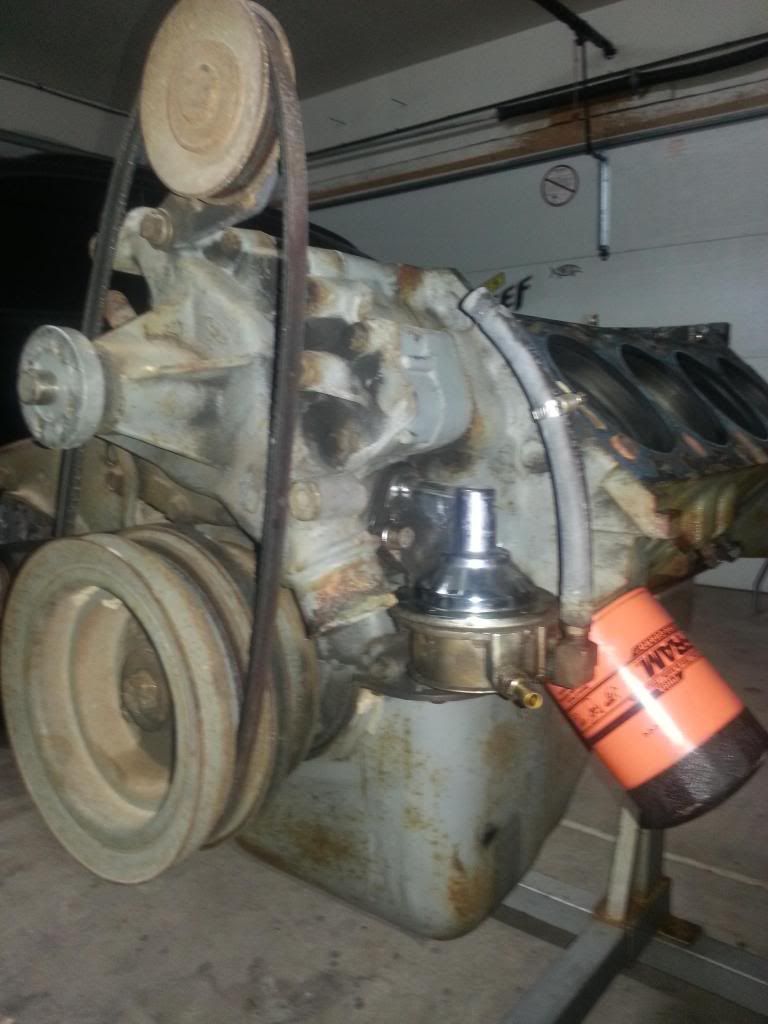
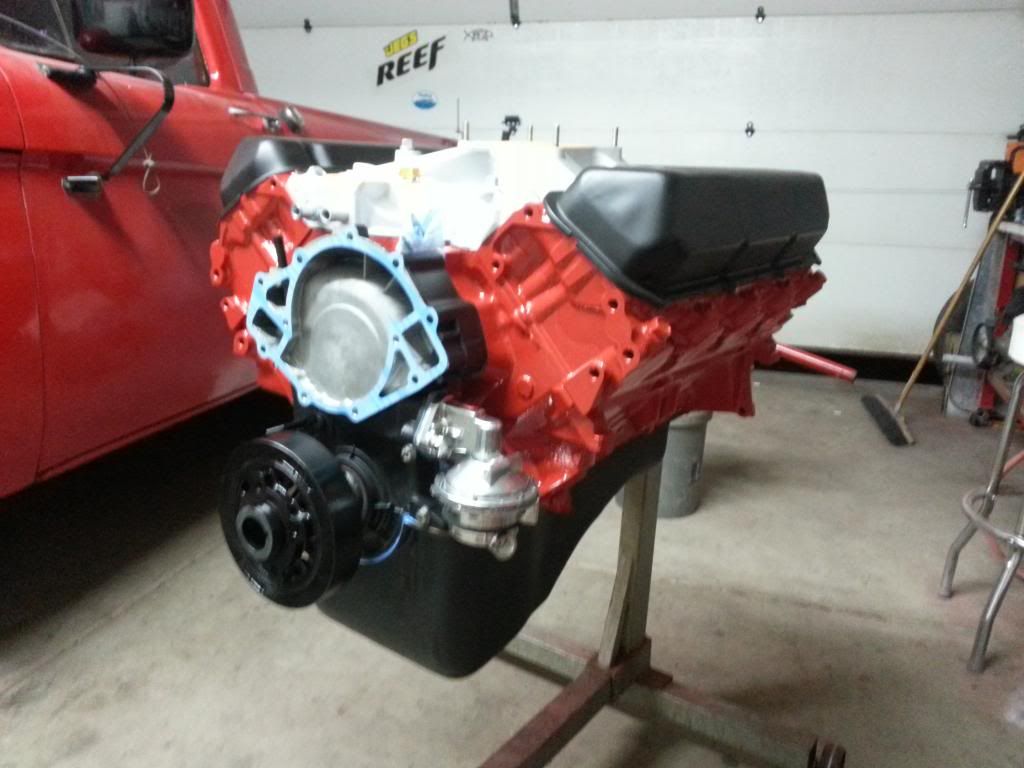
My first goal was to pull the motor, get a short block rebuild and get it back running and driving
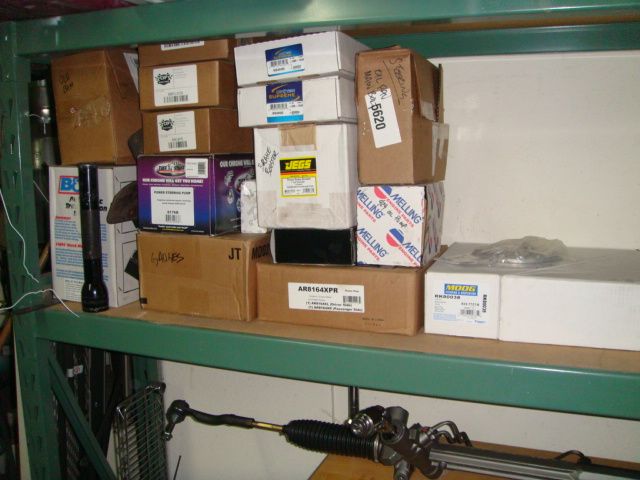
Fast forward a year. I started stockpiling parts for the Crown Vic Swap
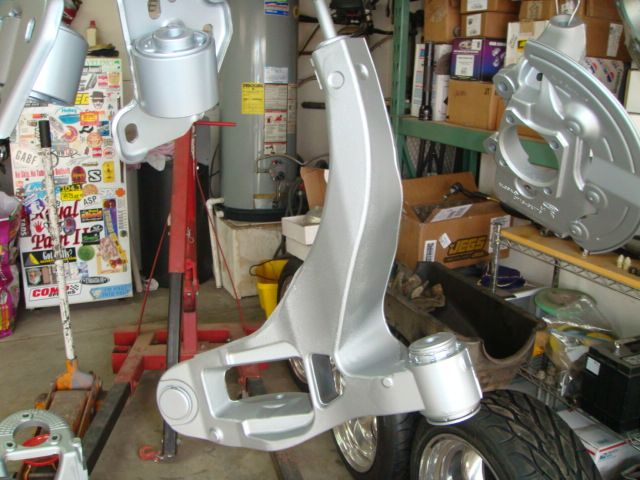
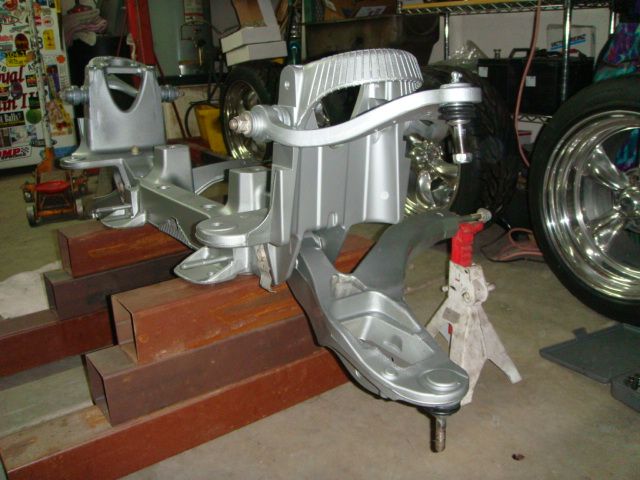
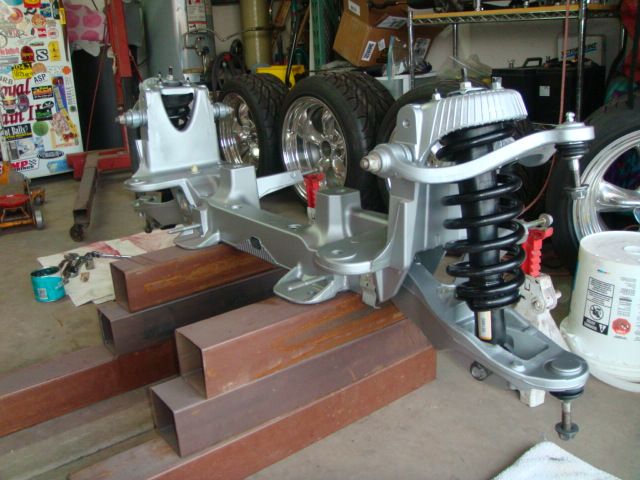
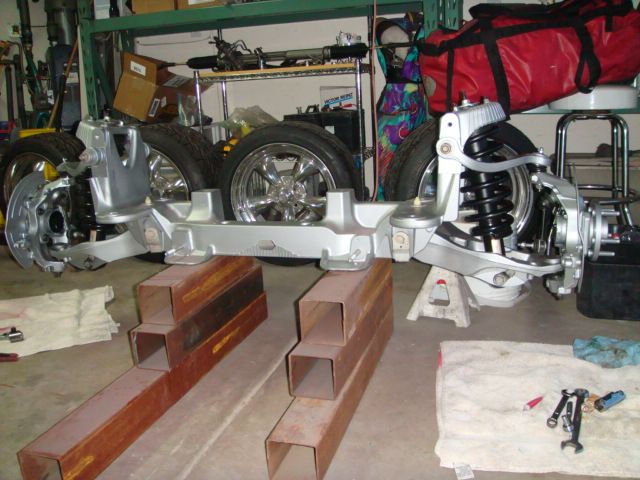
Did a complete tear down on the front end I picked up at the scrap yard. Paid $300 plus I tipped the dude $40 because he pulled while I waited. Decided To repaint everything. This is Duplicolor Cast Coat Aluminum Engine paint.
[img]http://i1038.photobucket.com/albums/a462/jcperea69/F100%20Resto/DSC04944_zpsfcd6d7ce.jpg[img]
Then started re-assembly
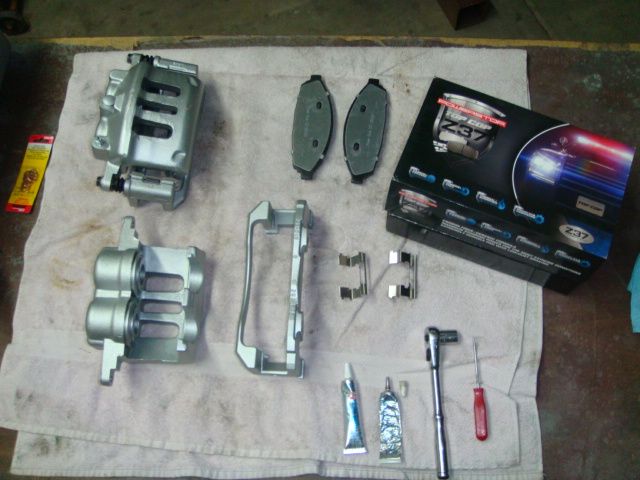
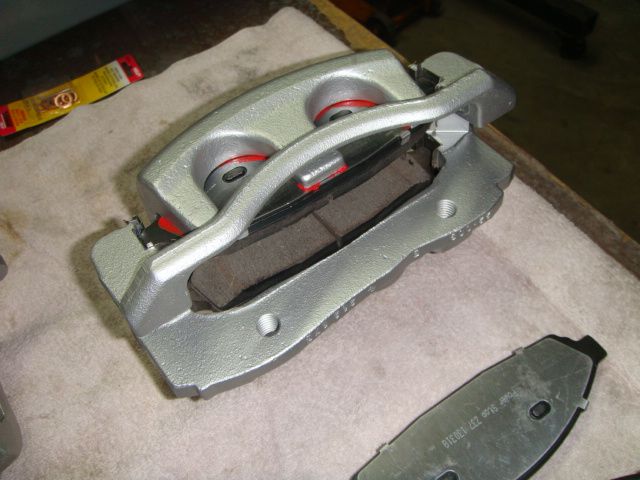
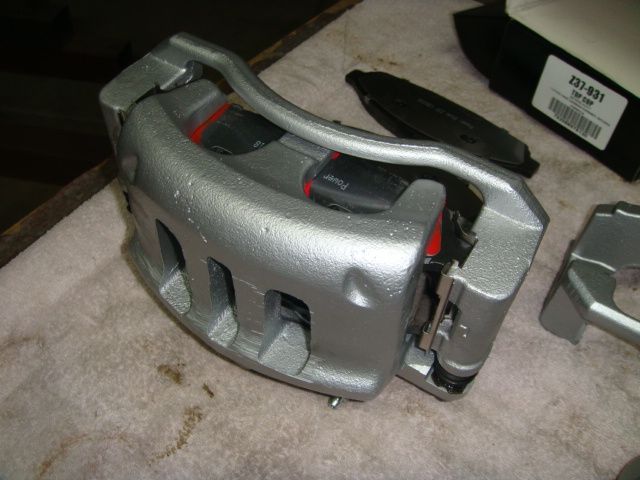
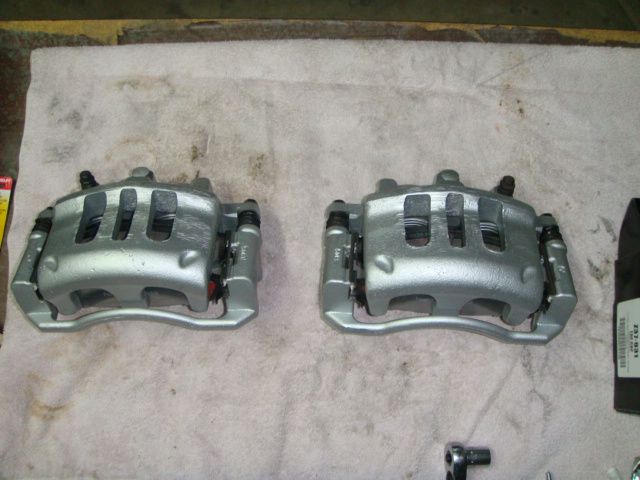
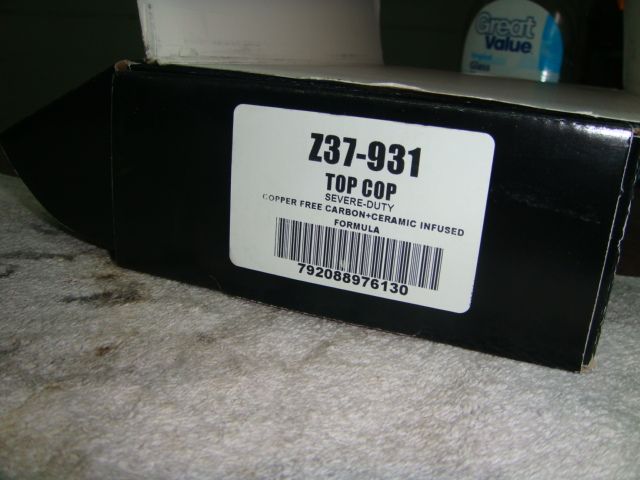
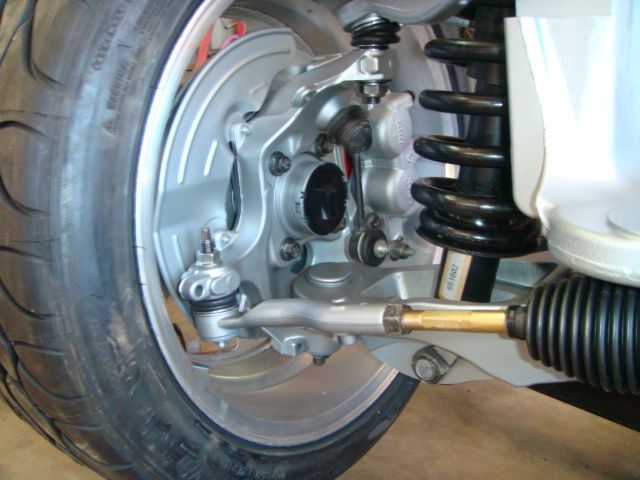
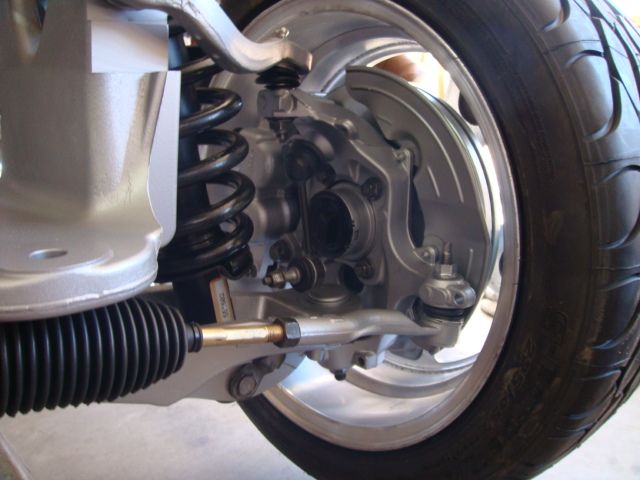
Brake rebuild was next. Rebuilt the calipers and went with Top Cop brake pads and drilled/slotted rotors. Rock Auto is where I ordered most of these parts.

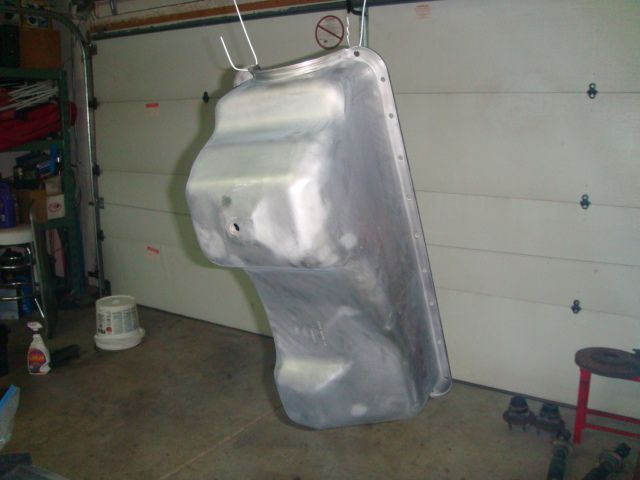
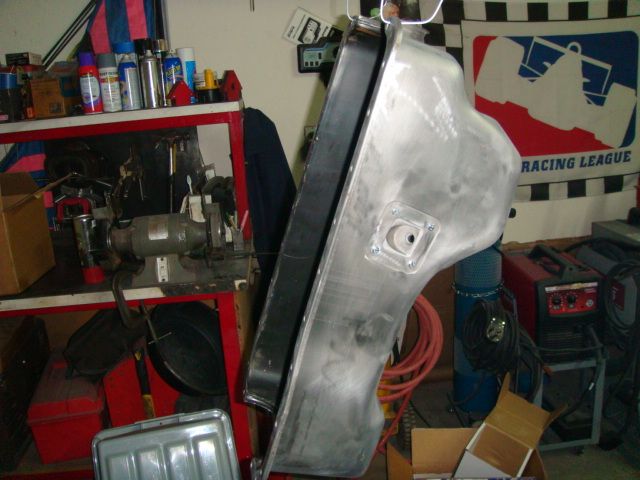
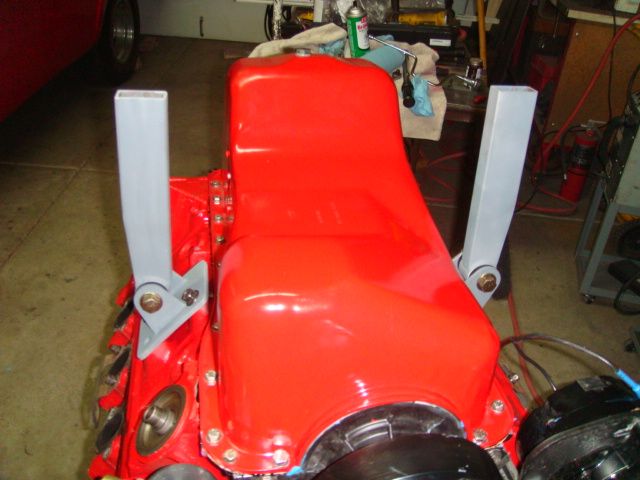
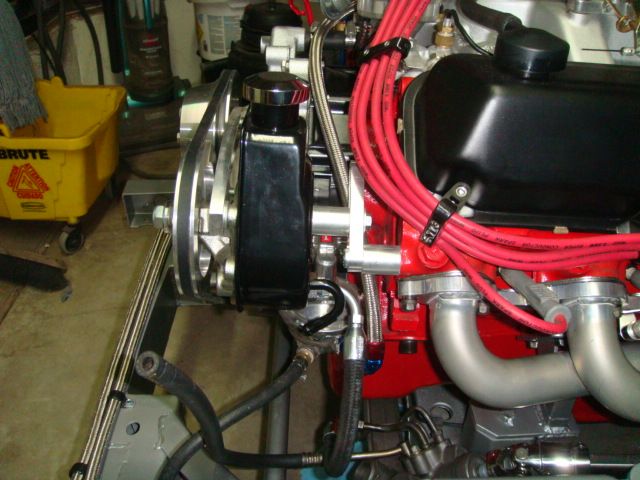
I knew I was going to need to change to a rear sump oil pan so scored one on Craigs for $30. Stripped and painted. Love that Ford Red!
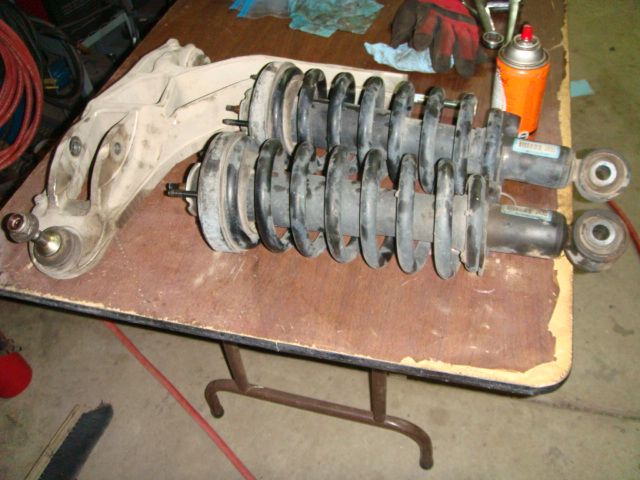
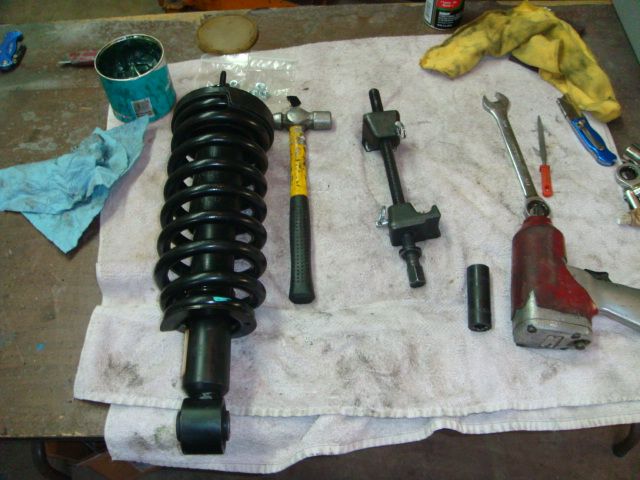
Decided to install new struts as well.
Hubs were up next
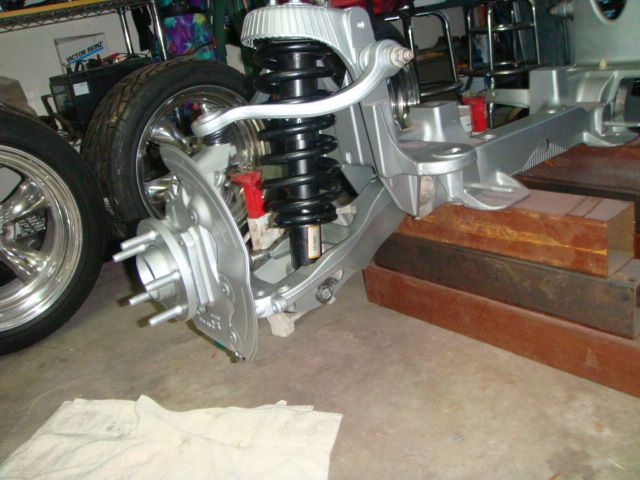
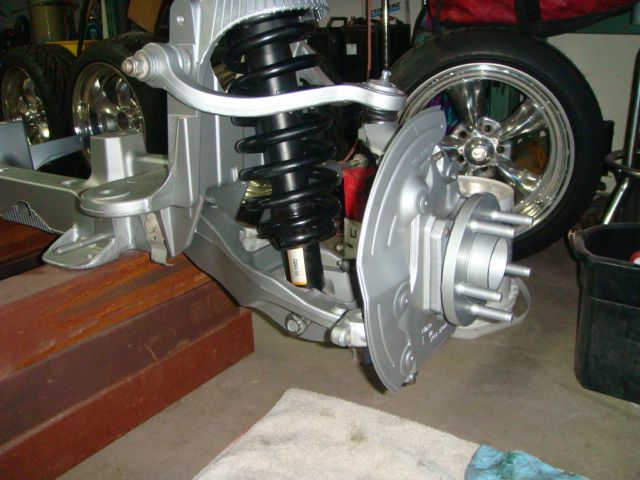
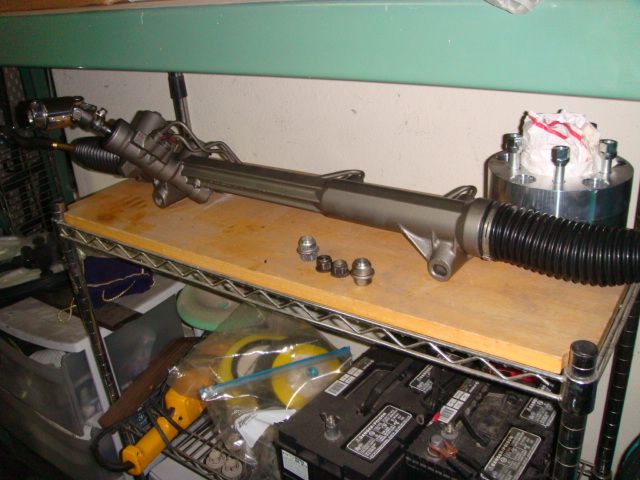
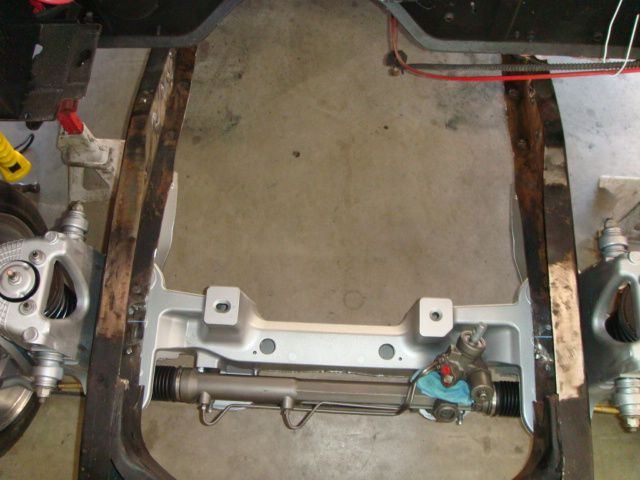
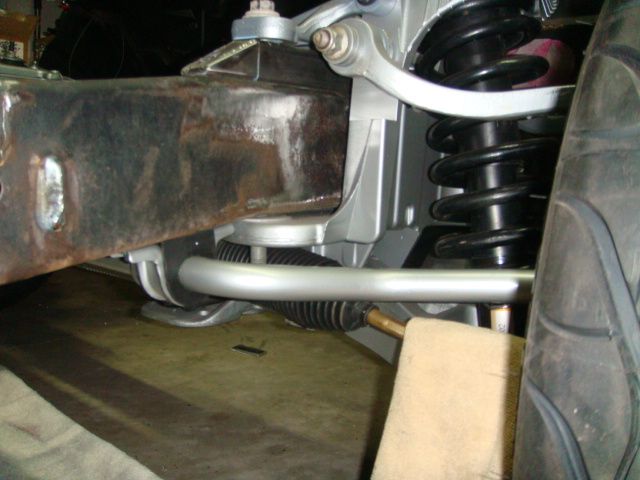
Rebuilt rack and pinion
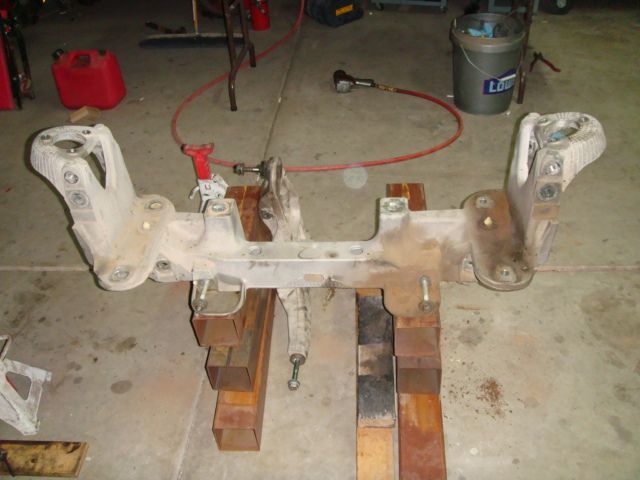
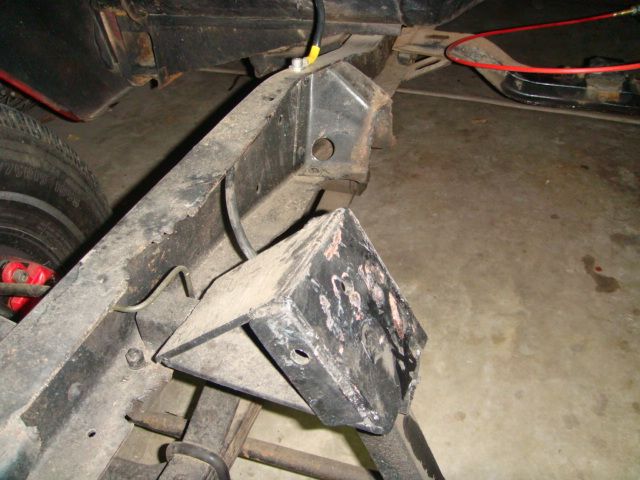
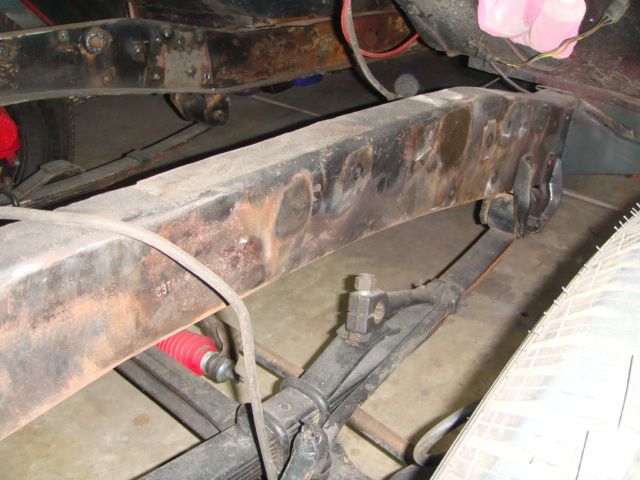
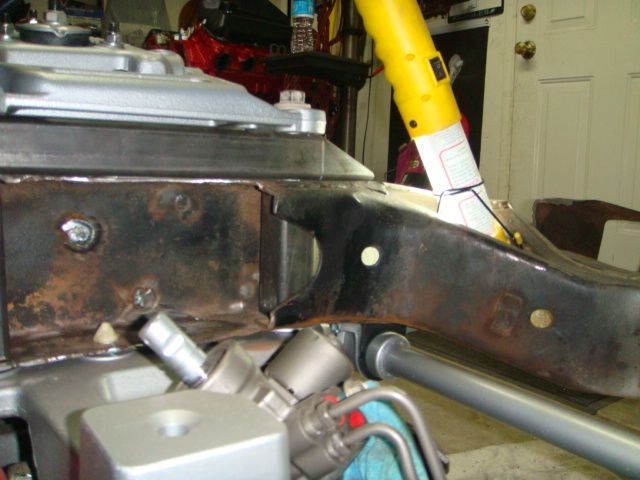
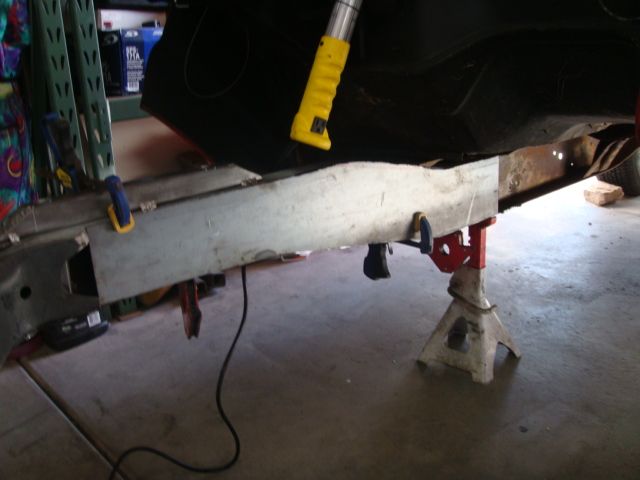
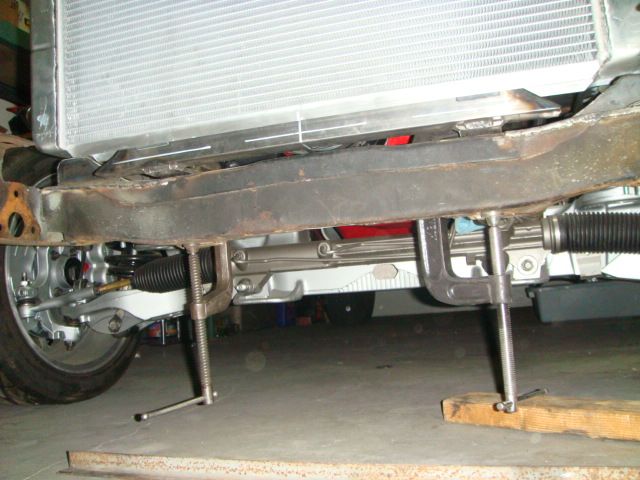
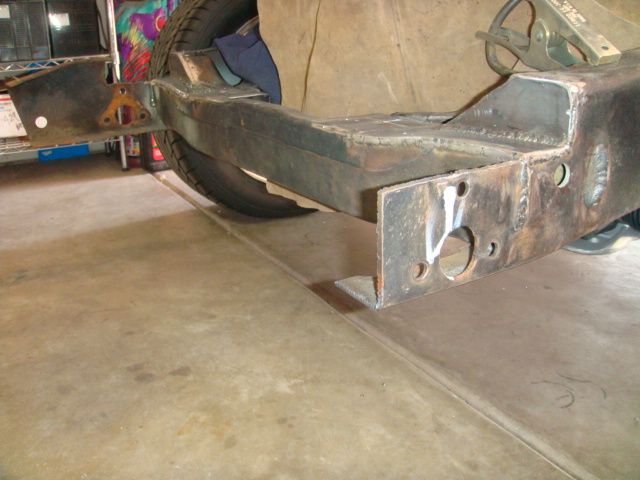
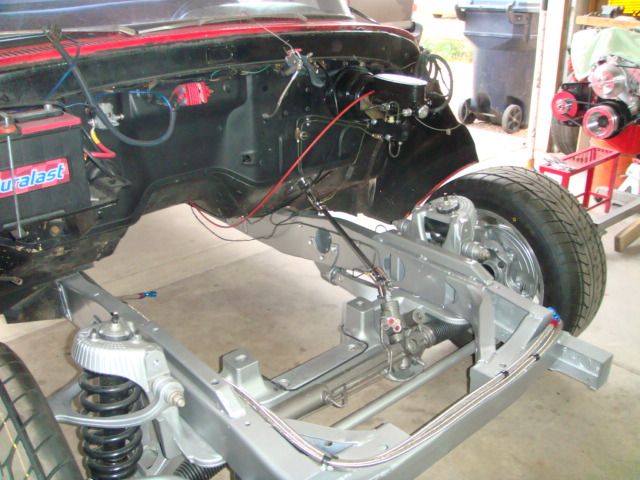
So I got the Crown Vic front end as far as I could before taking the truck out of commission. Pulled the motor. You can see the frame hacking that has been done to this truck. I'll fix that up. The previous owner got pretty creative with the radiator mount and motor mounts.

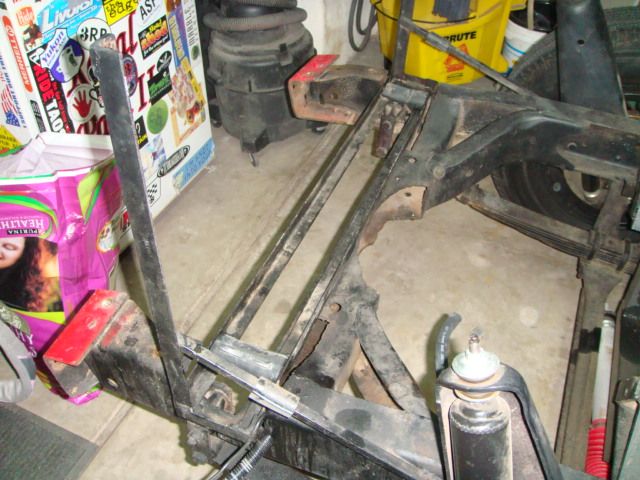
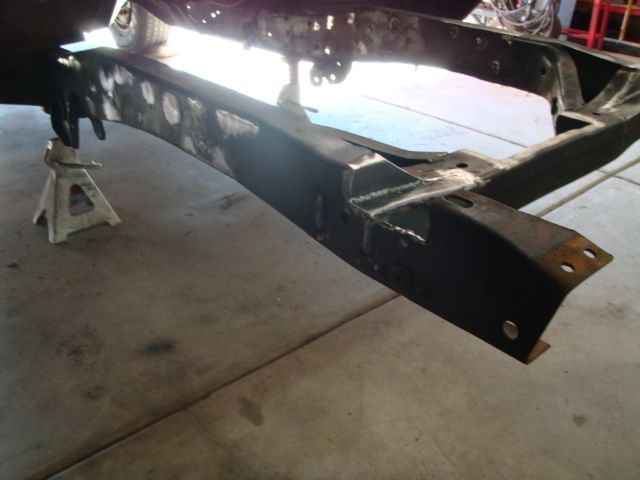
Started by trying clean up all the hacking that went on with this frame.
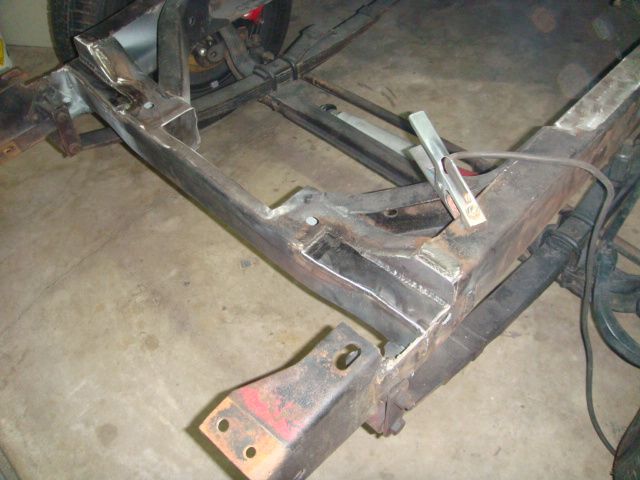
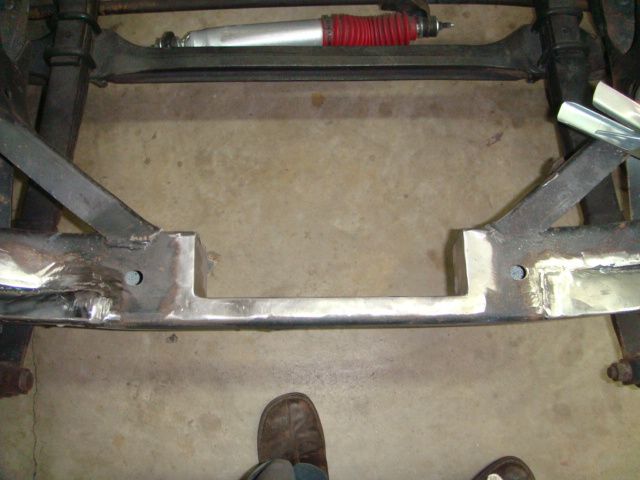
Then cut out the shock mounts, leaf springs and other crap. Started filling in the 47 holes that were left.
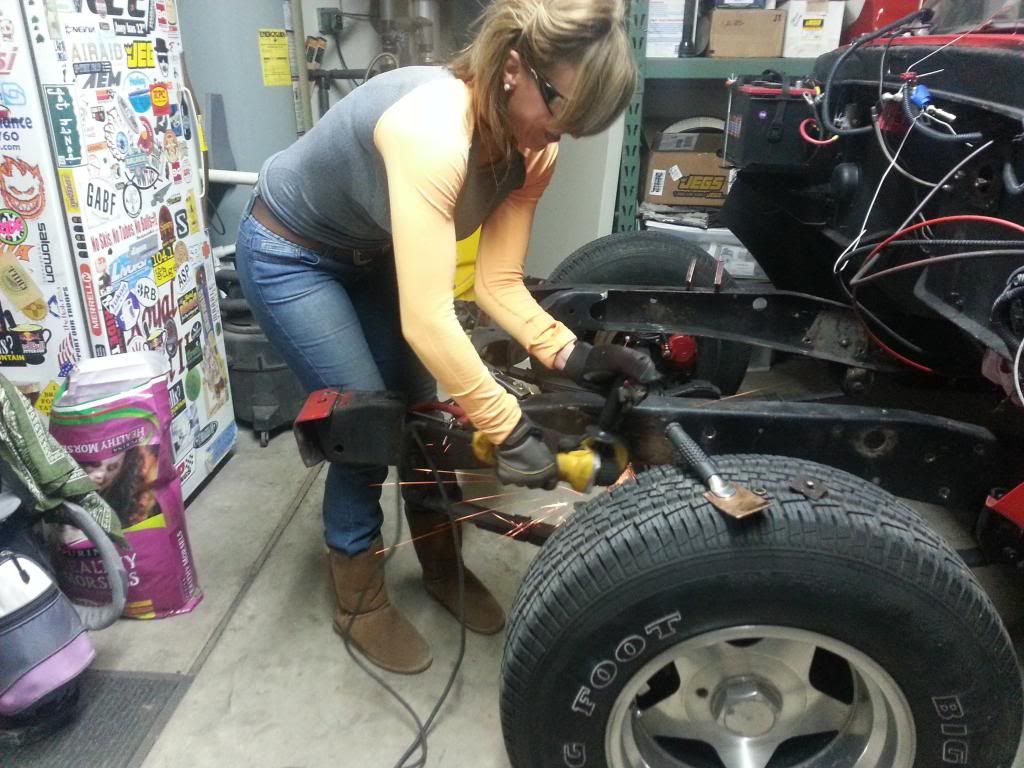
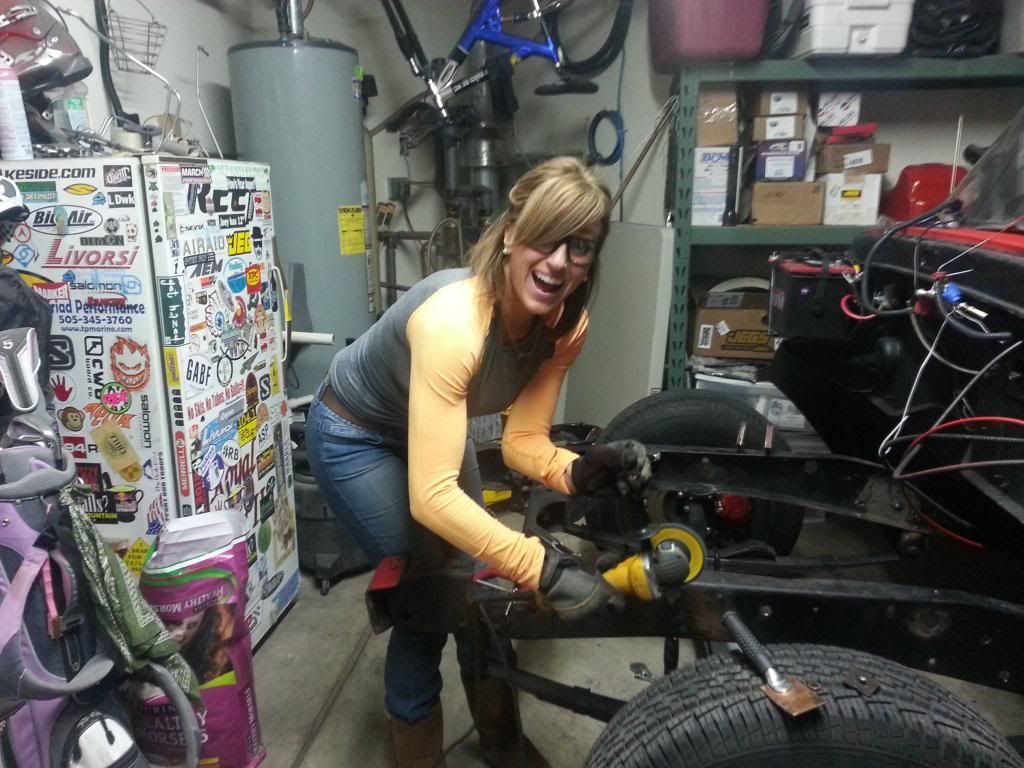
If you can get a hot girl to finish grind for you, don't hesitate..
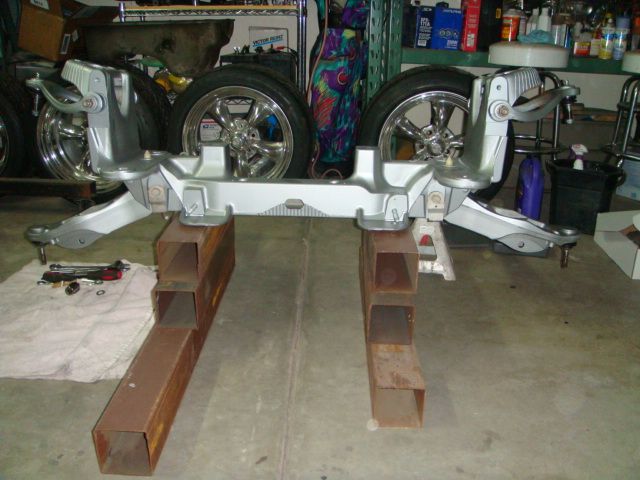
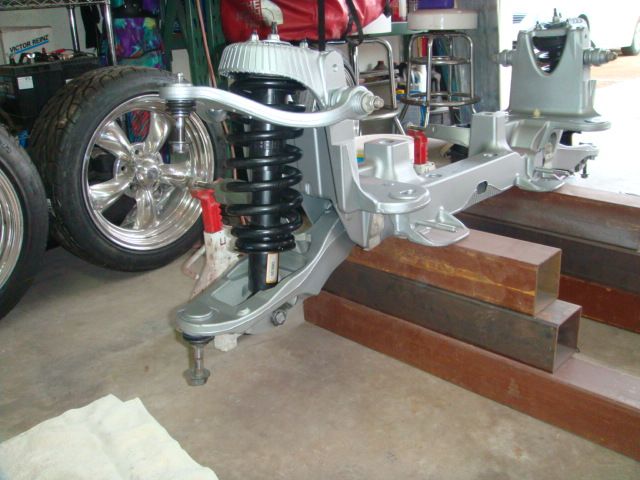
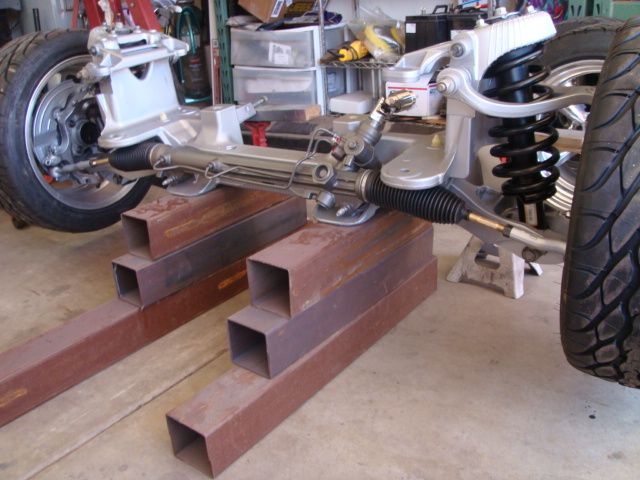
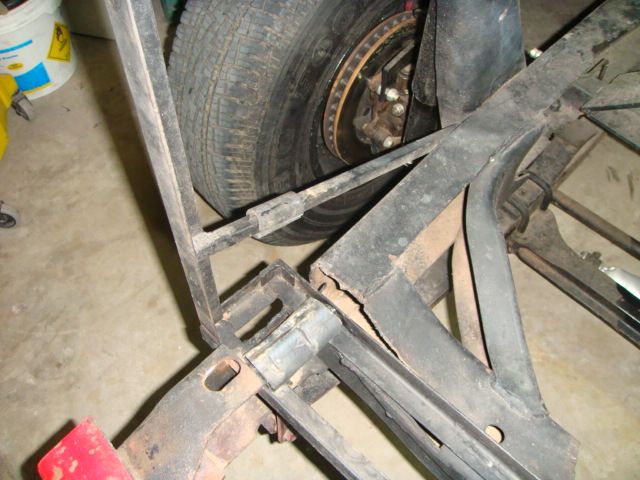
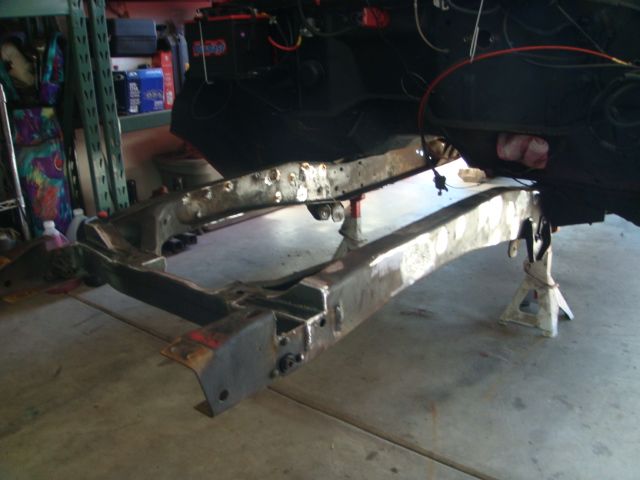
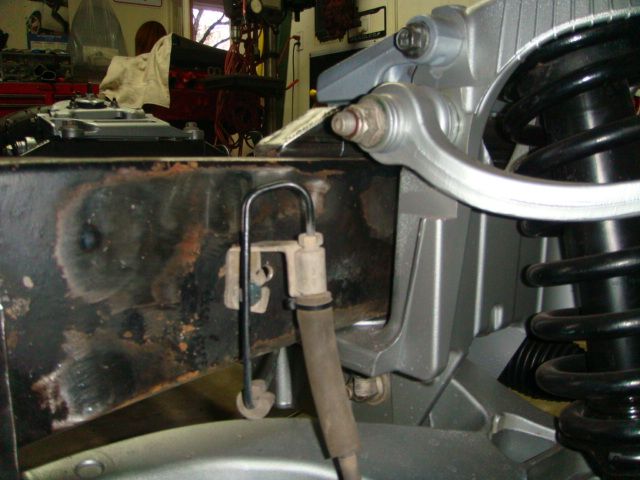
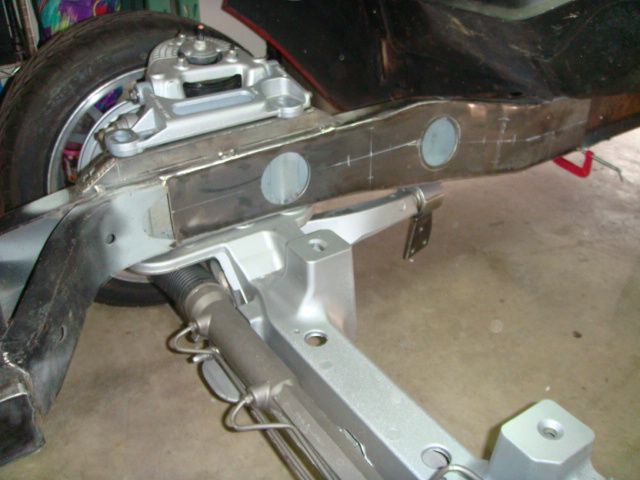
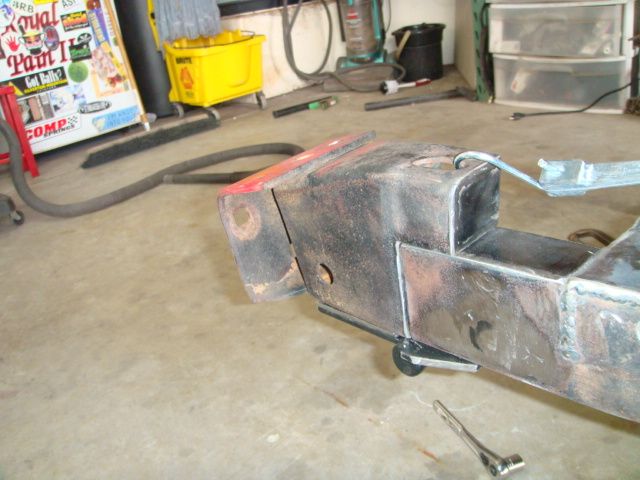
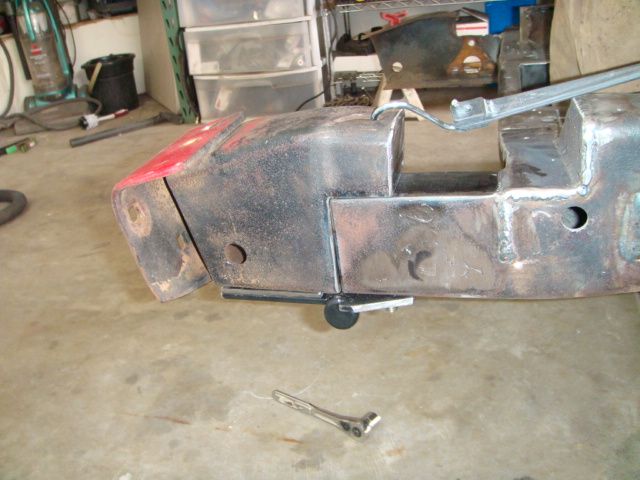
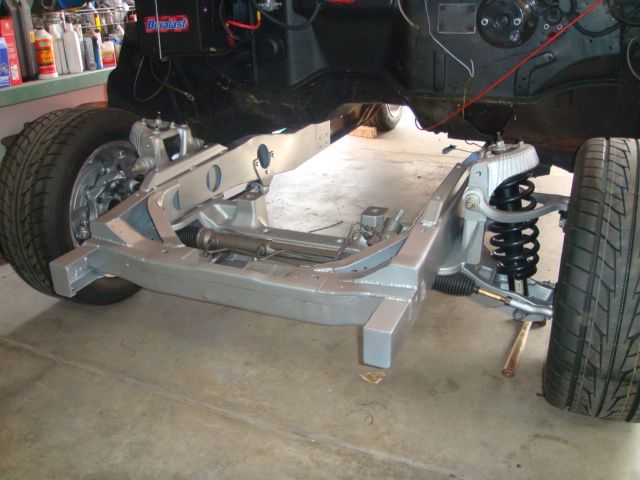
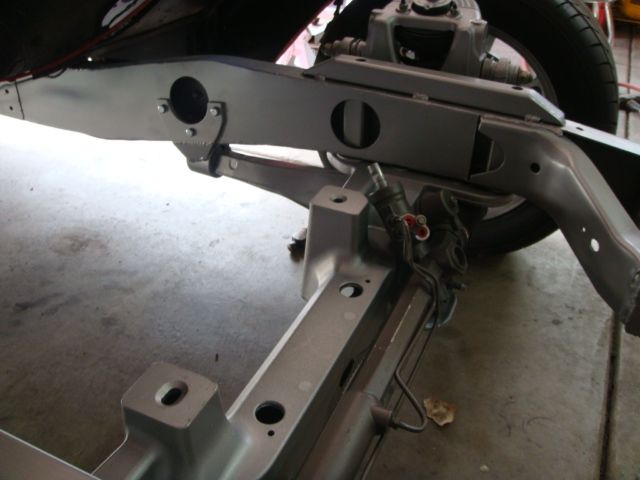
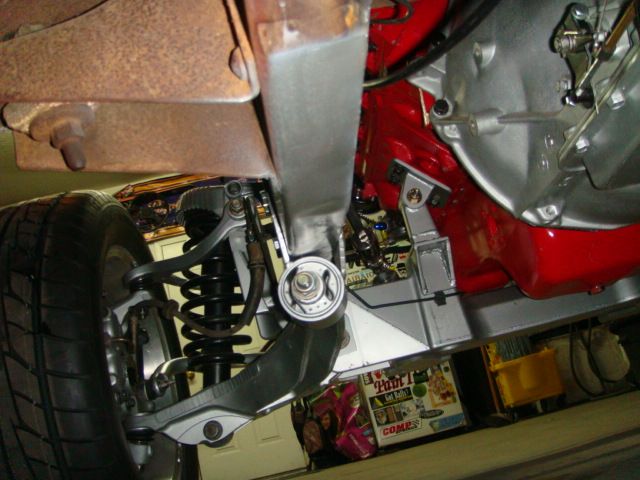
Got the CV front end under the frame for the first time. I moved the center point forward 3/4" based on some things I read in forums.
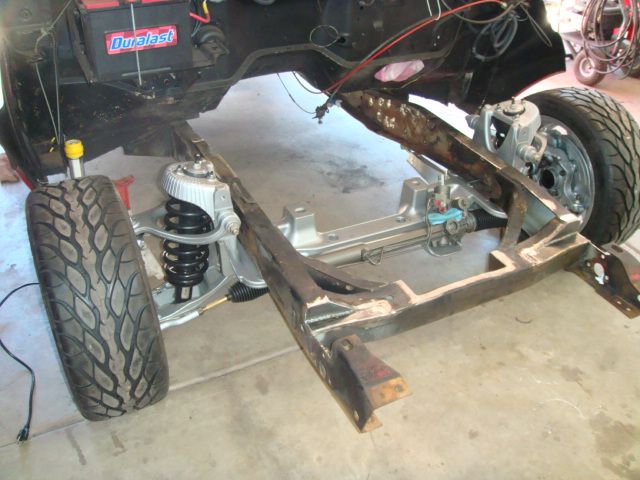
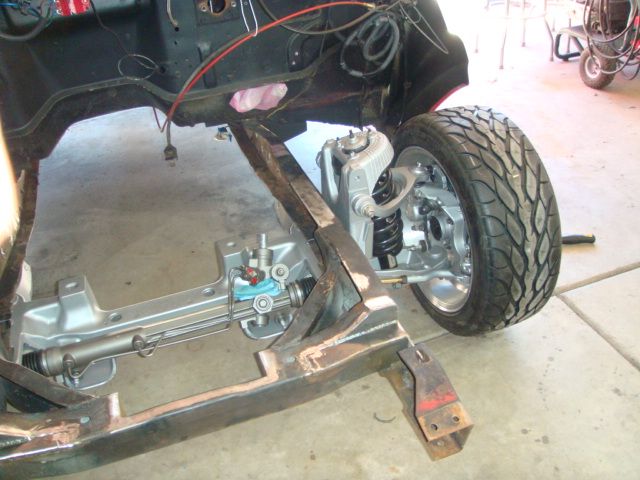
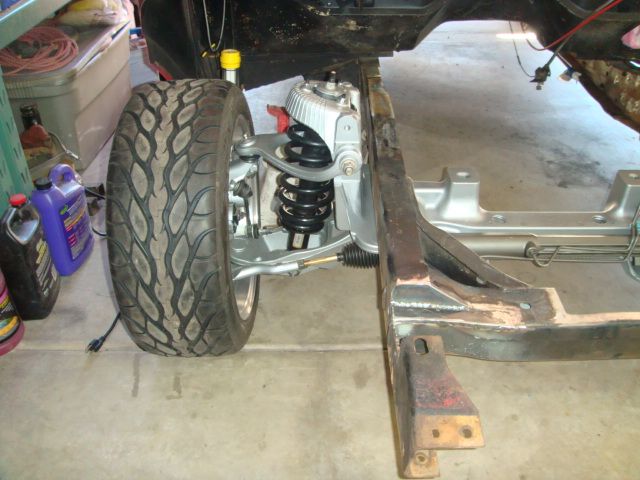

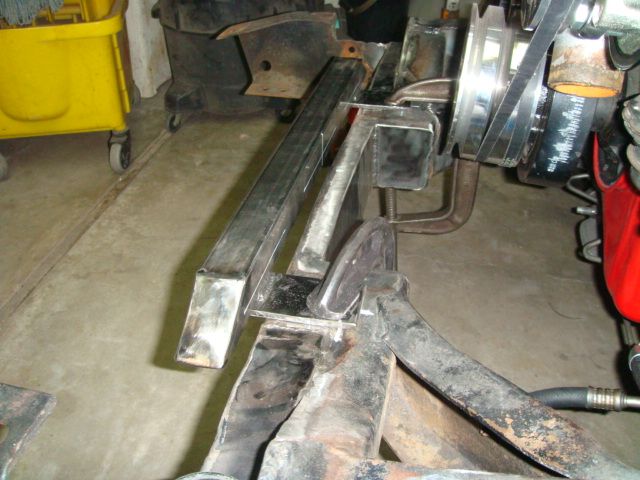
I used 1 1/2" square stock with 3/16" walls to make up the space between the frame and CV. Tapered it just for funzies..
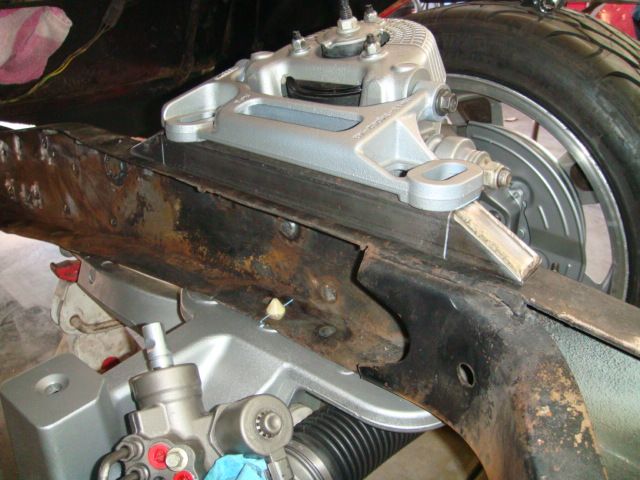
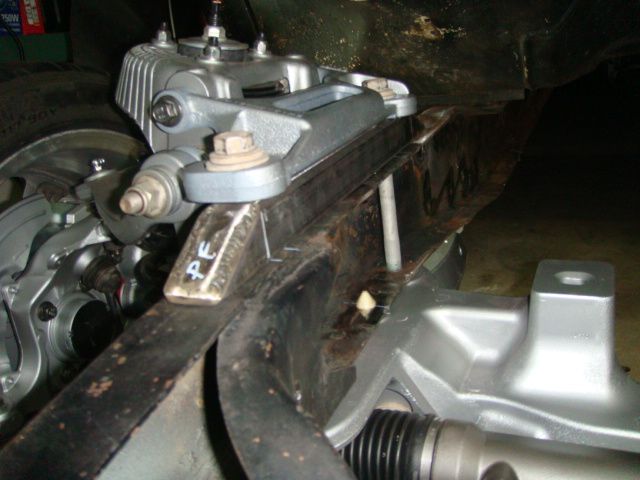

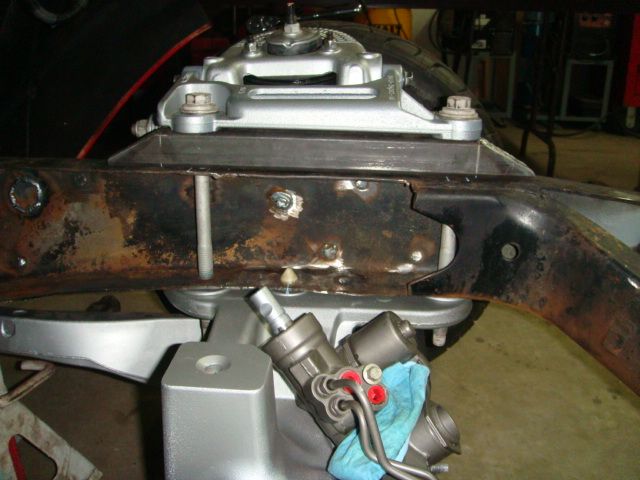
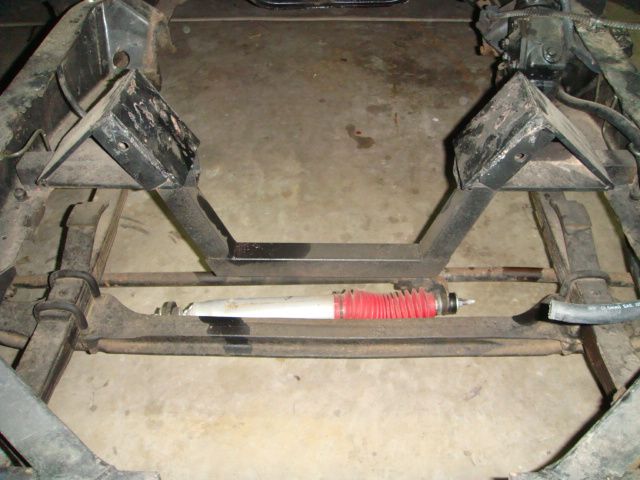
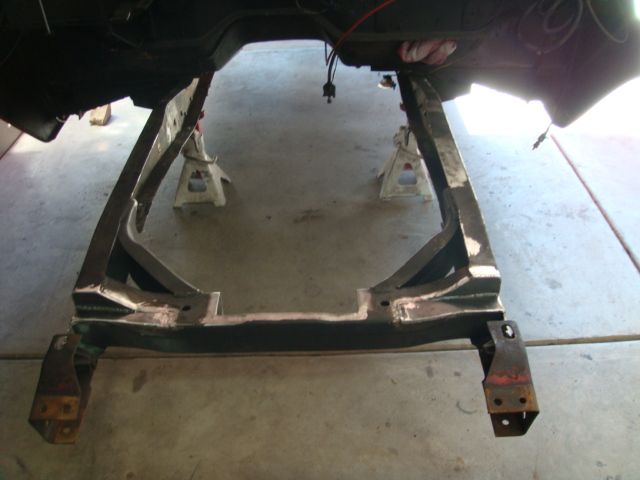
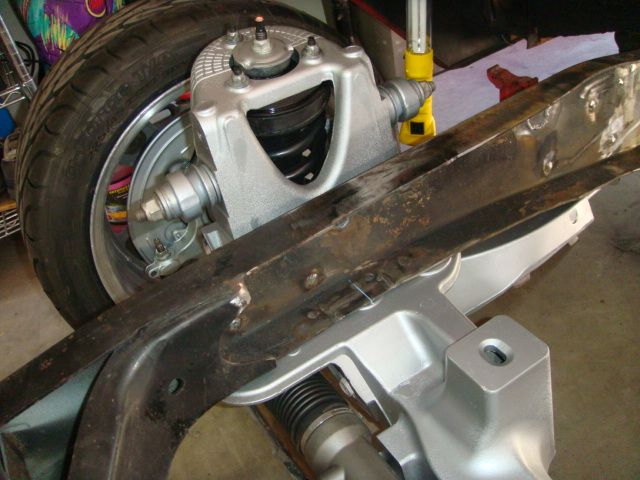
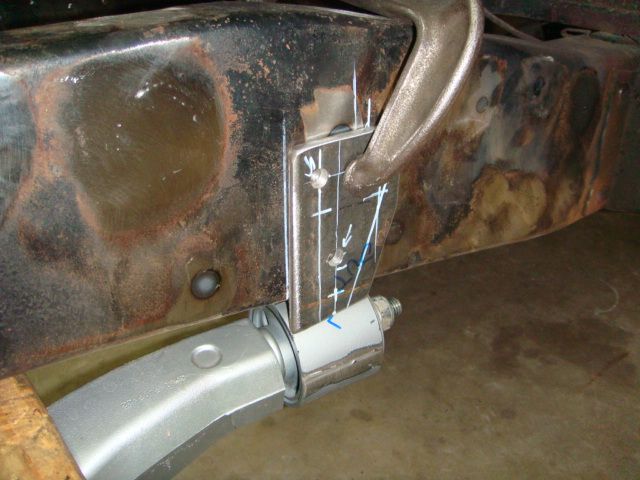
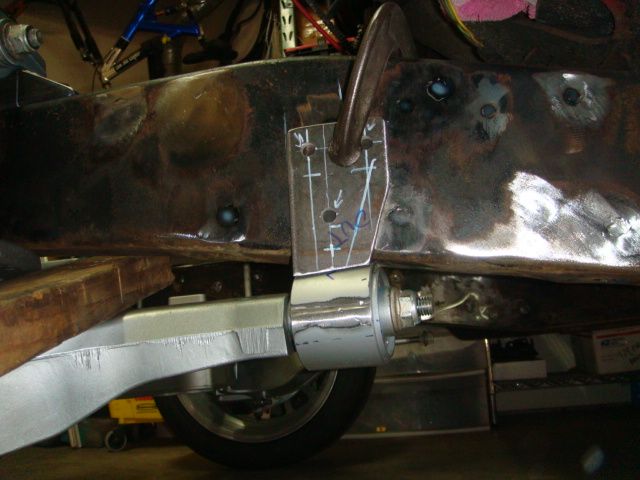
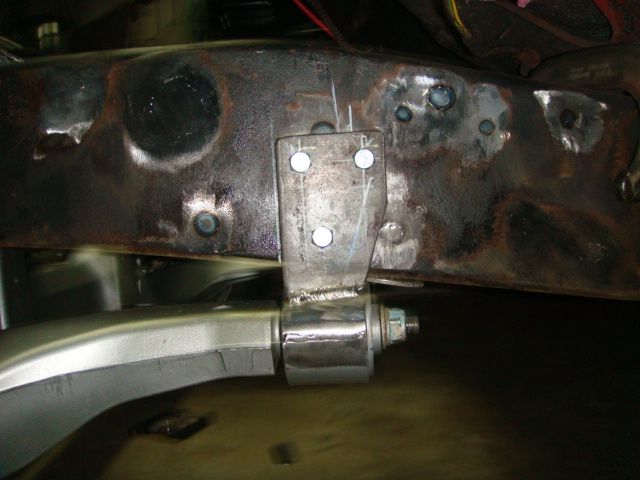
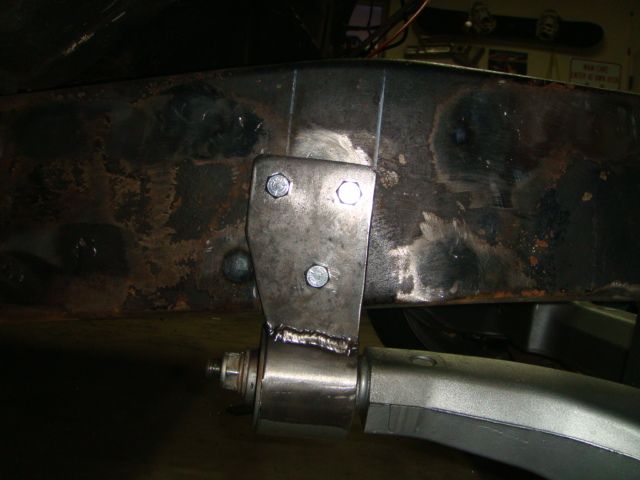
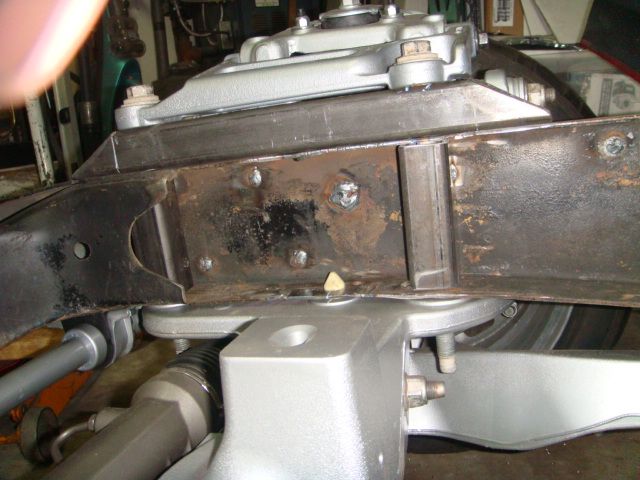
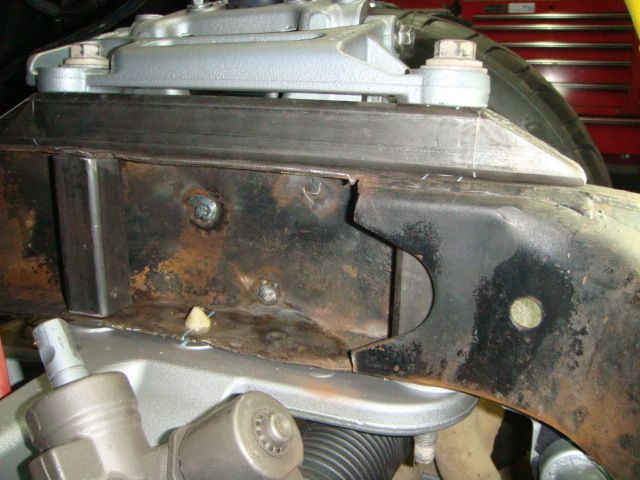
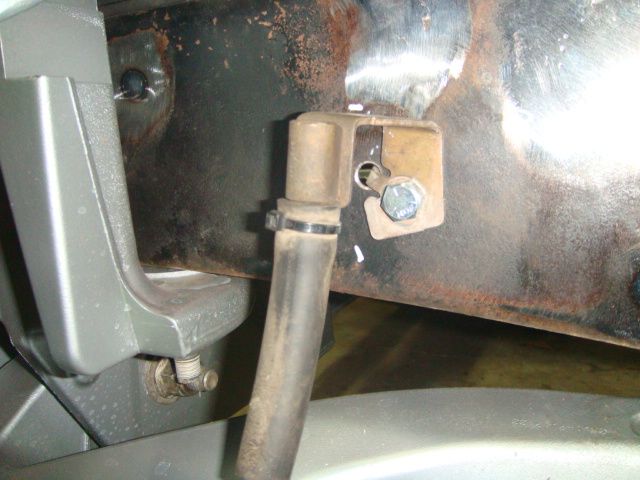
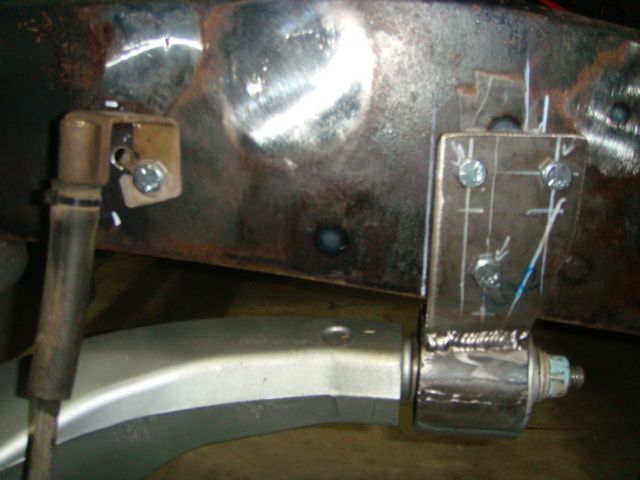
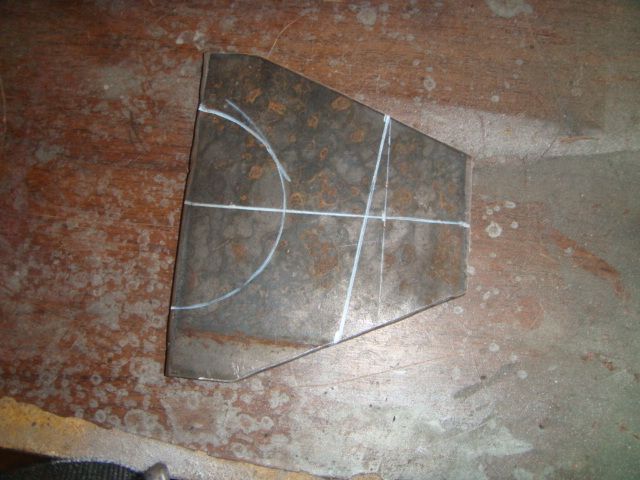
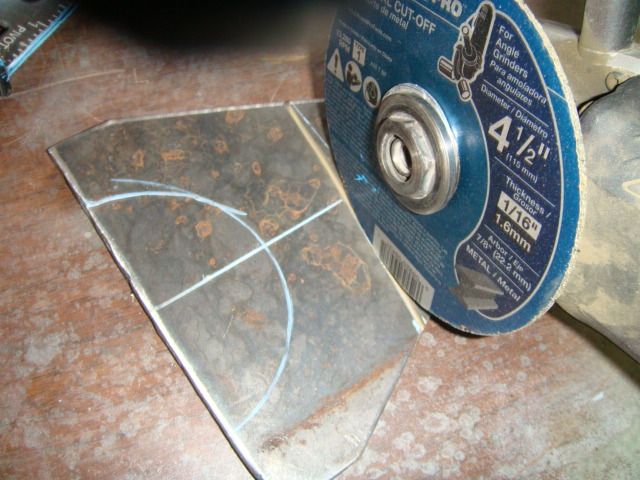
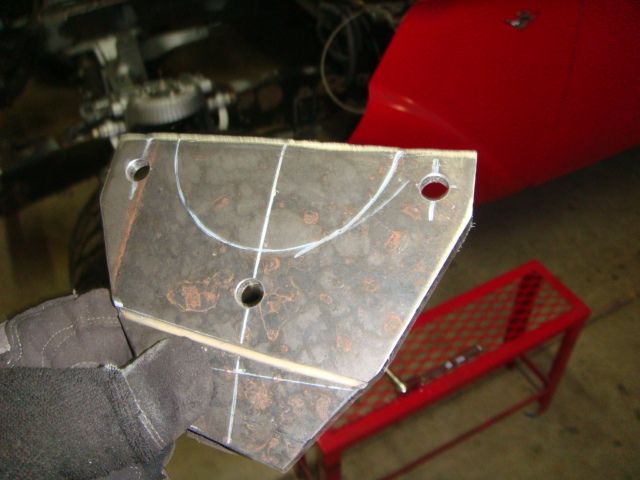
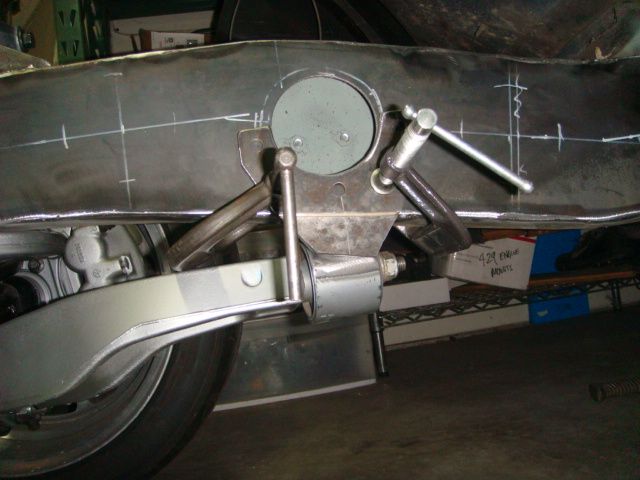
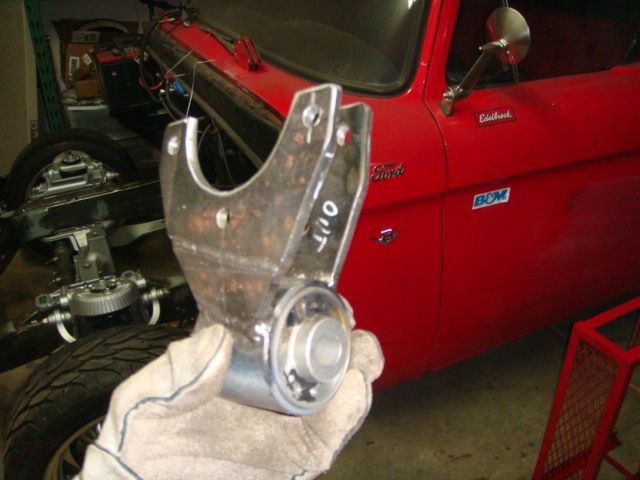
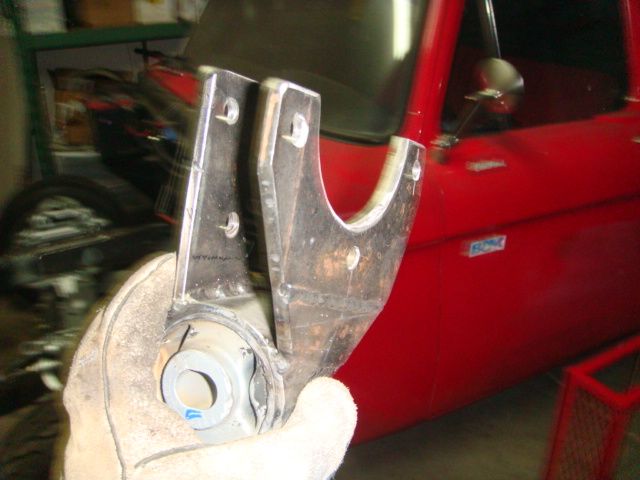
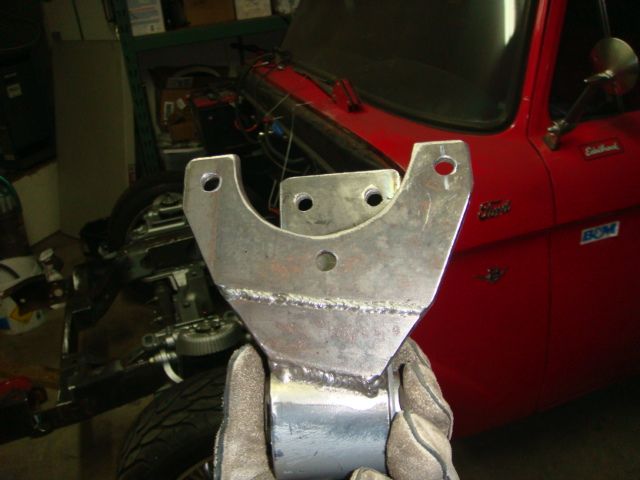
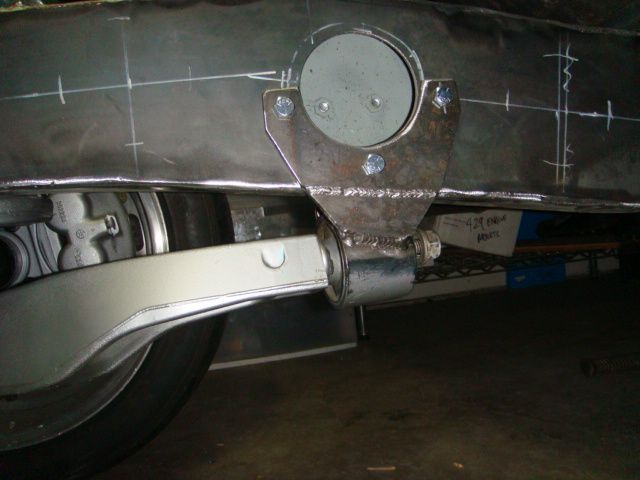
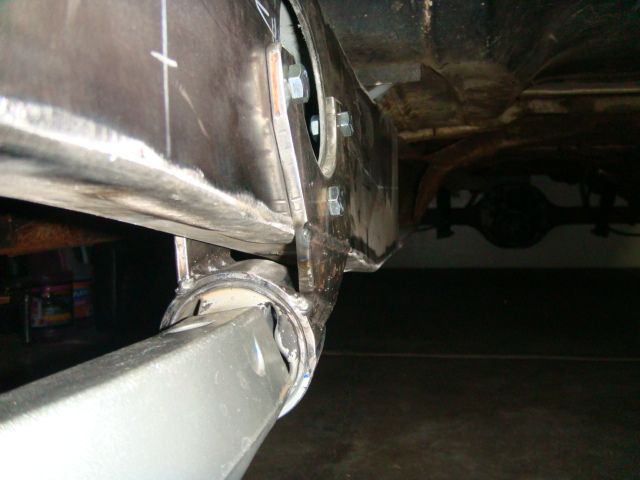
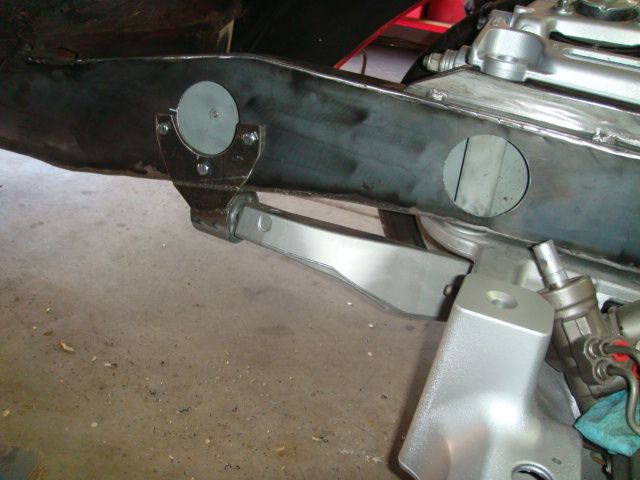
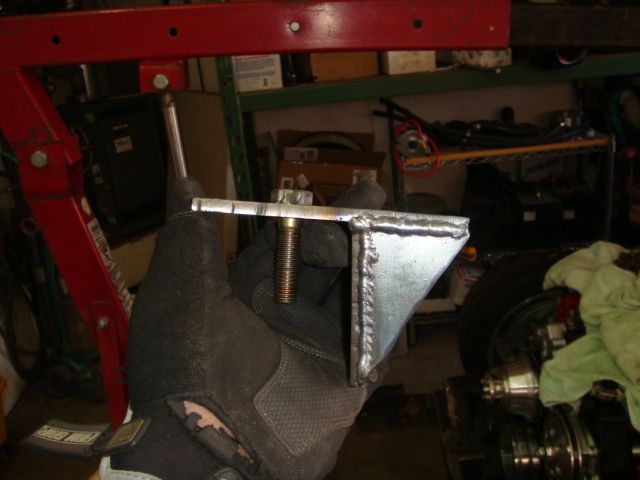
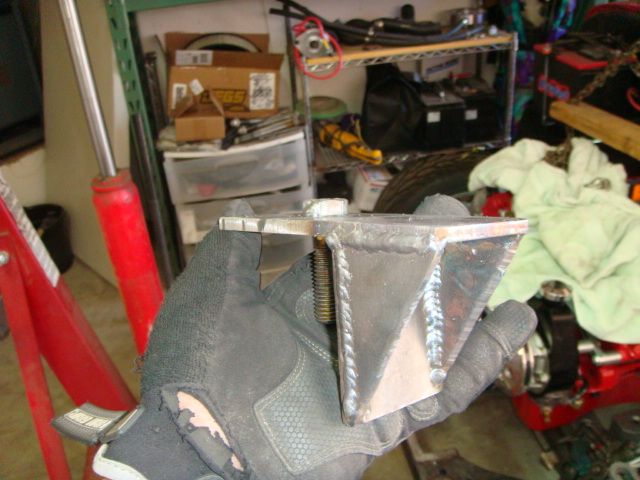
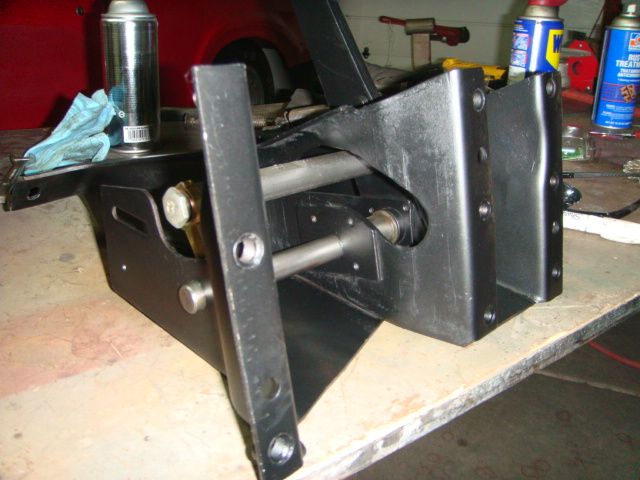
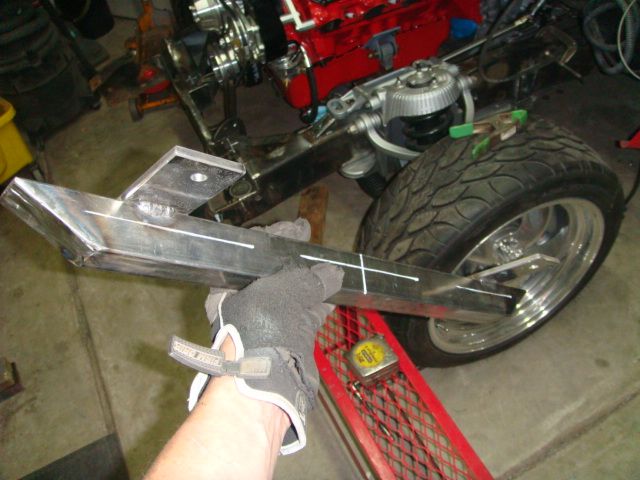
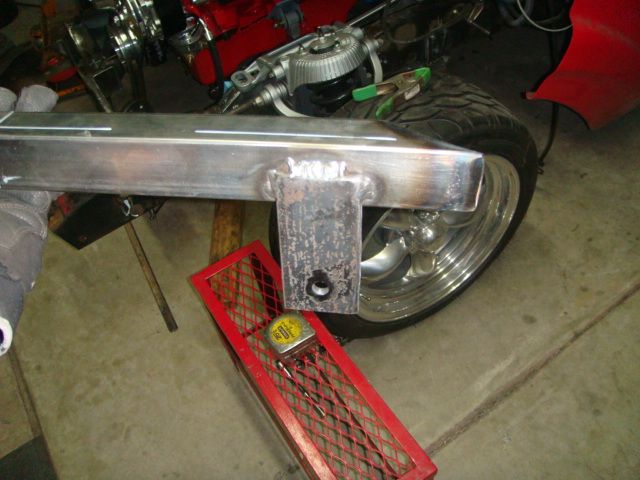
Next were the trailing arm mounts/bushing. I looked at this a few different ways. A lot of guys just make a mirror plate and mount it directly to the frame. I originally was going to do this but after taking a closer look at how these bushings function for the caster setting, I knew it was important to keep the oval adjustment hole in a horizontal orientation. Any other way and you really limit the caster alignment ability. So I cut off the base plates and just started "free-fabbin". This is what I came up with. This is just the out side frame mount. The inside mounts come later with frame boxing. There's some funky angles going on here so it was a lot of hit and miss. But it worked out. 1/4" plate by the way.
Mocked up the sway bar
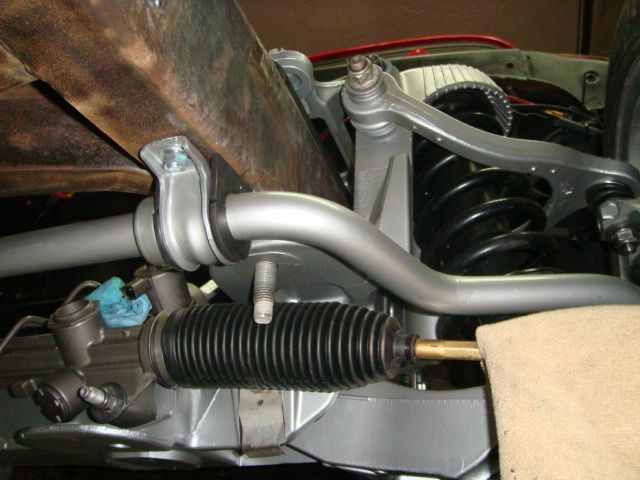
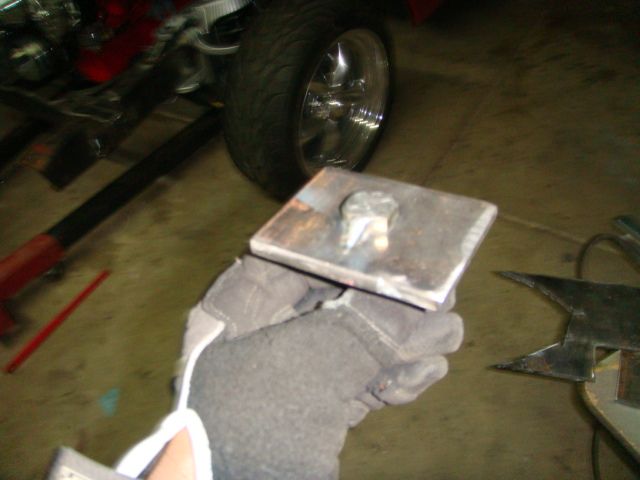
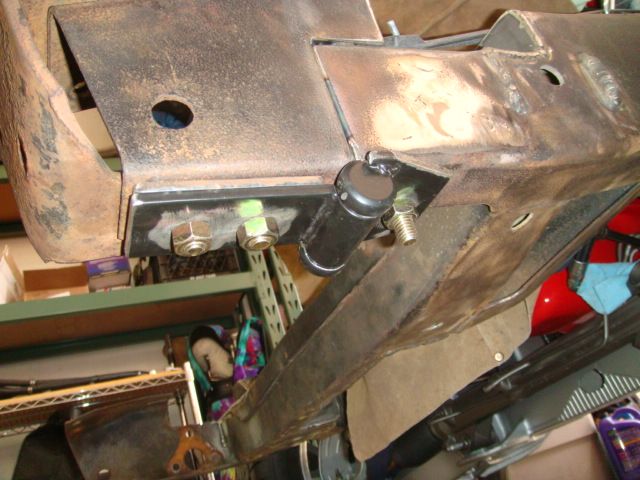
Used the same 1 1/2" square stock for the crush sleeves
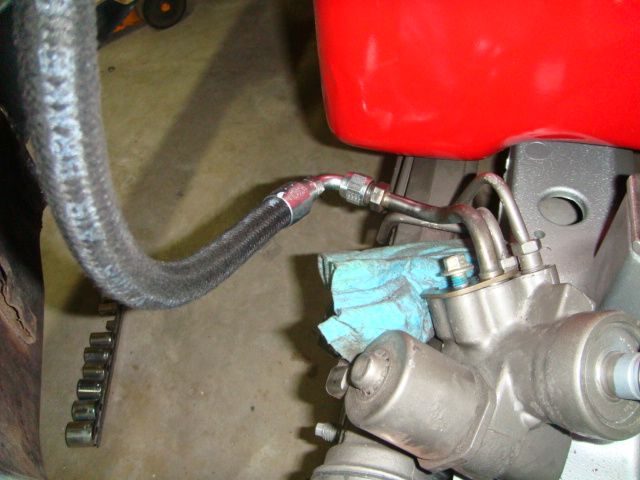
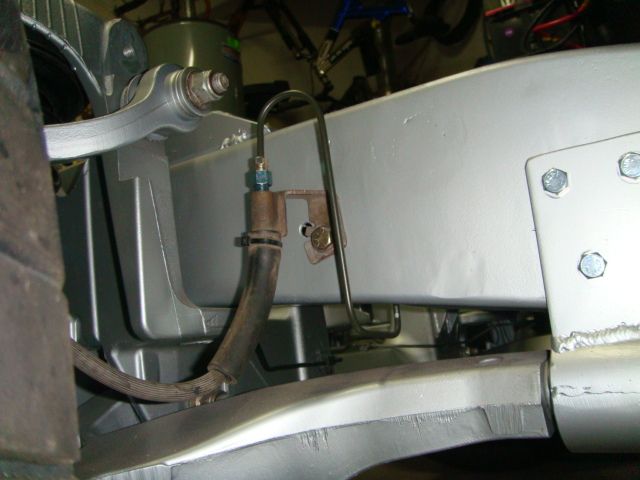
Mocked up the brake line mounts
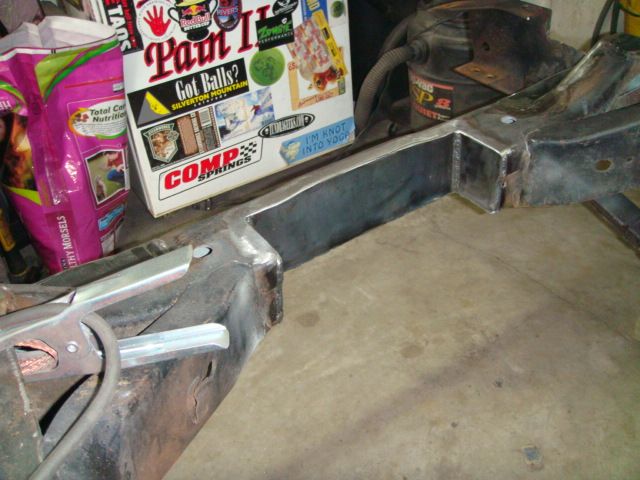
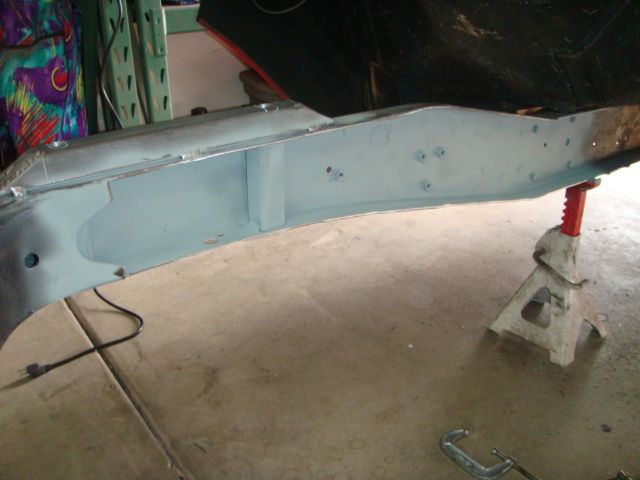
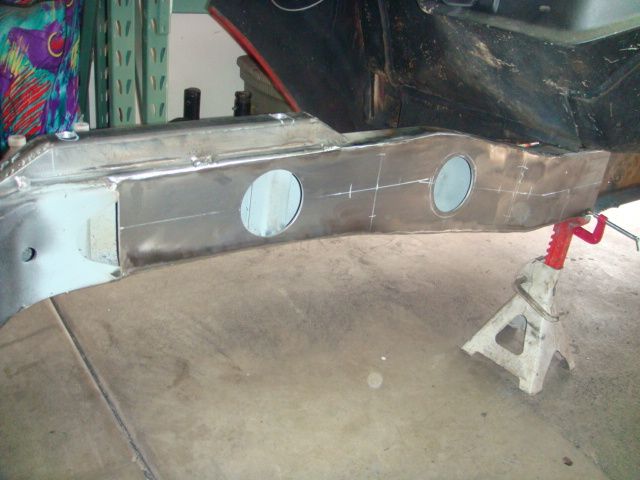
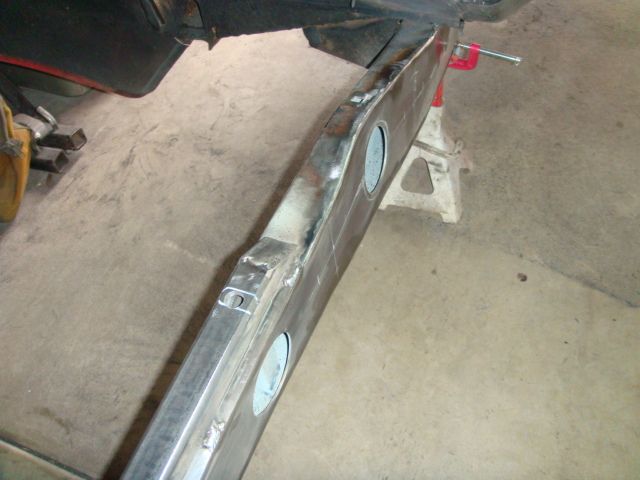
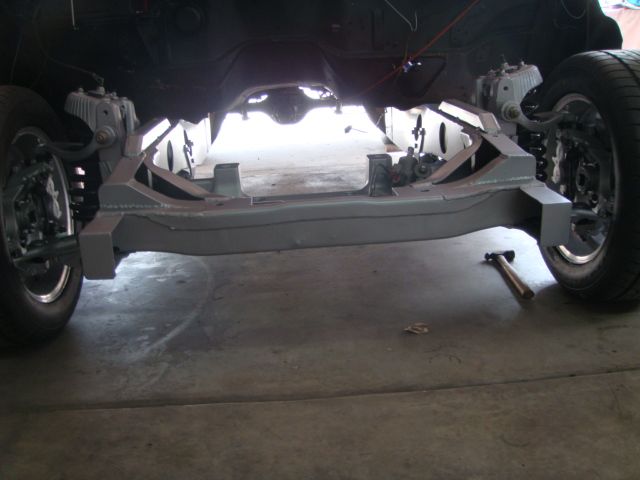
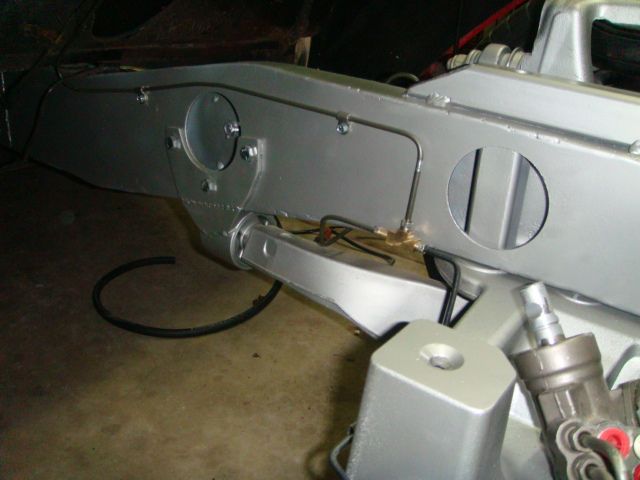
Boxed the frame using 1/8" plate. Probably should have used a heavier gauge but this was much easier to work with. Cut some access holes for wiring etc. A little weld through primer never hurts.
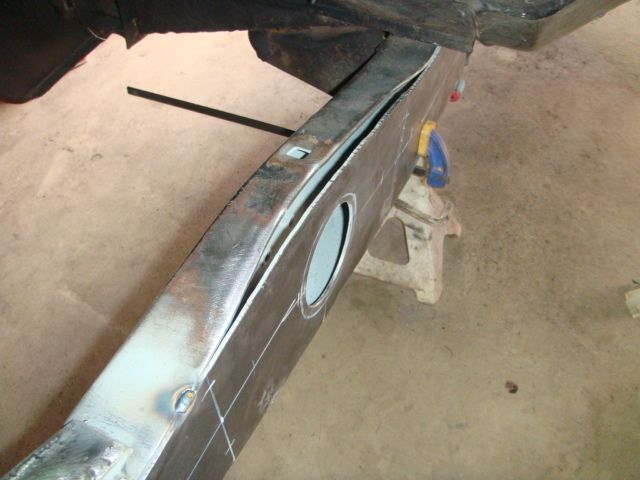
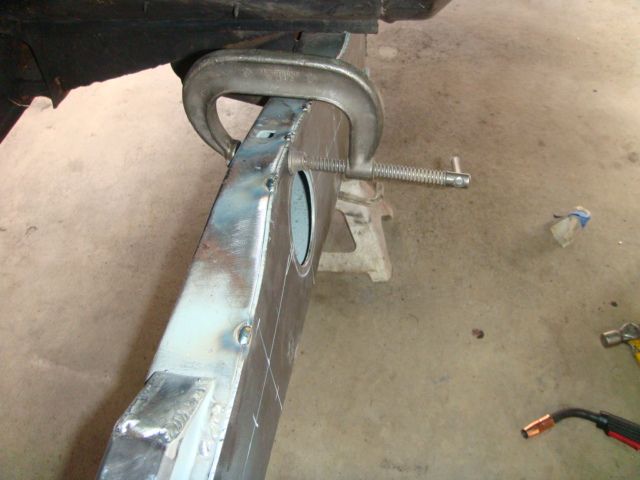
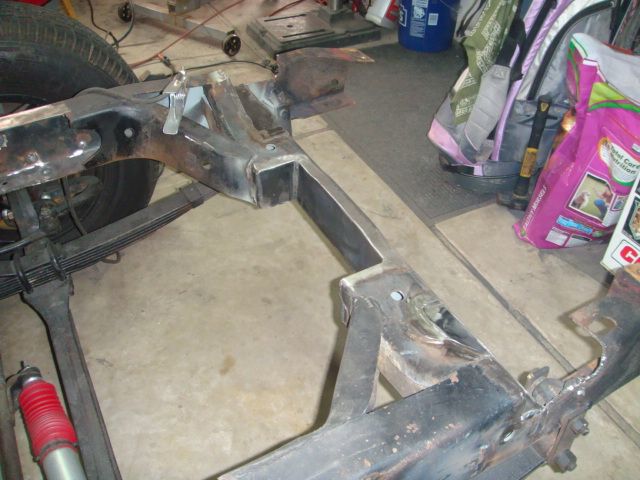
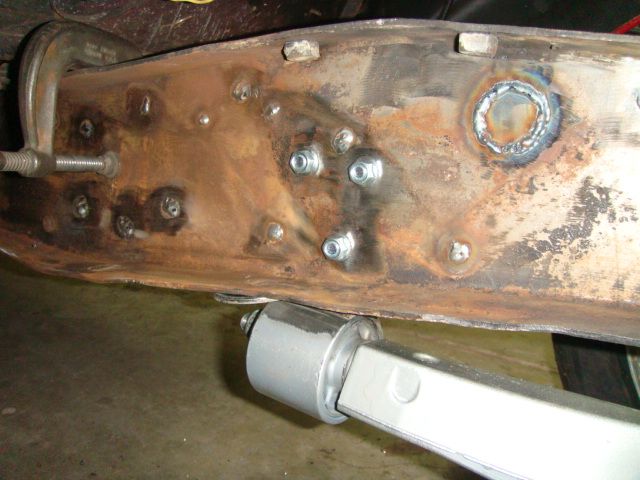
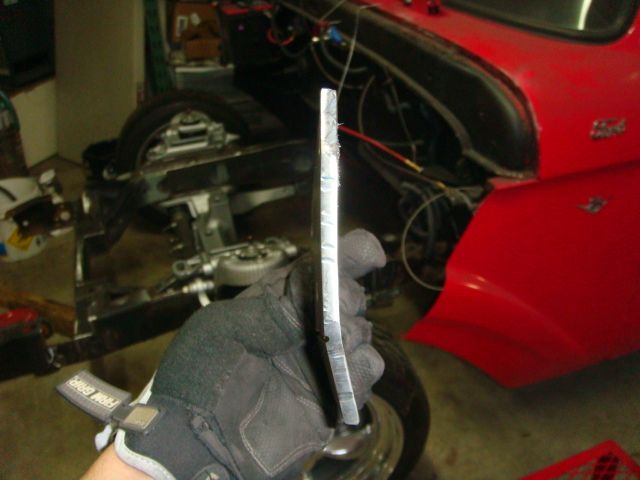
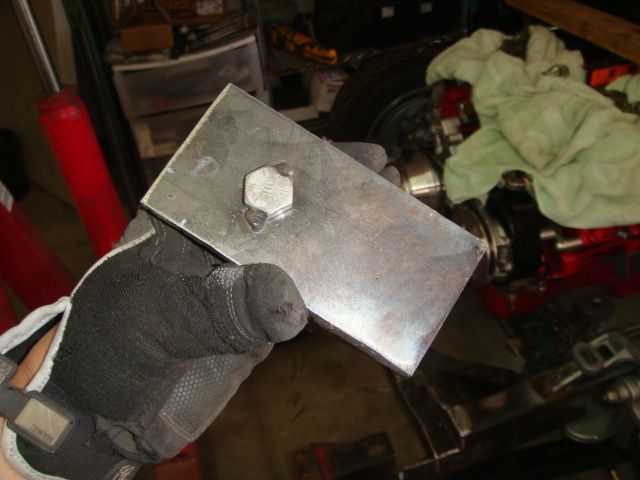
Next was the inside mount for the trailing arms. Wasn't quite sure what direction I was going to go but here's the result. Had to score the plate to get a bend to mate with the bushing. Again, trial and error but not a bad result.


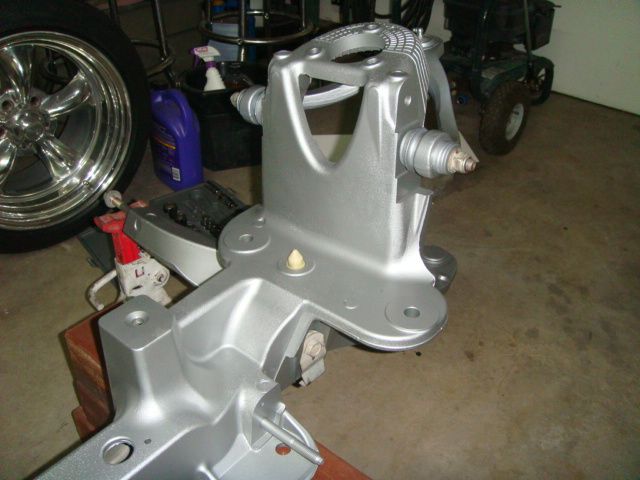
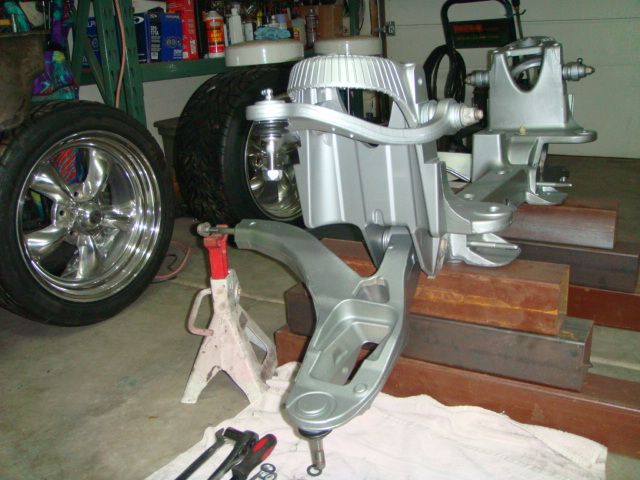
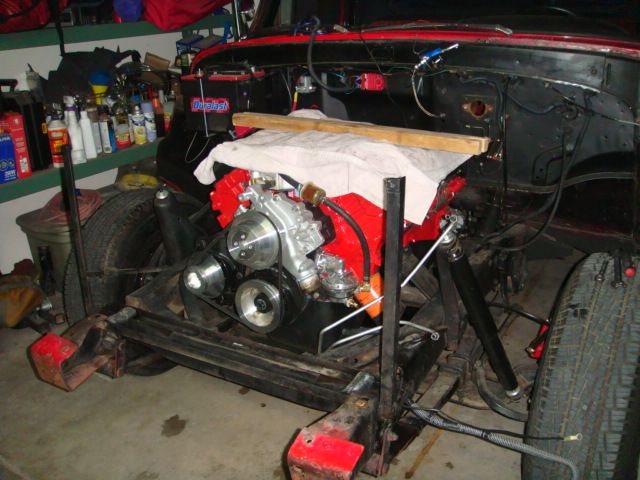
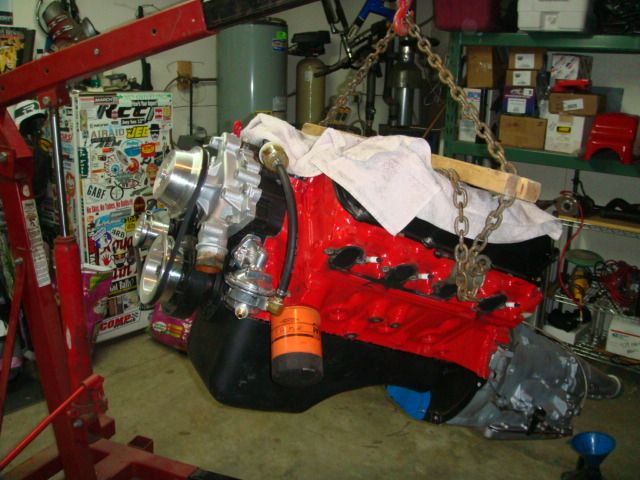
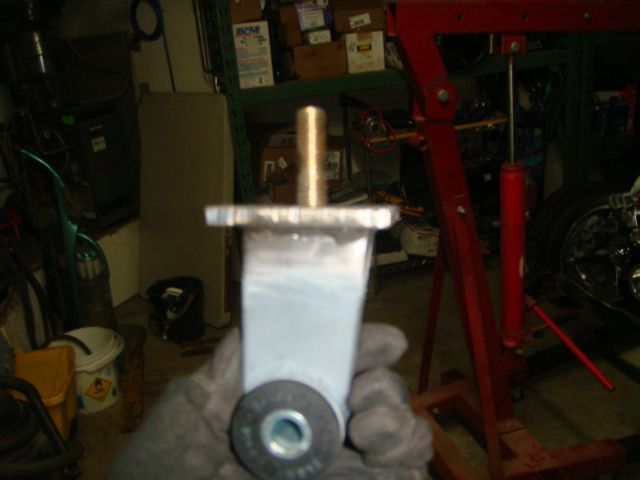
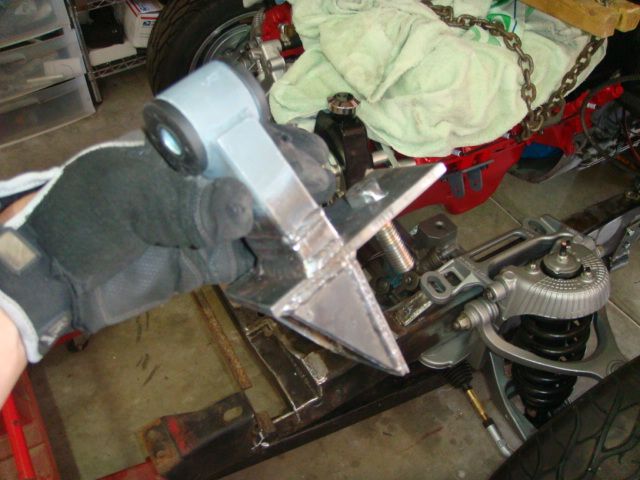
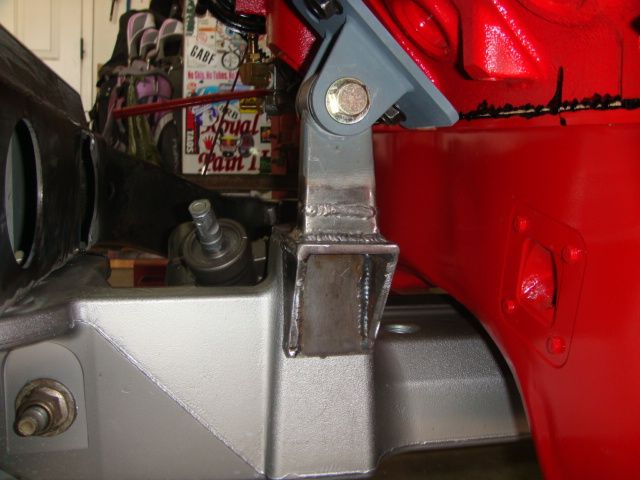
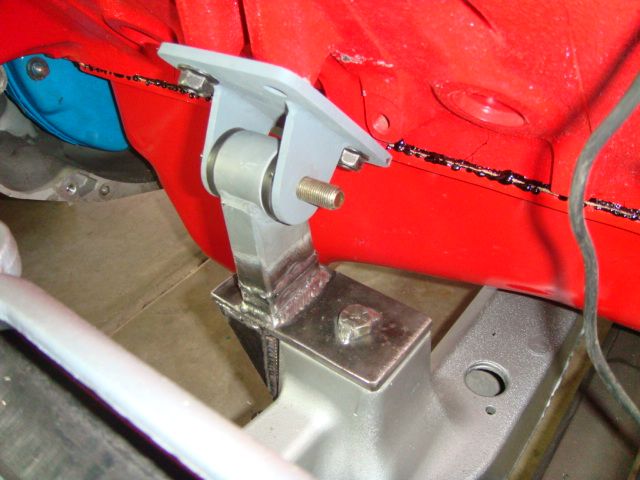
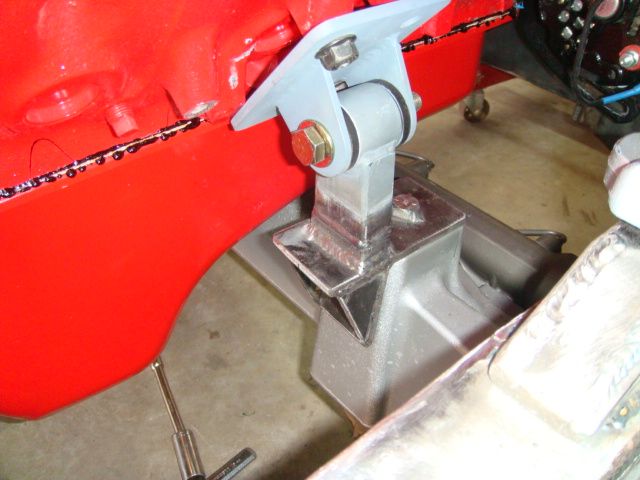
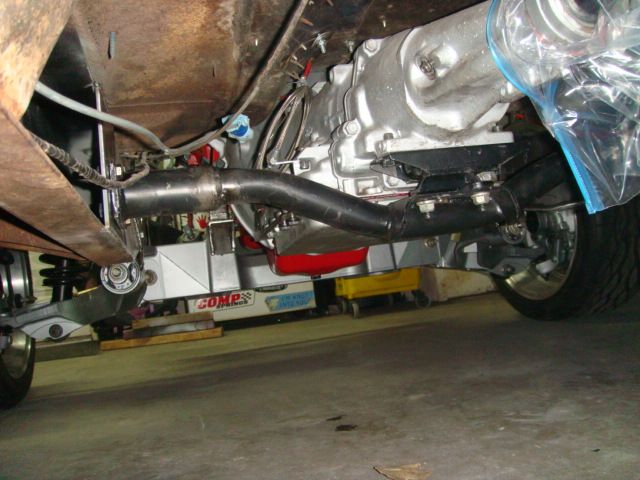
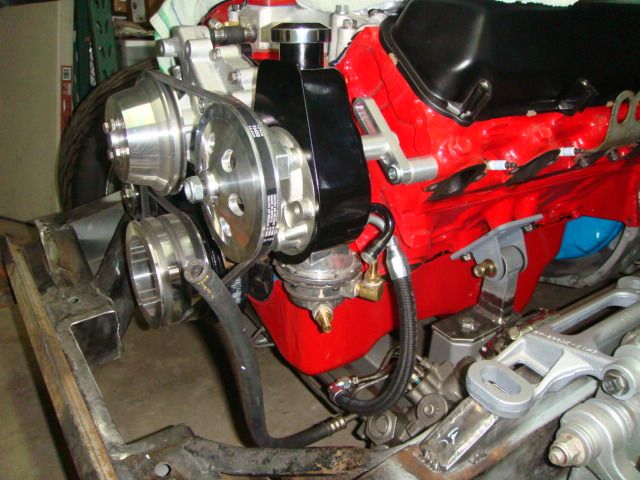
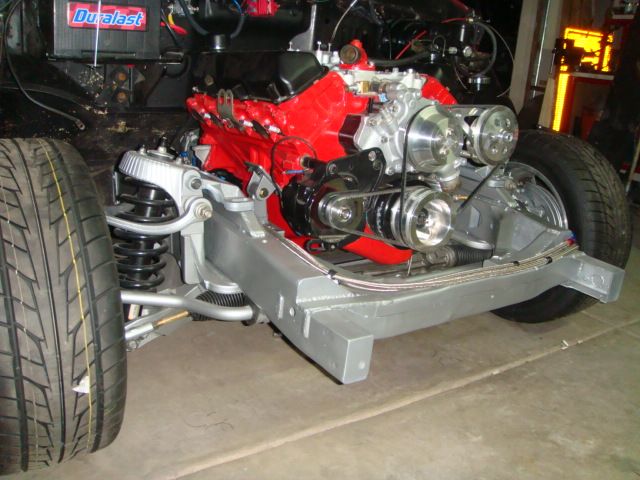
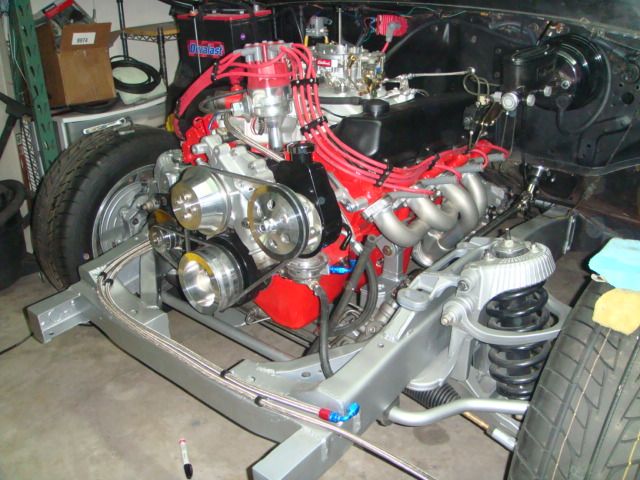
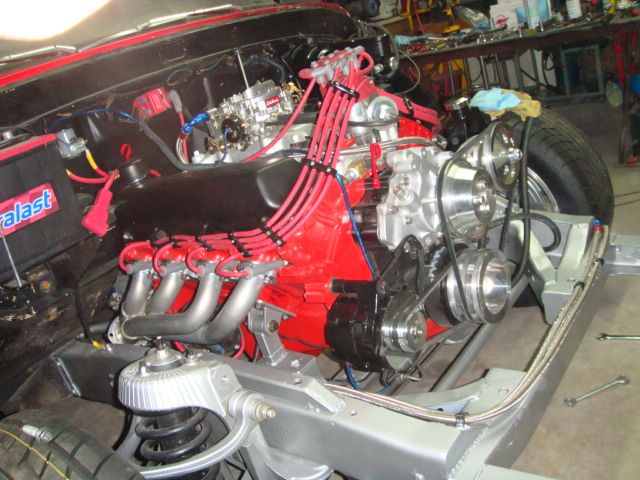
So then the fun started. Motor mounts. Now I searched high and low for guys with a Uni doing a CV swap with a 429/460 and how their mount came out. Could not find a thing, imagine that. So I was on my own. Found these mounts through RPM Streetrods. So this is my first go at the mounts and I must say I was pretty happy.
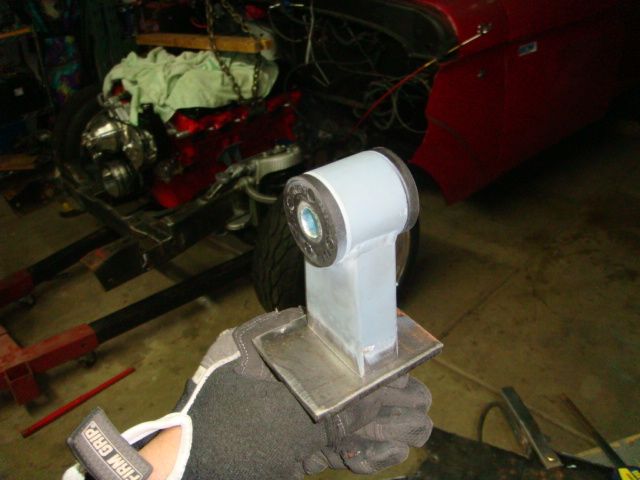
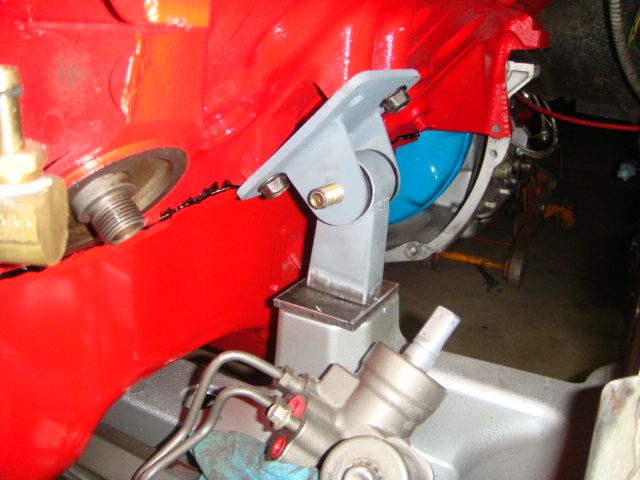
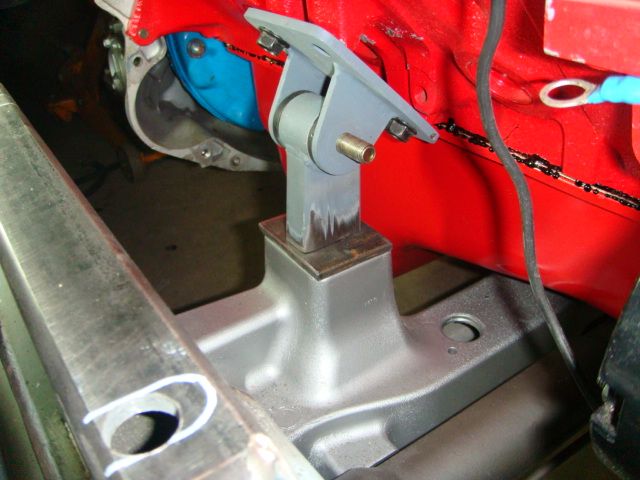
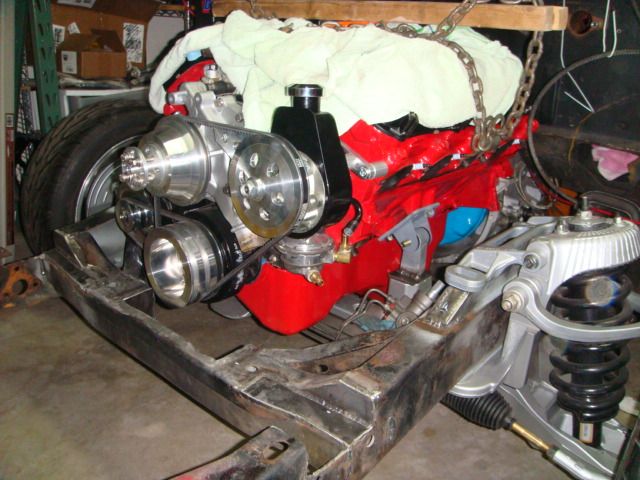
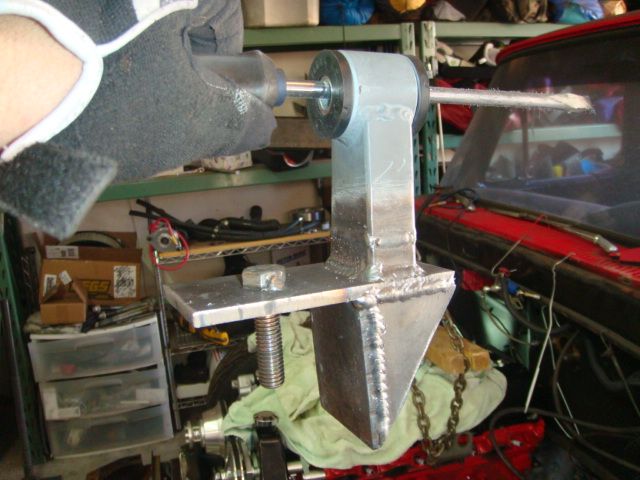
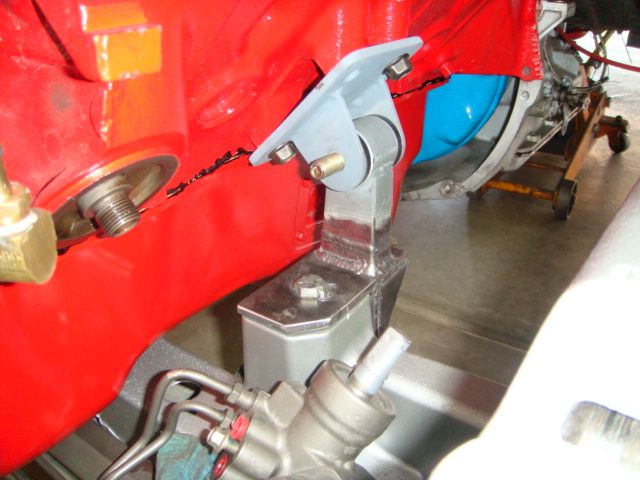
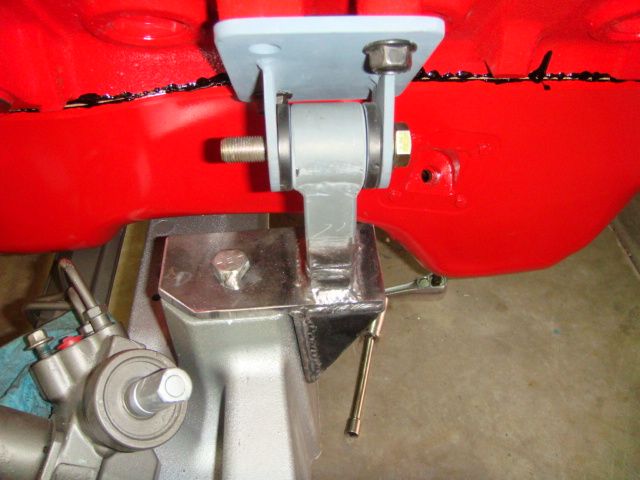
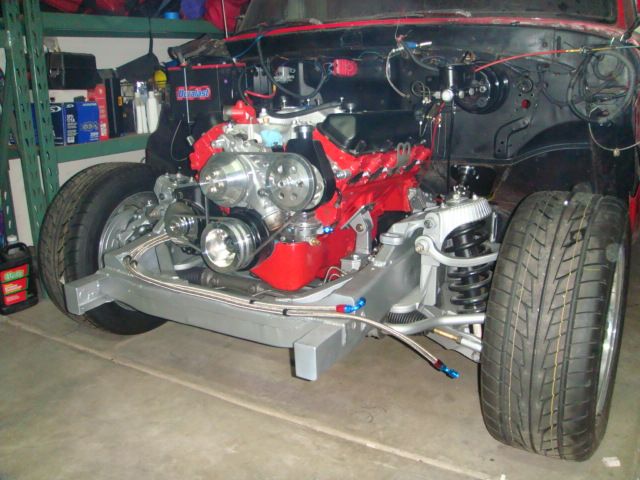
Those look great right?? Blah.. So after I set the motor I started taking measurements for radiator/fan clearance, steering, headers etc. Then the cussing began... I ended having to move the motor up about an inch and back 2.5". So here's the new mounts..
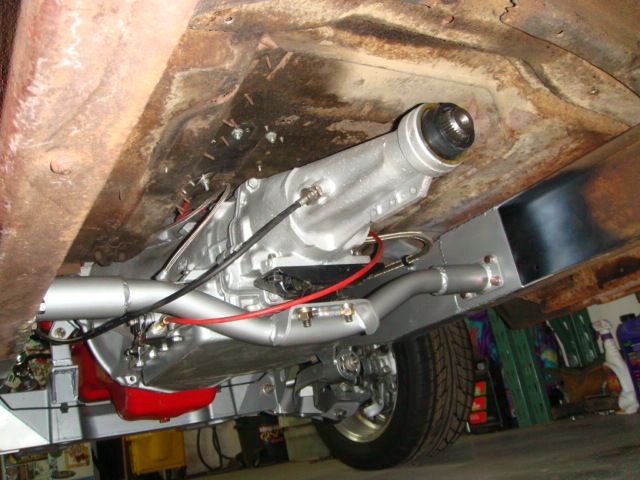
Got the trans mount mocked up.
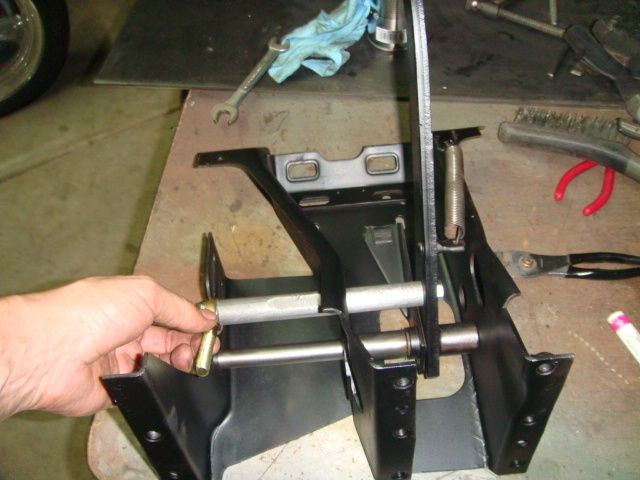
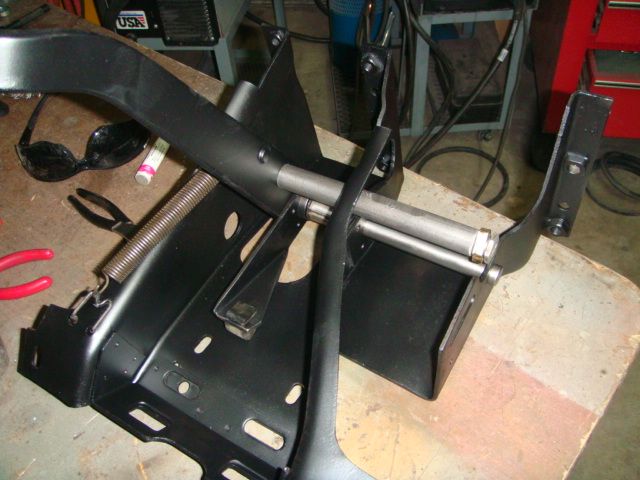
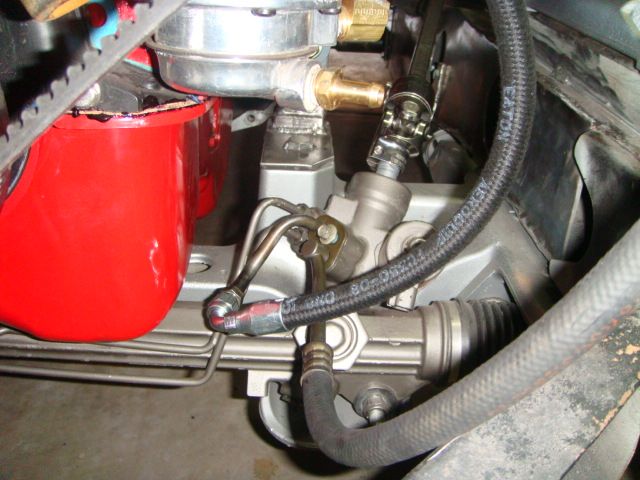
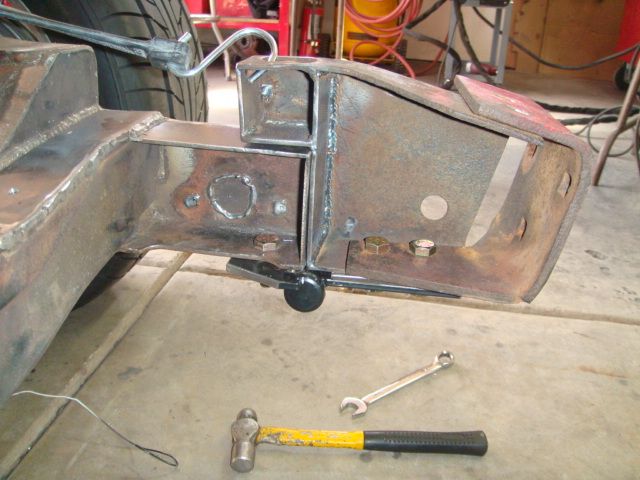
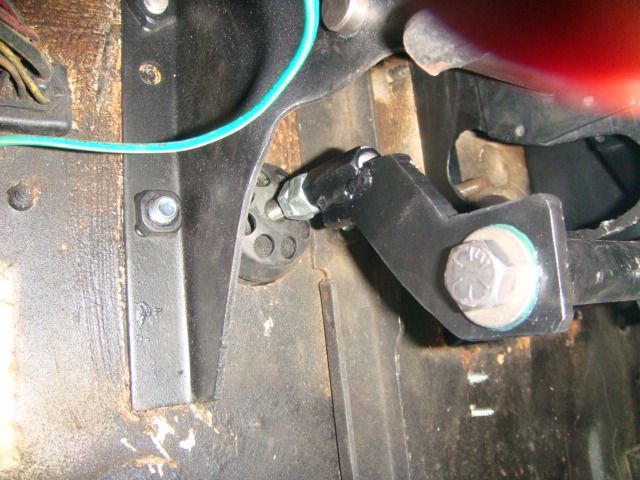
Here's where it got tricky.. Brakes! With moving the motor around I knew I was going to have to relocate the master. So used the factory hole for the hydraulic clutch, put some spacers plates in and mounted the booster.
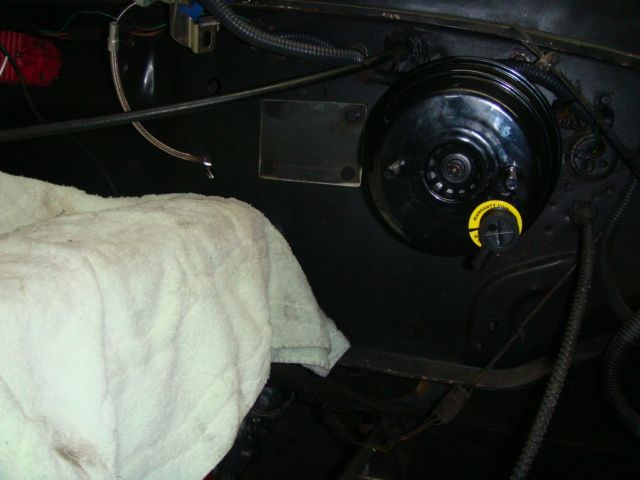
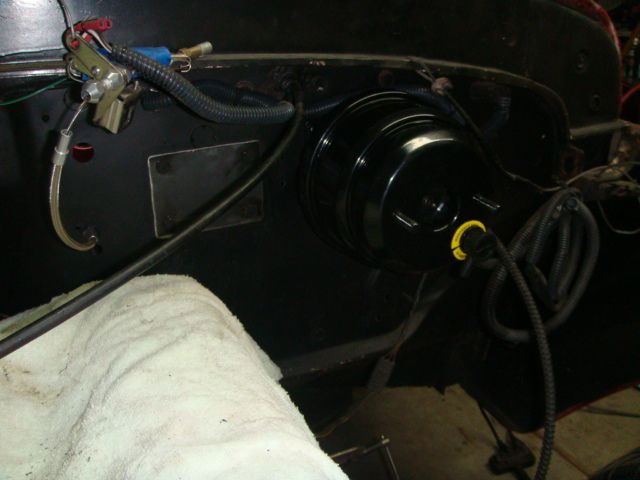

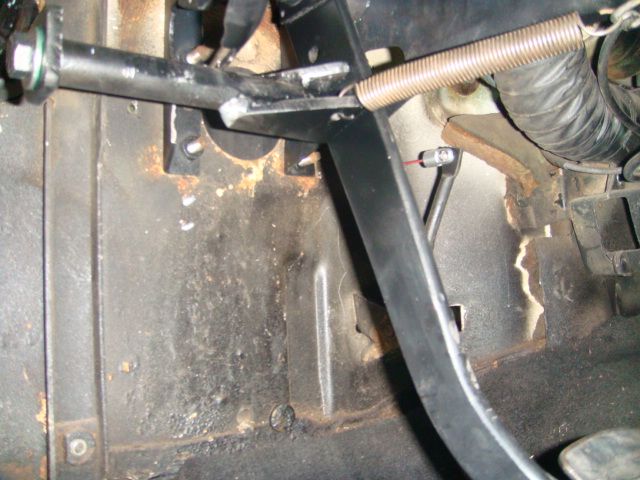
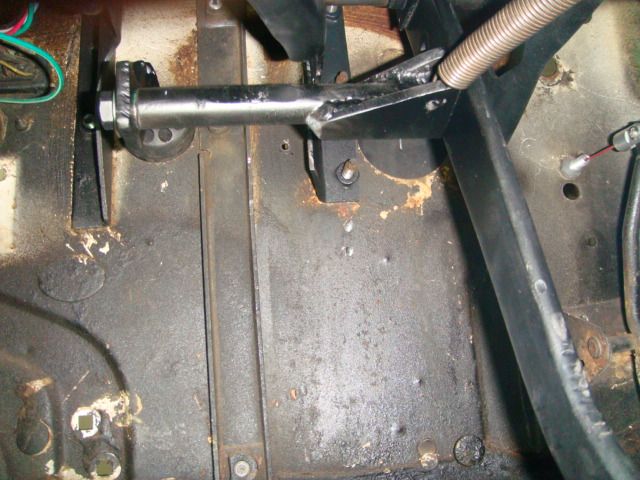
I knew I would to fabricate some kind of extension from the pedal to the MC push rod so here's my first go at it. Remember I was talking about pedal ratio earlier? Stay tuned....
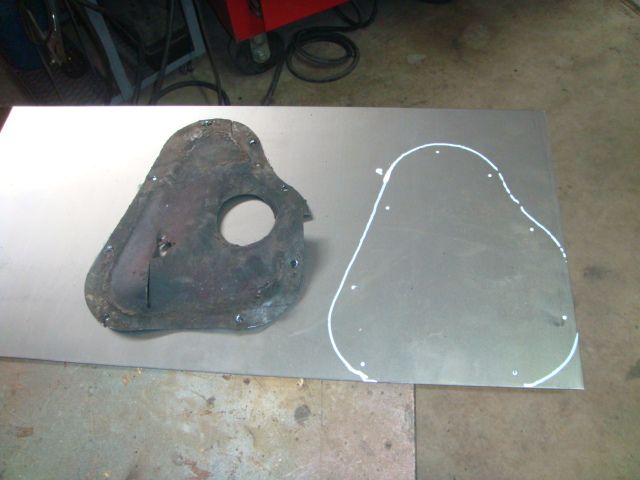
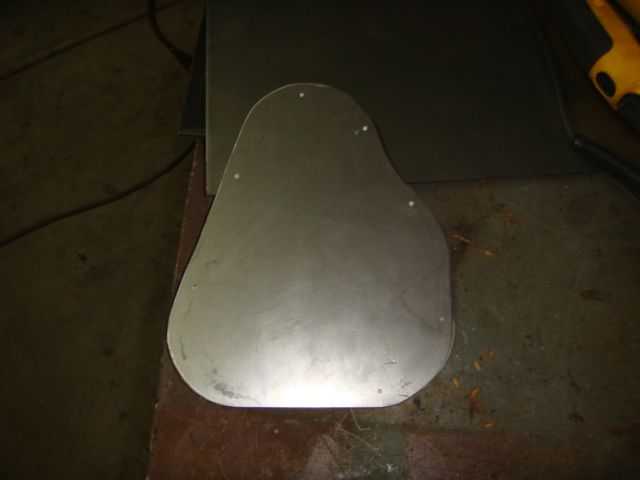
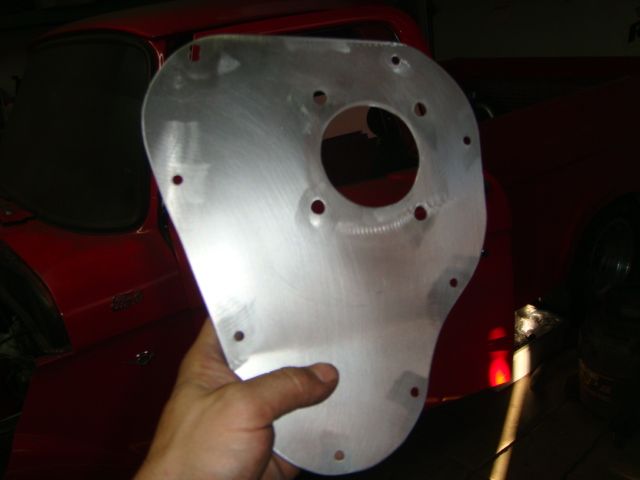
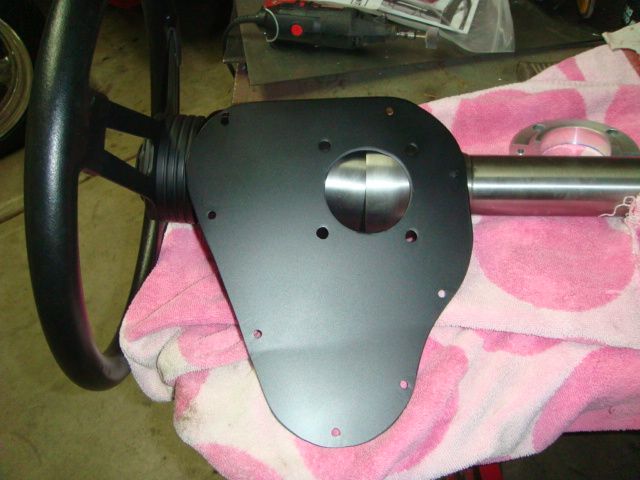
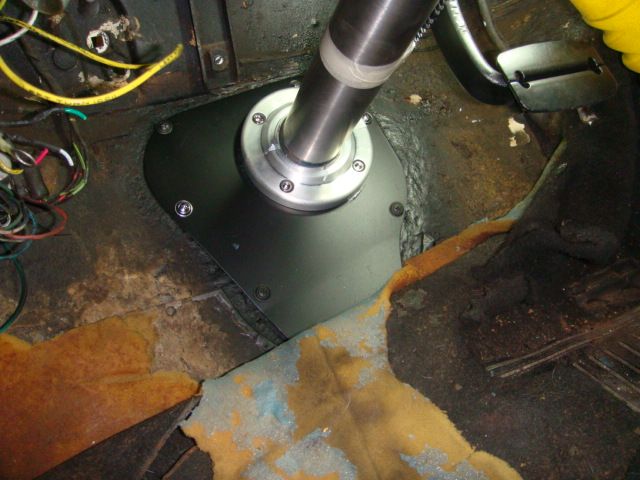
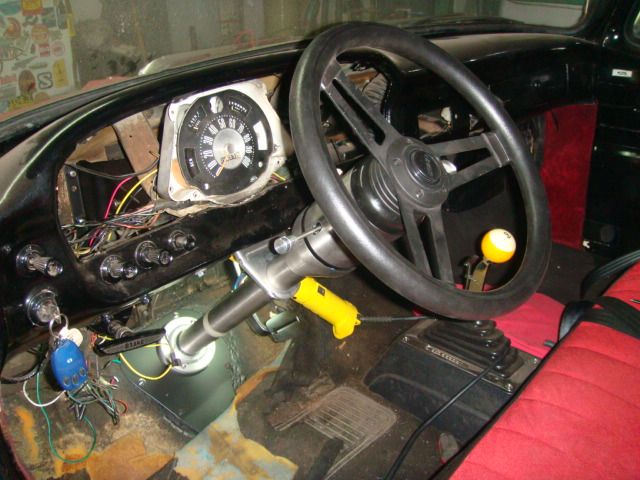
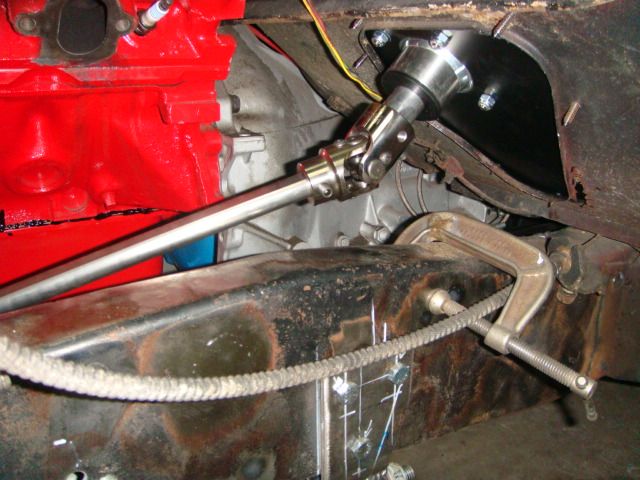
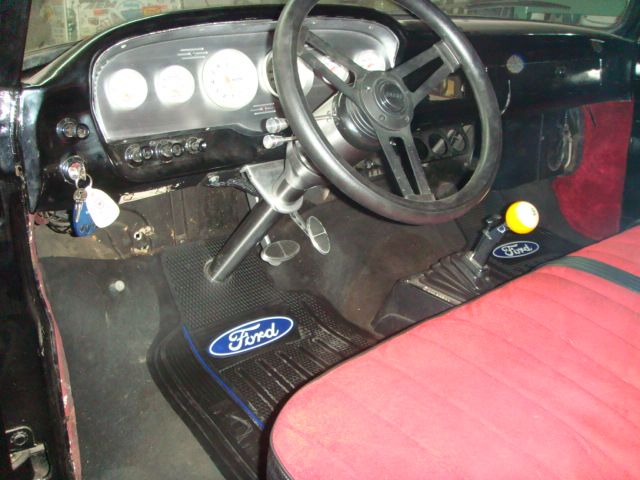
Took a break from brakes and made a new steering hole cover thingy.. Got the new Ididit mocked up. The ujoint angles are a little more than I like but I can get a good size feeler into the joints and they seem to be articulating pretty well.
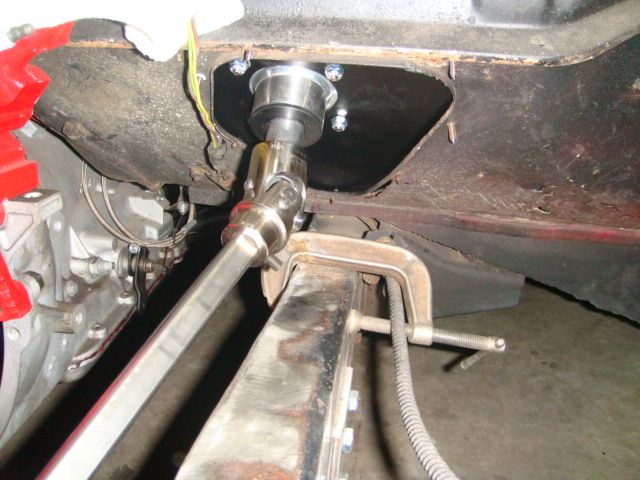
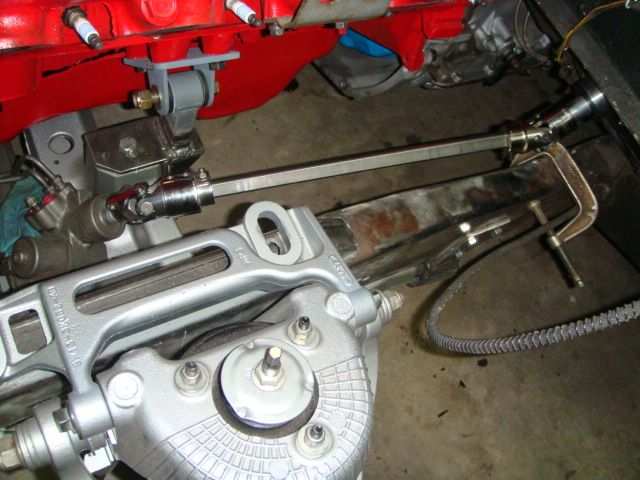
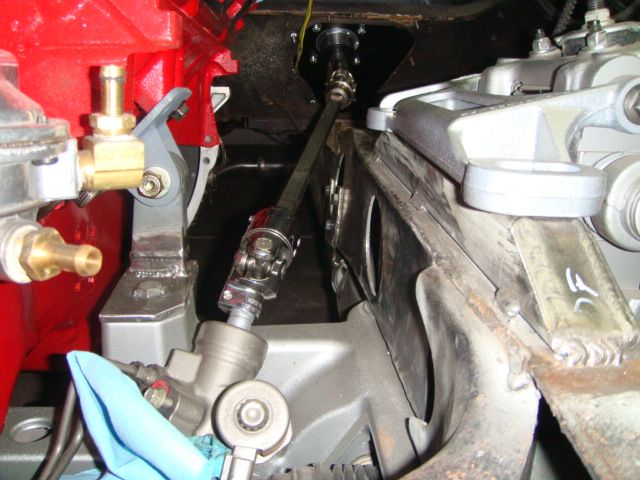
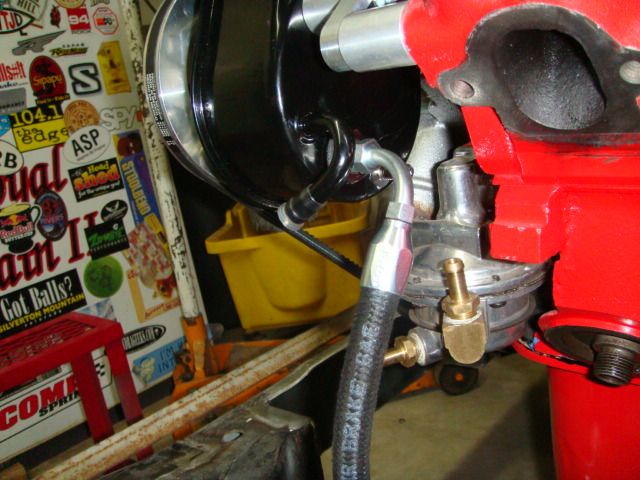
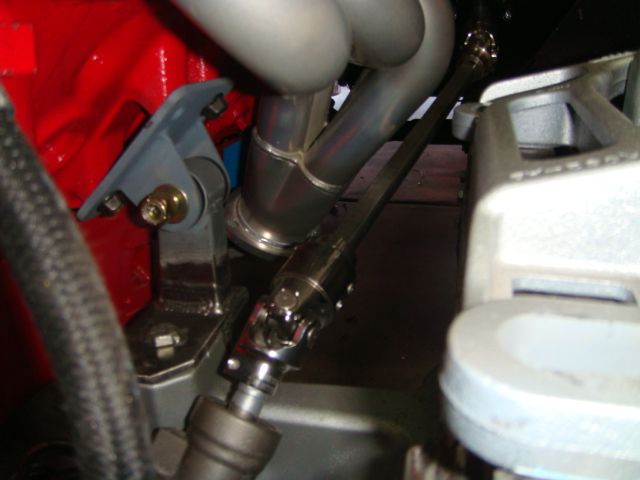
Power steering hose was next. I just dropped the $50 and had shop make it up for me. I absolutely hate leaks and I just didn't want to try using the Ford Focus pressure line or try to fab something. Call me lazy..
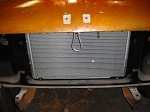
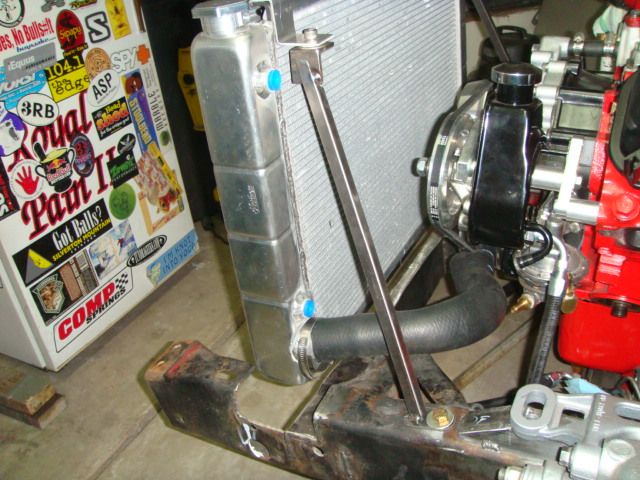
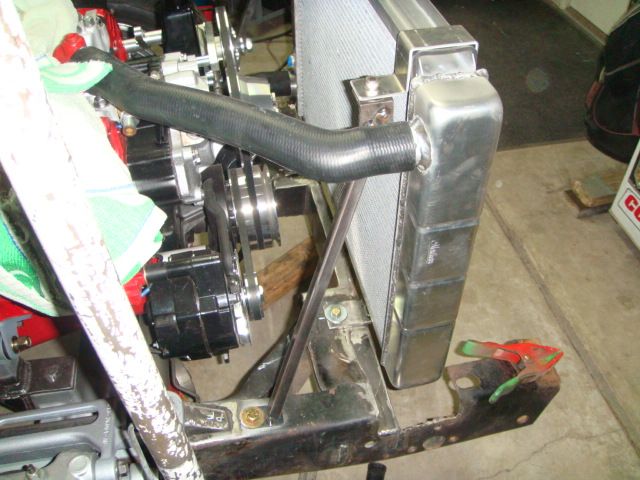
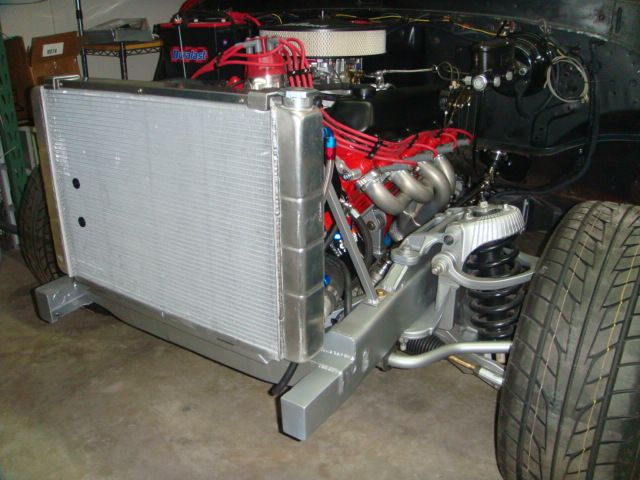
On to cooling. Since I have a flip hood set up I don't the use the truck's radiator support. So I'm free-fabbin' again. Came up with this for the radiator base mount.
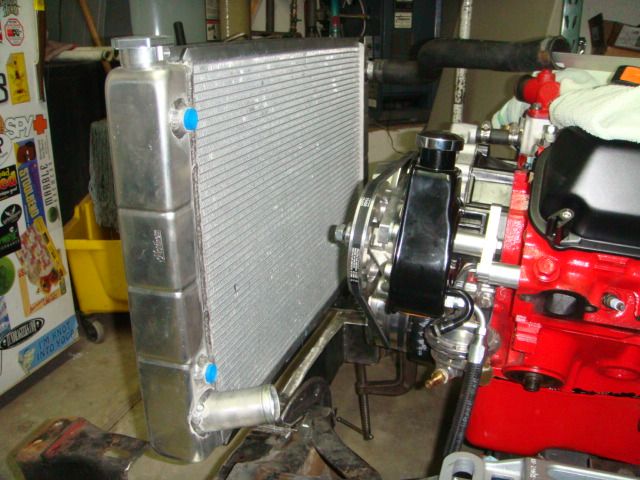
Here's the risers I made up.

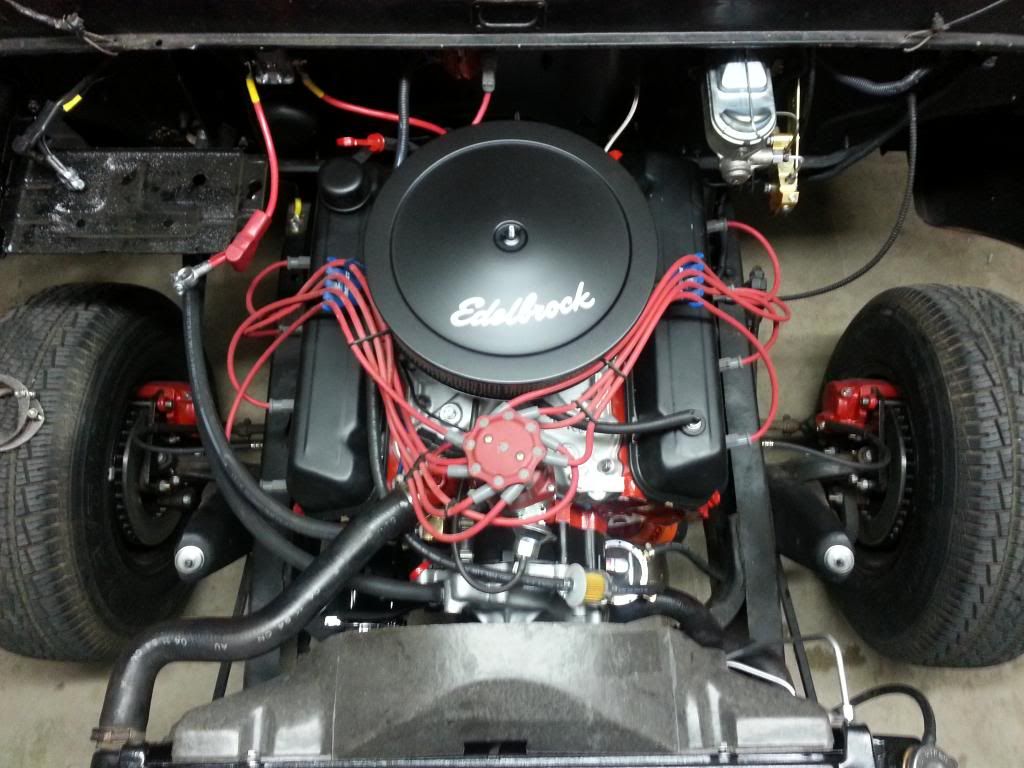
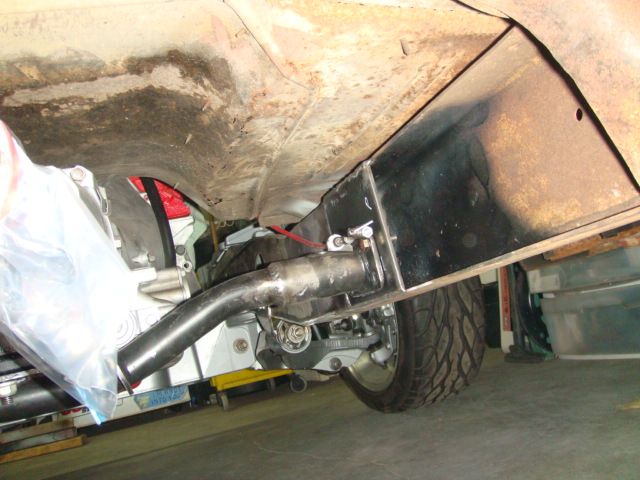
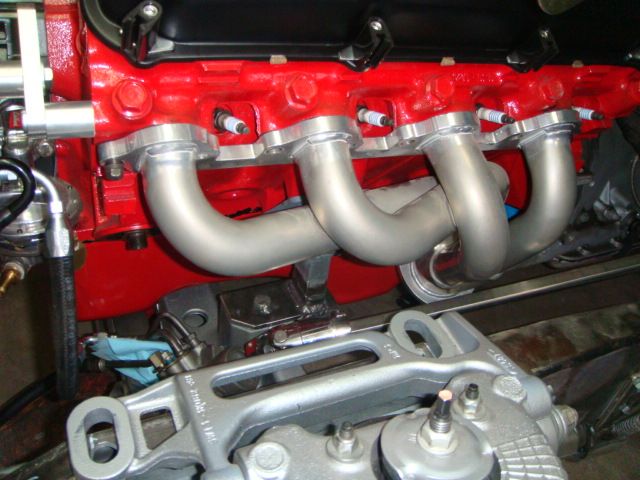
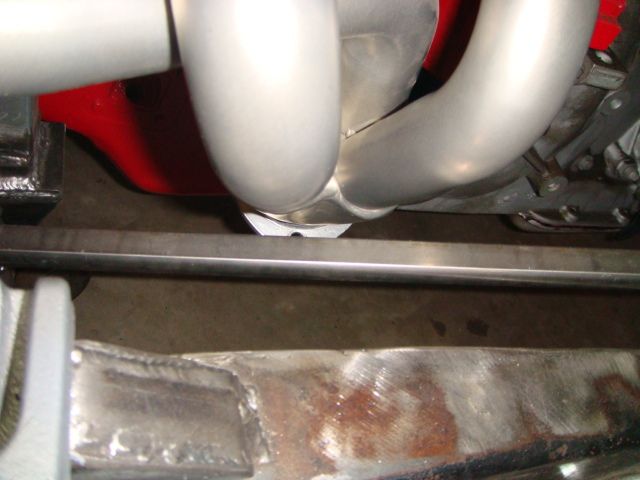
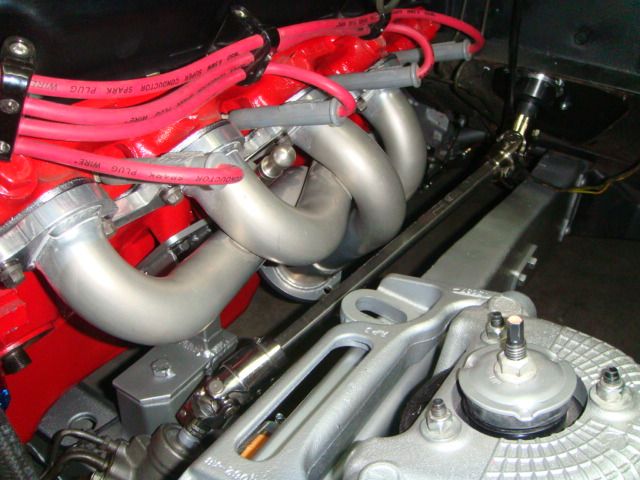
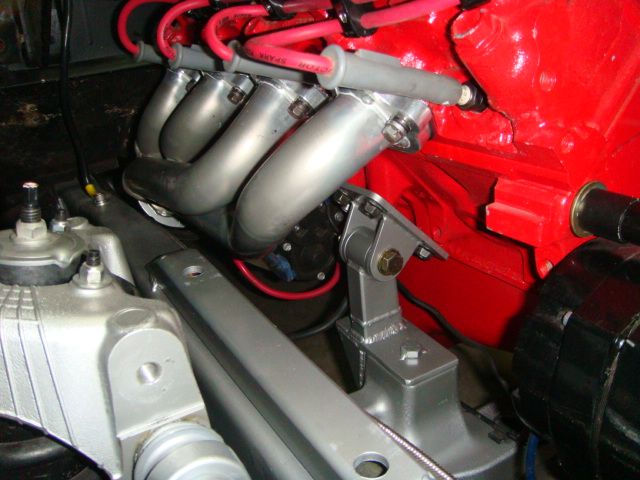
Got my new L&L headers!! Woo Hoo.. This was a pretty good Craigslist score. Clearance is tight!!!
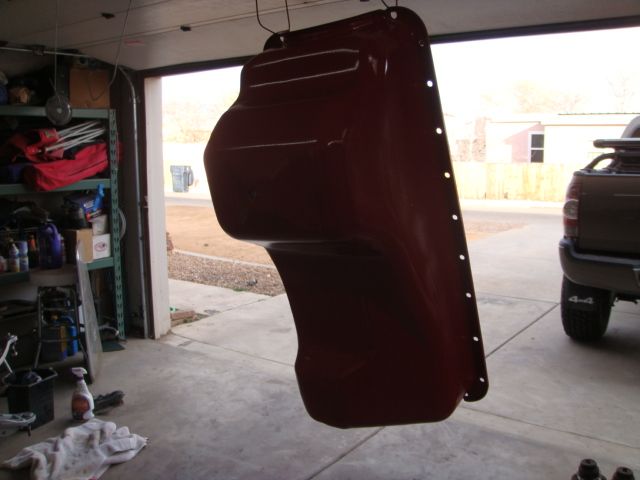
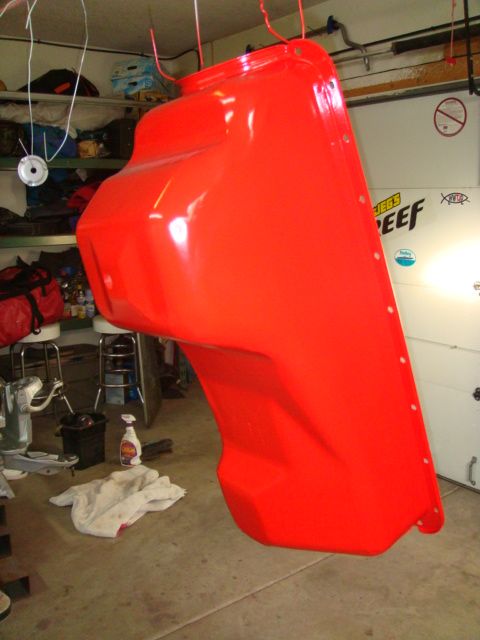
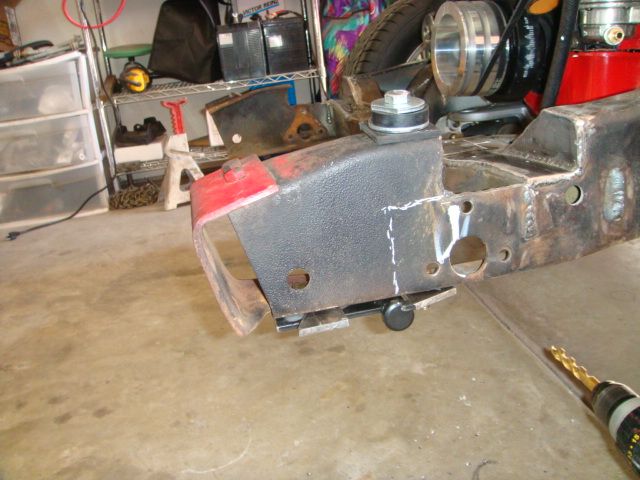
So I wasn't a big fan of how my hillbilly buddy set up the flip hood so I decided to reconfigure it. Here's the mods to the frame and the hinging I'll be using.


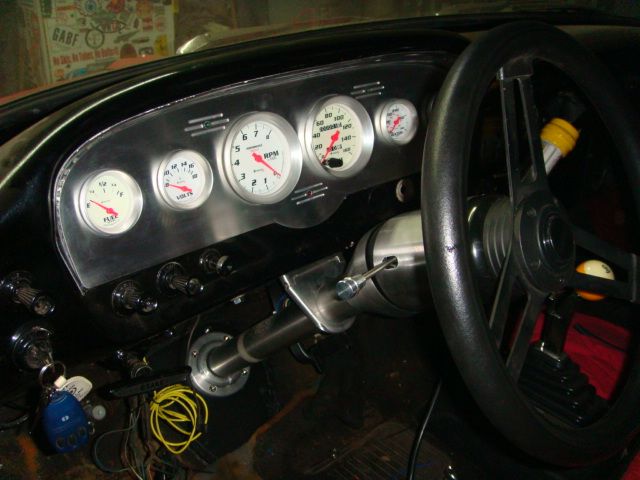
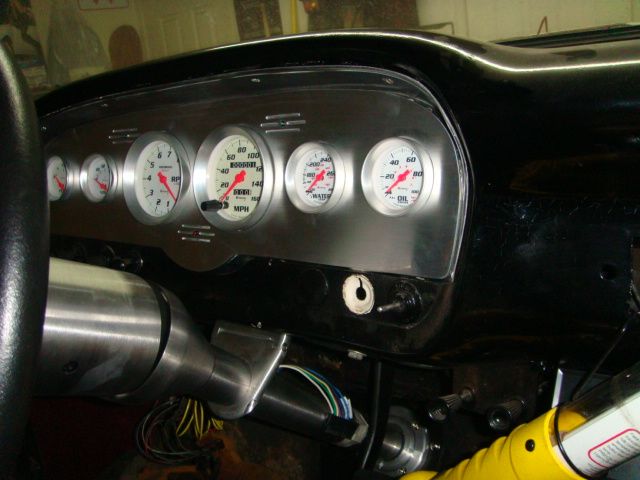
Got the new cluster banged out.
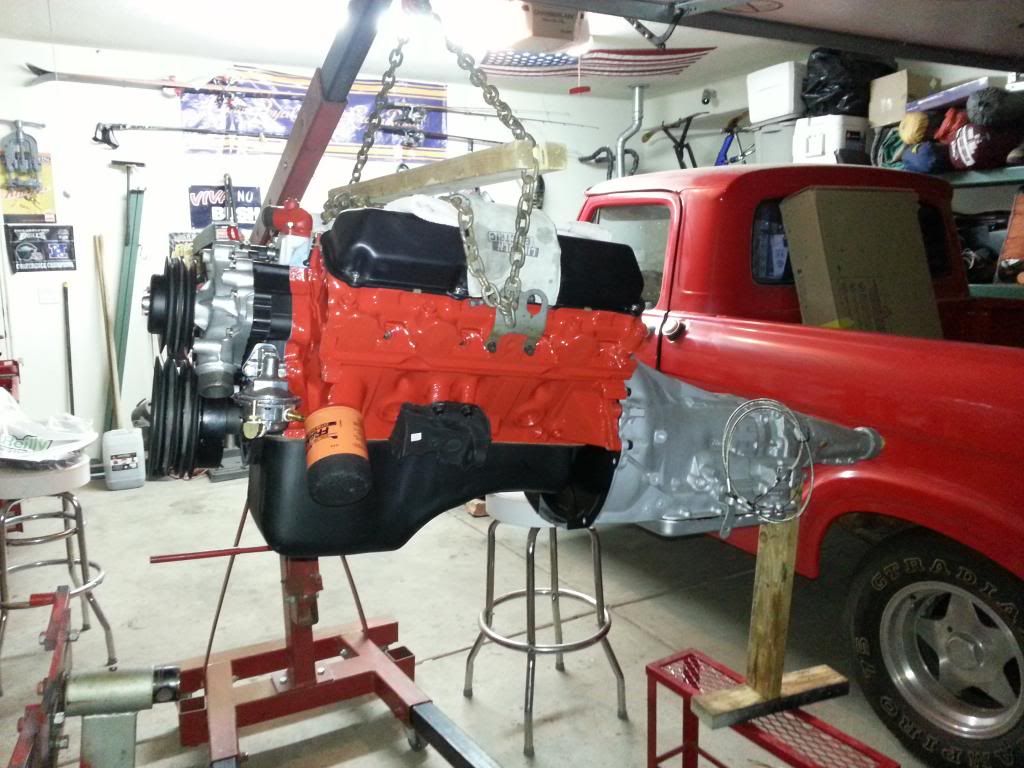
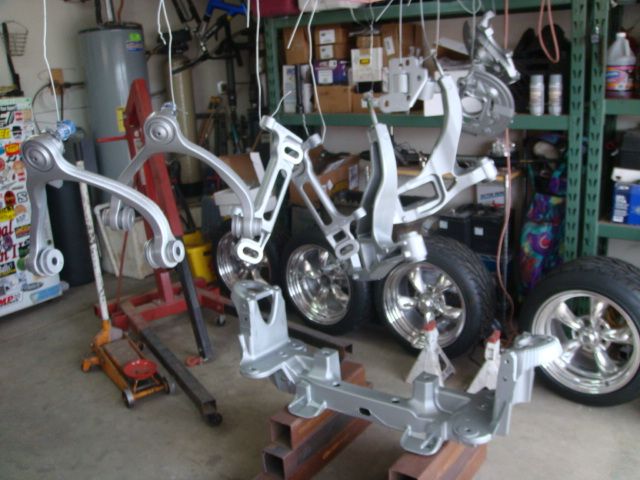
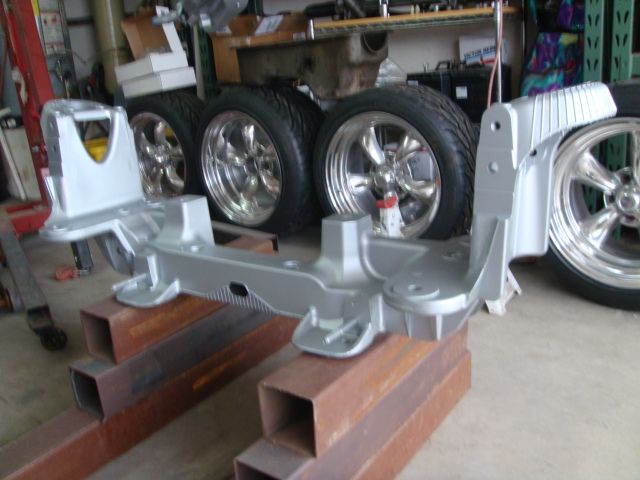
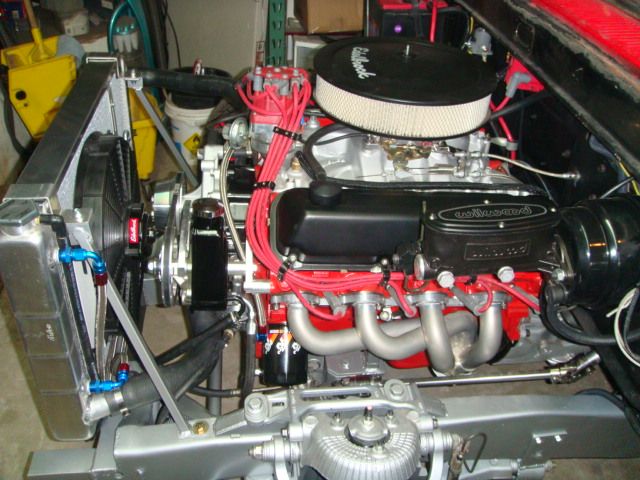
So by now I have completely mocked everything up. Complete tear down and paint next and then final assembly.


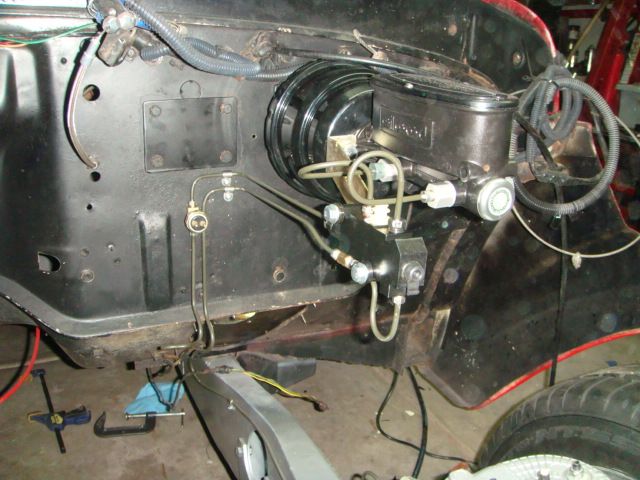
So back to brakes. The pedal ratio for manual brakes (from what I have read) should be about 6:1. Since I'm going to power brakes the ratio should be 5:1 or 4:1. The only way to do this is lower the push rod location down the towards the pedal. In my case, I moved it about 1.5". Keep in mind I then had to extend this over to the new MC location. Then I had to custom make a linkage piece that would bring me back up 1.5" to the push rod location. OMG what a PIA!! Now the process to get to this point took me a bout a week. Pulling my hair out because the brakes wouldn't bleed. Going through calipers, master cylinders, bench bleeding, covered in brake fluid. Bottom line.. You need to get the pedal ratio right guys or you'll never make it work. Here's the result.
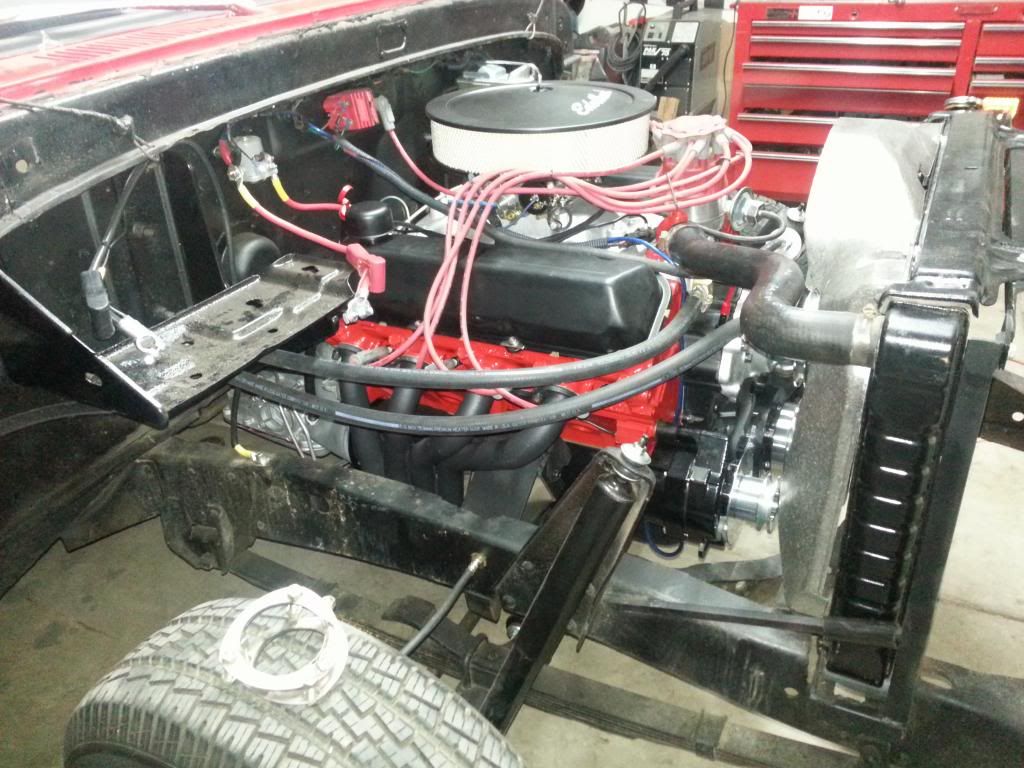
Brakes are working. She's ready for the motor..
That's it for now. I'll get a few more pics up when the sheet metal is back on. Thanks for looking.. joe