
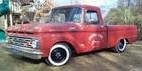
kstones63 project
-
edselcomet
- Posts: 17
- Joined: December 8, 2009, 1:24 pm
- Location: saskatchewan
-
Reds Rod Shop
- Posts: 317
- Joined: January 11, 2009, 6:43 pm
- Location: Anderson, SC
Defrost vents
The aluminum pieces that you have mounted to the dash for the defrost, did you make those or purchase them from someone?
Red
My 1964 Restomod Project http://fordtruk.com/forums/viewtopic.ph ... sc&start=0
My 1964 Restomod Project http://fordtruk.com/forums/viewtopic.ph ... sc&start=0
-
Reds Rod Shop
- Posts: 317
- Joined: January 11, 2009, 6:43 pm
- Location: Anderson, SC
Also, what is the length of the column that was used and where did you get the piece that mounts to the firewall that the column goes through. Thanks for the info.
Red
My 1964 Restomod Project http://fordtruk.com/forums/viewtopic.ph ... sc&start=0
My 1964 Restomod Project http://fordtruk.com/forums/viewtopic.ph ... sc&start=0

Re: Defrost vents
I made those pieces for the defroster. I got bored one day and figured that there was a better way than the factory cardboard pieces that were in mine. I made them out of a solid piece of round aluminum.Reds Rod Shop wrote:The aluminum pieces that you have mounted to the dash for the defrost, did you make those or purchase them from someone?
The column is 31" from the bottom of the steering wheel adaptor to very bottom of the column where the knuckle bolts on. I made the column mount at the floor along with the brake pedal floor bracket.
Kevin
kstones63
_______________________________________
63 F100
29 Ford Sedan Delivery
99 F250 PSD, 4x4, CC
95 F350 Flatbed Dually Diesel
_______________________________________
63 F100
29 Ford Sedan Delivery
99 F250 PSD, 4x4, CC
95 F350 Flatbed Dually Diesel
-
Reds Rod Shop
- Posts: 317
- Joined: January 11, 2009, 6:43 pm
- Location: Anderson, SC
Thanks. The defrost pieces are cool. I think that i located a tilt 80 camaro column for $20. He's suppose to be rounding it up for me. Thanks for the info.
Red
My 1964 Restomod Project http://fordtruk.com/forums/viewtopic.ph ... sc&start=0
My 1964 Restomod Project http://fordtruk.com/forums/viewtopic.ph ... sc&start=0
-
Reds Rod Shop
- Posts: 317
- Joined: January 11, 2009, 6:43 pm
- Location: Anderson, SC
A couple more questions for you. Was the floor in your bed in really good shape or did you replace it. If you replaced it, what with and where from? Also, I noticed that your brake pedal goes through the floor. what type master cylinder / assembly did you use? Do you have any pics of it? I really like the smooth firewall and keeping it clean. Thanks in advance for the info. Red
Last edited by Reds Rod Shop on February 9, 2010, 7:15 pm, edited 1 time in total.
Red
My 1964 Restomod Project http://fordtruk.com/forums/viewtopic.ph ... sc&start=0
My 1964 Restomod Project http://fordtruk.com/forums/viewtopic.ph ... sc&start=0
-
Reds Rod Shop
- Posts: 317
- Joined: January 11, 2009, 6:43 pm
- Location: Anderson, SC
Keystone, have you made any progress lately, I'm having withdrawals. lol. No really, your project keeps me inspired on mine. Red
Red
My 1964 Restomod Project http://fordtruk.com/forums/viewtopic.ph ... sc&start=0
My 1964 Restomod Project http://fordtruk.com/forums/viewtopic.ph ... sc&start=0
I have been busy with work so I haven't had as much time to work on this as I would like. I am making progress. The bed is almost ready to be primed for block sanding. This week might be short on work so I migh get it primed this week.
Here are some pics of what else I have been doing on the truck. My tailgate support straps would sometimes hit on the bed side so I was worried about that chipping the paint. I decided to use cables instead of the factory supports.
I made these pieces to hold the cable at the top.

I am using the cables that match my 99 F250 SuperDuty. I put the new mount in the top mounting hole and they are the perfect length.

I cut off the lower mount, drilled and tapped it for the factory 99 bolt and installed it.

I did have to mill off the top of the latch assembly to make it clear the top mount. It was stamped so poorly, it just took a little bit more that actually flattening it it out smooth to give it clearance.
Kevin
Here are some pics of what else I have been doing on the truck. My tailgate support straps would sometimes hit on the bed side so I was worried about that chipping the paint. I decided to use cables instead of the factory supports.
I made these pieces to hold the cable at the top.
I am using the cables that match my 99 F250 SuperDuty. I put the new mount in the top mounting hole and they are the perfect length.
I cut off the lower mount, drilled and tapped it for the factory 99 bolt and installed it.
I did have to mill off the top of the latch assembly to make it clear the top mount. It was stamped so poorly, it just took a little bit more that actually flattening it it out smooth to give it clearance.
Kevin
kstones63
_______________________________________
63 F100
29 Ford Sedan Delivery
99 F250 PSD, 4x4, CC
95 F350 Flatbed Dually Diesel
_______________________________________
63 F100
29 Ford Sedan Delivery
99 F250 PSD, 4x4, CC
95 F350 Flatbed Dually Diesel
I got the bed primed today with the first coats of high build primer. Hopefully on Saturday, I will get this block sanded and fix anything that needs to be fixed and reprime on Sunday for final block sanding.
The new radius under the top panel can now been seen.


This is how the gas filler will be behind the taillight. I purchased a gas cap that doesn't need to come off to fill. It has a spring loaded center that the fuel nozzle pushes into.


I am putting a false floor in the bed to put lawn chairs, spare tire and stuff under, so this fuel neck will be hidden.
Here is the front of the bed. I fixed the corner where the the side panel meets the front panel. I cut out the overlap, reshaped the seam and cut the new seam in to continue it on.

I'm making good progress finally again.
Kevin
The new radius under the top panel can now been seen.
This is how the gas filler will be behind the taillight. I purchased a gas cap that doesn't need to come off to fill. It has a spring loaded center that the fuel nozzle pushes into.
I am putting a false floor in the bed to put lawn chairs, spare tire and stuff under, so this fuel neck will be hidden.
Here is the front of the bed. I fixed the corner where the the side panel meets the front panel. I cut out the overlap, reshaped the seam and cut the new seam in to continue it on.
I'm making good progress finally again.
Kevin
kstones63
_______________________________________
63 F100
29 Ford Sedan Delivery
99 F250 PSD, 4x4, CC
95 F350 Flatbed Dually Diesel
_______________________________________
63 F100
29 Ford Sedan Delivery
99 F250 PSD, 4x4, CC
95 F350 Flatbed Dually Diesel
-
Alan Mclennan

- Posts: 9324
- Joined: October 14, 2006, 6:16 pm
- Location: In the shed... Cranebrook NSW

Goodonya Kevin!, that looks great as usual!
Honey, If I say I`ll fix something I will, there`s no need to remind me every 6 months!!
66 f100 tabletop swb 351 Clevo C6 "Beryl"
Slick Stock 3 KCMO
Slick Stock 4 Altoona
Slick Stock 5 KCMO
Slick Stock 6 Altoona
Slick Stock 7 Salina KS
Slick Stock 8..............................
66 f100 tabletop swb 351 Clevo C6 "Beryl"
Slick Stock 3 KCMO
Slick Stock 4 Altoona
Slick Stock 5 KCMO
Slick Stock 6 Altoona
Slick Stock 7 Salina KS
Slick Stock 8..............................
-
ezernut9mm

- Posts: 9141
- Joined: July 21, 2006, 9:37 pm
- Location: KCMO

always
"i believe i've achieved satisfaction".-bubbles
"should i be gettin" baked for this boys?"-bubbles
i could no longer keep "r.i.p.ing" all of our fallen brothers and sisters, so i say here, slick loads of love and much respect to all you beautiful people.
"i believe i've achieved satisfaction".-bubbles
"should i be gettin" baked for this boys?"-bubbles
i could no longer keep "r.i.p.ing" all of our fallen brothers and sisters, so i say here, slick loads of love and much respect to all you beautiful people.
keeping up with the stones
whats the old saying? "keeping up with the smiths?" well on this site and in this valley i have to keep up with the stones. the bed looks great kevin. once you finish with your cart i cant start working on my bed too.
'64 ford bbw custom cab short styleside bed
'32 ford 5 window body
'28 ford roadster pickup
'04 ford f150 crew cab short bed
'32 ford 5 window body
'28 ford roadster pickup
'04 ford f150 crew cab short bed
I got the bed block sanded out today and fixed a few small problems. Tomorrow, I will spray one more good coat of high build primer so I can start wet sanding on Monday to be ready for paint.
azratrod & I are starting to get our ideas for our tilt forward hoods. I took some pics of elpolackos hood and we will try and use ideas from his hood and Alan's hood. We hope to get started on this right away.
Kevin
azratrod & I are starting to get our ideas for our tilt forward hoods. I took some pics of elpolackos hood and we will try and use ideas from his hood and Alan's hood. We hope to get started on this right away.
Kevin
kstones63
_______________________________________
63 F100
29 Ford Sedan Delivery
99 F250 PSD, 4x4, CC
95 F350 Flatbed Dually Diesel
_______________________________________
63 F100
29 Ford Sedan Delivery
99 F250 PSD, 4x4, CC
95 F350 Flatbed Dually Diesel
Beautiful work, Kevin!!kstones63 wrote:I got the bed block sanded out today and fixed a few small problems. Tomorrow, I will spray one more good coat of high build primer so I can start wet sanding on Monday to be ready for paint.
azratrod & I are starting to get our ideas for our tilt forward hoods. I took some pics of elpolackos hood and we will try and use ideas from his hood and Alan's hood. We hope to get started on this right away.
Kevin
Regarding a "tilt forward" hood, other than the "cool factor" why would you prefer this over the standard mount? Won't it limit access to many things under the hood? Just curious....
Thanks for the detailed posts! You really do impressive work.
Thanks for the compliments.randyr wrote:Beautiful work, Kevin!!kstones63 wrote:I got the bed block sanded out today and fixed a few small problems. Tomorrow, I will spray one more good coat of high build primer so I can start wet sanding on Monday to be ready for paint.
azratrod & I are starting to get our ideas for our tilt forward hoods. I took some pics of elpolackos hood and we will try and use ideas from his hood and Alan's hood. We hope to get started on this right away.
Kevin
Regarding a "tilt forward" hood, other than the "cool factor" why would you prefer this over the standard mount? Won't it limit access to many things under the hood? Just curious....
Thanks for the detailed posts! You really do impressive work.
Regarding the hood, I don't like the way that the hood hinges let the hood stick up in the back. I know that you can get some good hinges that don't do this but I don't want to take the chance.
The main reason for the tilt forward hood is that I want something different and something that will help draw attention to it over the 200 "32" Fords that are at every car show. I have done so many small subtle changes to this truck, I just think that it needs something different to go along with the fuel filler and all the other things.
Thanks,
Kevin
kstones63
_______________________________________
63 F100
29 Ford Sedan Delivery
99 F250 PSD, 4x4, CC
95 F350 Flatbed Dually Diesel
_______________________________________
63 F100
29 Ford Sedan Delivery
99 F250 PSD, 4x4, CC
95 F350 Flatbed Dually Diesel

Ok, that makes sense. I don't think you'll have any trouble drawing attention to this truck, though. It's really going to be a sweet ride!kstones63 wrote:[
Thanks for the compliments.
Regarding the hood, I don't like the way that the hood hinges let the hood stick up in the back. I know that you can get some good hinges that don't do this but I don't want to take the chance.
The main reason for the tilt forward hood is that I want something different and something that will help draw attention to it over the 200 "32" Fords that are at every car show. I have done so many small subtle changes to this truck, I just think that it needs something different to go along with the fuel filler and all the other things.
Thanks,
Kevin
Maybe you'll design a "quick release" hinge for the tilt forward hood so you and lift it off easily for repairs....
Those welded seams on the bed look great!
Randy
-
64low-n-slow
- Posts: 296
- Joined: January 5, 2009, 4:05 pm
- Location: Daytona Beach
Well the bed and tailgate are finally ready to go to the painter. We just kept finding some small things that weren't quite right, so it was sand, hammer, prime and start sanding again. Then repeat. Now we are happy. 
The painter wants me to bring it down on Saturday morning and hopefully we will get it painted and and a couple of coats of clear on it. Then on Sunday we can wet sand and put the final coat of clear on.
Probably won't happen like I have planned, but OH WELL, it will get done soon.
Kevin
The painter wants me to bring it down on Saturday morning and hopefully we will get it painted and and a couple of coats of clear on it. Then on Sunday we can wet sand and put the final coat of clear on.
Probably won't happen like I have planned, but OH WELL, it will get done soon.
Kevin
kstones63
_______________________________________
63 F100
29 Ford Sedan Delivery
99 F250 PSD, 4x4, CC
95 F350 Flatbed Dually Diesel
_______________________________________
63 F100
29 Ford Sedan Delivery
99 F250 PSD, 4x4, CC
95 F350 Flatbed Dually Diesel