
suspension nightmares
-
Chefsonfire
- Posts: 18
- Joined: November 5, 2009, 10:11 pm
suspension nightmares
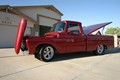
Hi, first post on my project. Decided to graft a volare type suspenion to my 61'. Everything was going fine UNTIL I went to install shock mounts(?). Then find that I'm high on one side 5/16 . Bolts will not line up.Of course..this is found AFTER all welding and the rails are boxed in. Something about..."measure twice..cut once" ...seemed to evade me at the moment. Suggestion on attempting to just cut the one side free and attempt to make adj. I am thinking...cut the WHOLE thing loose ( lots work).. and start from scratch. *&^&%$!!!!p.s.....figure, while I have it out...go a little deeper on the notch for a little extra drop....those dropped spindles run over $500.00....Oh the price to be cool..


Volarie
Sorry to hear it turned out that way. Seen a lot of guys use those on the old fat fender trucks. They rode pretty nice. Hope you can get it dialed in where you want it. Cutting that all out will be a pain. Much as I would like to go IFS, Monoleafs front and rear, some good shocks, and a dropped axle sure are easy to install and ride real good. Plus you can always add sway bars front and rear. And the best part, no welding. Well maybe a little for the sway bar mounts. I wish you all the luck in your project and hope round 2 goes a lot better. TR
-
Ford blue blood
- Posts: 64
- Joined: November 10, 2009, 11:07 am
- Location: Birmingham, AL
You really need to cut it out and start over. If it is not in there "square" it will never align correctly and never drive properly. There is no such thing as too much time measuring and cross checking! I put a Volare in a 48 half ton years ago and it turned out very nice, truck was slamed and road like a dream, aligned properly and is still on the road today in TN.
Many great Fords,
Bill
Bill
-
Chefsonfire
- Posts: 18
- Joined: November 5, 2009, 10:11 pm
nightmares
Yeah, My first notion WAS to go with a drop straight axle, add power steering and discs..DUH!...SO HERE i AM...READY TO STRIKE THE TORCH....AGAIN... oH WELL, glad I wasn't further down the line when I caught this...thanks for the support guys..
-
Chefsonfire
- Posts: 18
- Joined: November 5, 2009, 10:11 pm
4 cutting wheels,6 sawzall blades,5 grinding wheels and 2hrs on the torches and VOILA!...OFF IT COMES...what a pain. And thats just to get it off...Now the fun part of cleaning off old welds and welding surfaces..But I'd rather do it right to insure assembly and handling...So this time around everything( cross member,motor mounts etc.) will be completely mocked up...and once again, more measurements..prior to final welding.. The lessons WE learn on what NOT to do..


-
Ford blue blood
- Posts: 64
- Joined: November 10, 2009, 11:07 am
- Location: Birmingham, AL
-
Chefsonfire
- Posts: 18
- Joined: November 5, 2009, 10:11 pm
almost ready...
Got the cross member all clean of prior welds and slag....started laying out the new "notch"in the frame rails...took old template and just took another 1.5 inches out....First bump in the road...the cross member has "pads" at the rear of it ,that when first installed, were welded directly to the frame. Now, by moving the notch "up", I have to account for that depth on the position on the pad. Thus, trimming the pad down( have to anyway...got screw up on the removal) to half the original height. Now I will have to make a notch for the pad. I will male a "dog leg" from some angle iron to weld to the rail allowing a new "seat" for the pad. Will have to take in account the thickness of the angle iron so to make the notch the correct depth.. And the band played on...
-
Anthony
-
Ford blue blood
- Posts: 64
- Joined: November 10, 2009, 11:07 am
- Location: Birmingham, AL
Chefsonfire one of the things to look for before you weld that bad boy back in there is when the frame is at the ride higth (rake you want) the flat part of the center of the crossmember should be bubble level. That suspension was designed to be level with the ground in order to get the alignment right. So try to set the frame like it will be when everything is in place and it is setting on the ground then proceed.
Many great Fords,
Bill
Bill