Page 1 of 3
62 UNI Take II
Posted: April 1, 2012, 9:42 pm
by noley99
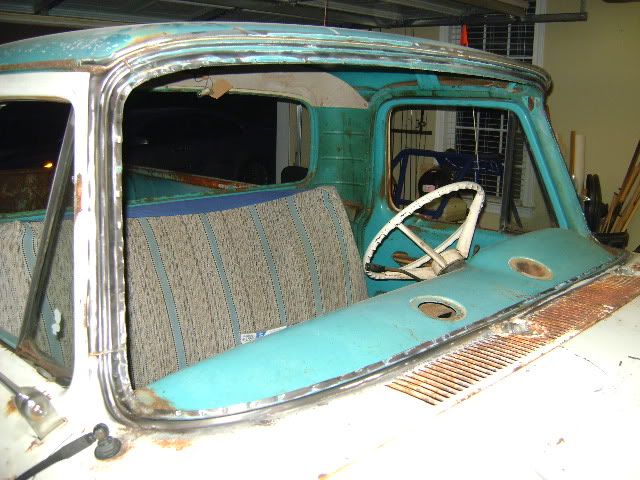
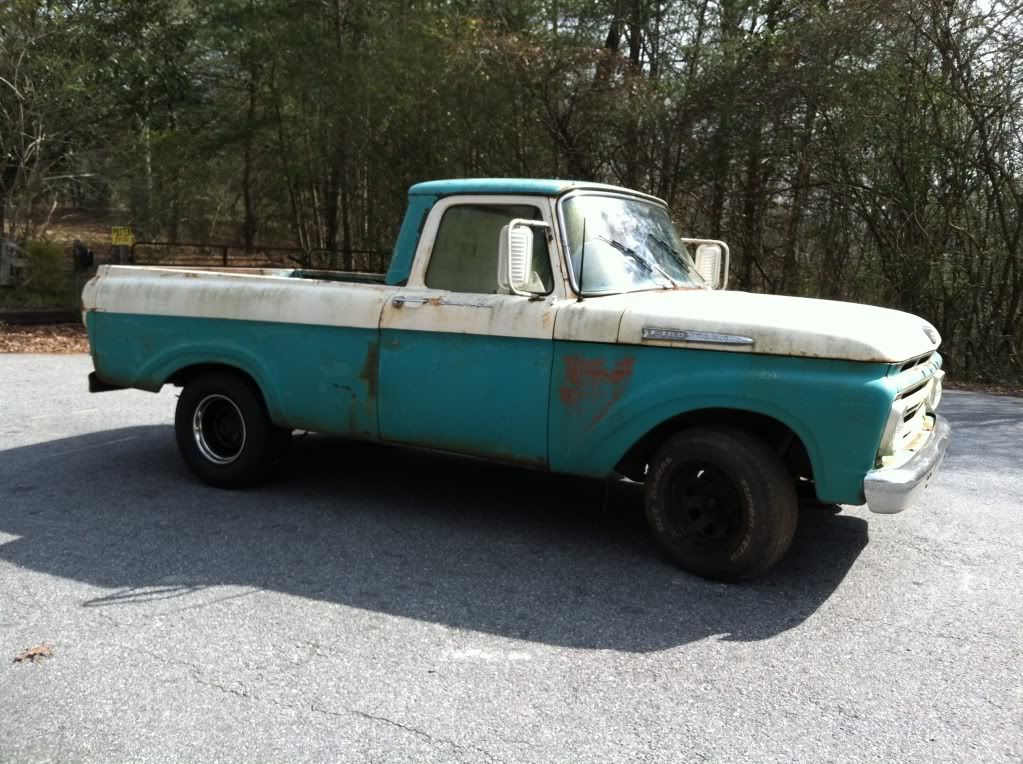
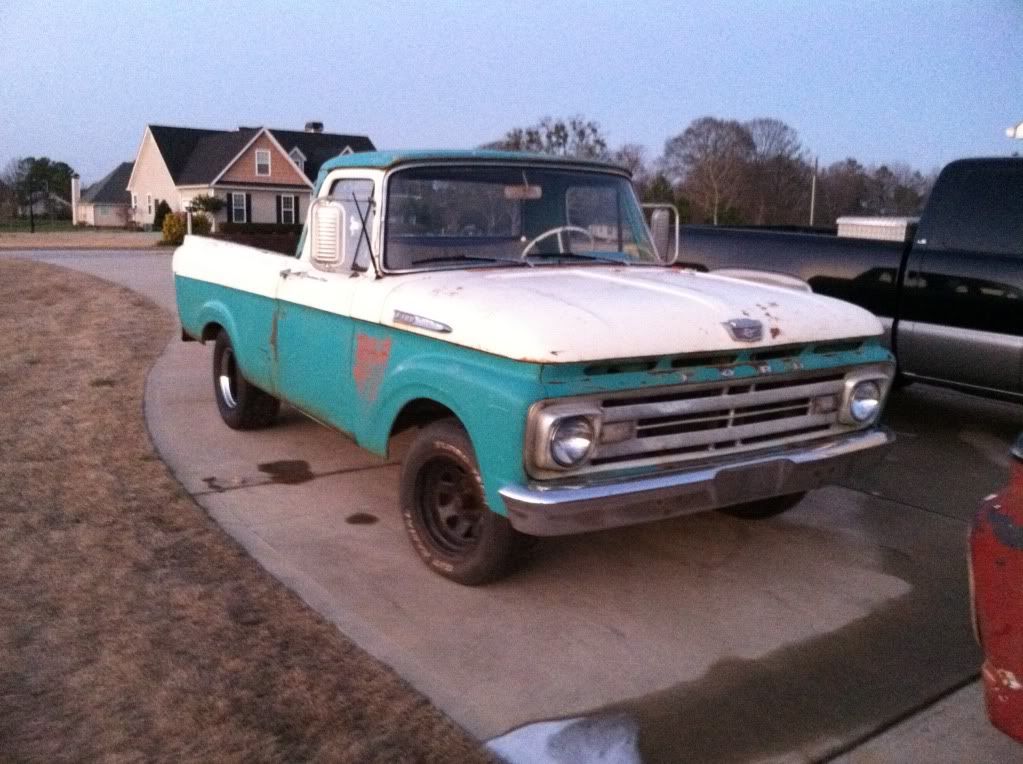
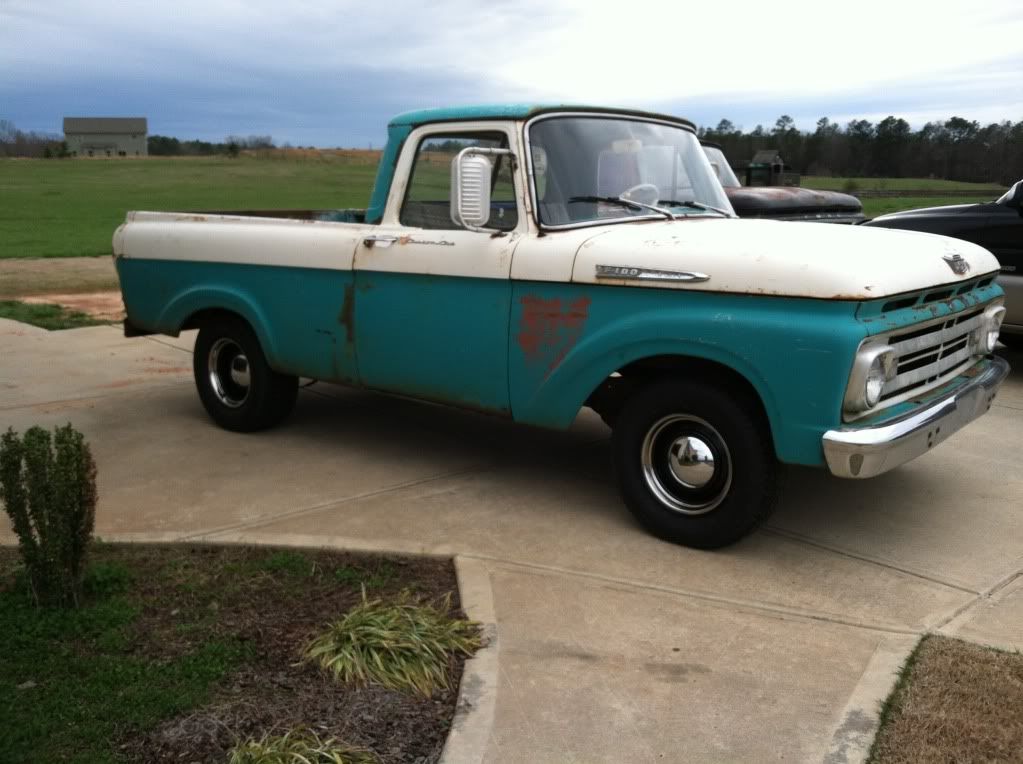
I thought I would start a new build thread with my latest Uni project. It seems the last one was a bit more of a parts truck than a project truck. Basically the frame was shot and the more I dug the deeper the rust. I found this one while I was looking for parts for the other. The price was right and it was in very good shape for a East Coast truck sitting around for 15 years. The truck came with a lot of brand new Ford parts (all door parts, new rubbers front and back, door seals and vent windows). This one is a keeper for sure and is coming along nicely.
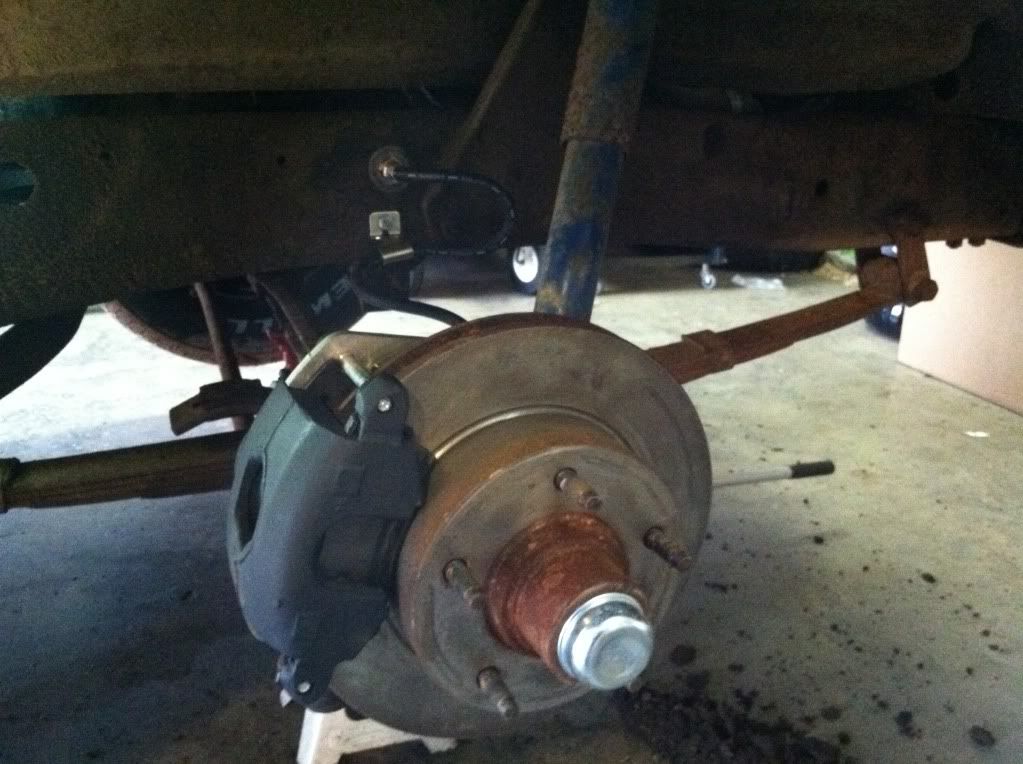
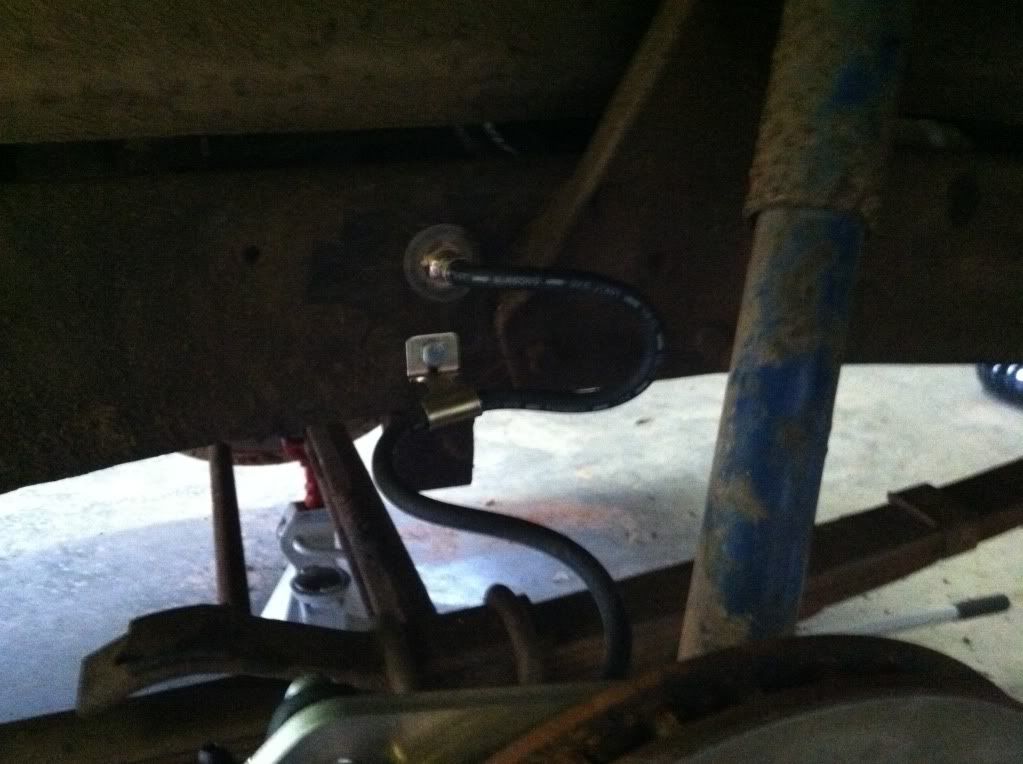
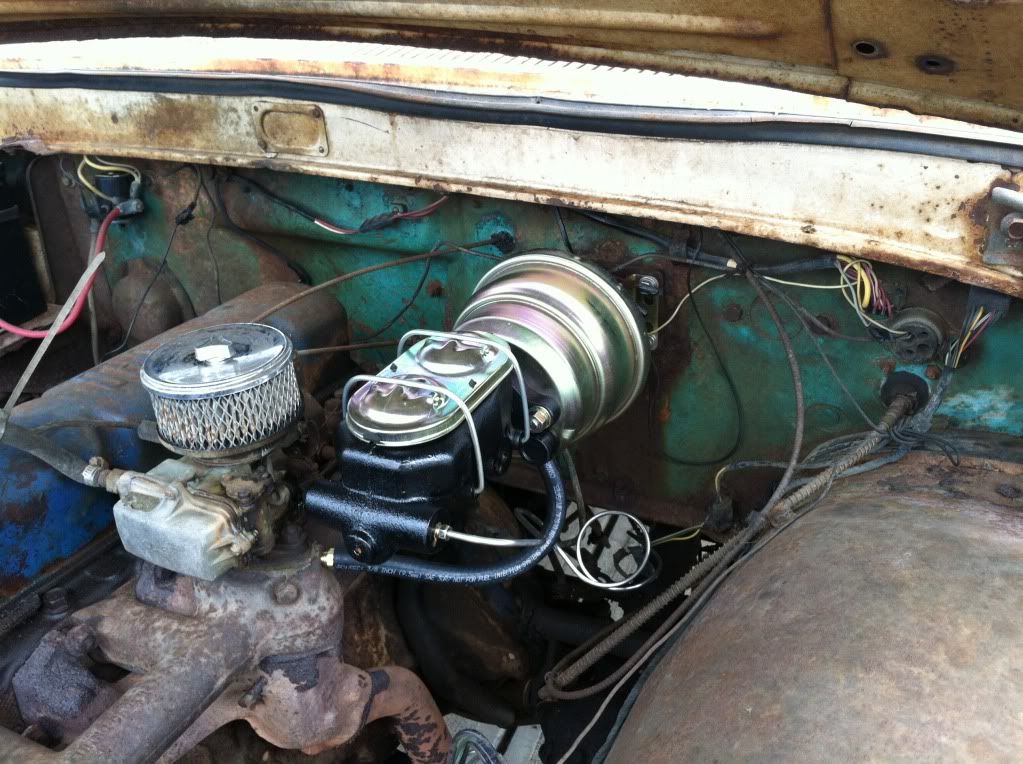
So far I've completely replaced the brakes. New stainless lines, MC, Booster, Pads, Rotors, Drums, Shoes and wheel cylinders. Next part is the front end. I plan to lower the front by 3 to 4 inches and replace all of the bushings and steering parts. I want to keep the straight axle so I will start by taking some springs out and then get the mono's later.
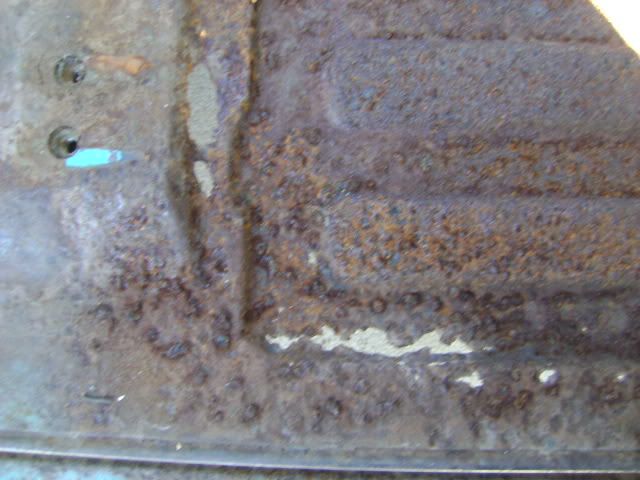
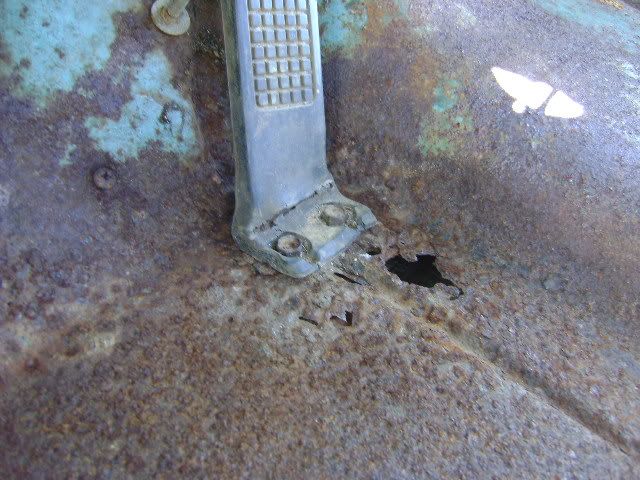
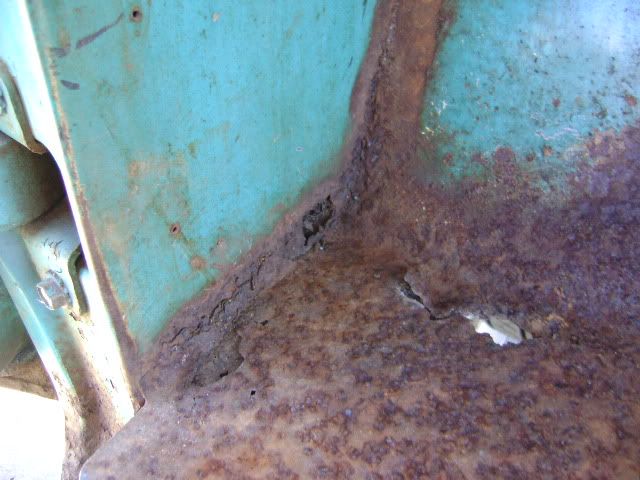
As for the body on this truck it has the typical rusty floor pans and a little in the bed. The torque box is in great shape... not that it matters since I plan to install rear cab mounts for support. One front cab mount needs attention and the passenger side lower door pillar.
The engine is going to be the same as the last truck (nasty little 302 with a T5 and posi 3.55 gear). For now I've got the 6 cyl. running rather well and am driving it a bit. It will make it easier to transport when I need to go to the glass shop and sand blaster etc. I've put the steel smoothies with trim rings and 7" baby moons on and it looks pretty cool. I'm still struggling with the color choice as I really want to do the satin finish black but also like the two tone green and white. Let me know what you guys think.
As for the interior I am going plain Jane with arm rest and updated gauges and a comfortable seat restoration. I do plan to borrow an idea I saw on here and use marbles as inserts for the knobs. Being that this is a Custom Cab I will do a polish job on the dash insert. I think I will try my hand at restoring the steering wheel too, I have two to choose from.
Here are some pictures from when I picked it up until now.
Re: 62 UNI Take II
Posted: April 2, 2012, 4:55 am
by Anthony
nice find and project!!! always nice to drive 'em around a little bit...

Re: 62 UNI Take II
Posted: April 3, 2012, 10:05 pm
by slickmainer
nice brake setup.
Re: 62 UNI Take II
Posted: April 9, 2012, 3:44 pm
by noley99
Thanks! Going to tackle the front end rebuild and lowering this week. Maybe get some of the window stuff done as well.
Re: 62 UNI Take II
Posted: April 9, 2012, 8:17 pm
by Leeroy
Love the babymoons! Really look good on your uni.
I think the two tone looks good on your uni (but hey I'm bias!) Chrome grill and mirrors it'd look really nice!
It looks good at the moment anyway, so whatever you chose is only going to get better!
Re: 62 UNI Take II
Posted: April 10, 2012, 8:32 am
by noley99
Got the chrome mirrors and am working on the grill. I plan to go with a two tone paint job... Black on Black. More on that later....
Got the windows out last night and all cleaned up and ready to paint. Going to put off the front end work as the parts have not come in yet. I should have the interior of the truck all sanded and ready for primer by the end of the day.
Going to get back at it!
Re: 62 UNI Take II
Posted: April 13, 2012, 11:36 pm
by noley99
Got the interior stripped and sanded. Found that the gas tank was leaking(note: always remember to run the gas out). Got it out with minimal spillage. Found very little rust in that area. Got the new floor pans ordered, should have them by Tuesday. Once I get those installed I will be ready to finish up the interior with primer and paint.
I'll post pictures as soon as my lap top is repaired. I'm really determined to keep the momentum going so I will be ready for the Dream Cruise In August.
Re: 62 UNI Take II
Posted: April 27, 2012, 9:57 am
by noley99
Re: 62 UNI Take II
Posted: April 30, 2012, 9:20 am
by slickmainer
Thats what I was doing this weekend. got everything out of the way so I can see where my rust issues area. I have to cut my floors out and put in new panels. much of my floor near the tranny cover are still really good, I'd hate to cut out the good original metal, but I think putting in a whole pan will look better in then end.
Re: 62 UNI Take II
Posted: May 1, 2012, 8:19 pm
by Max Blast
How does it stop with the disc brakes?
Re: 62 UNI Take II
Posted: May 2, 2012, 7:32 am
by noley99
Max Blast wrote:How does it stop with the disc brakes?
I don't have a comparison as the drum brakes were shot when I got it but it stops very well. I don't worry about it at all.
Re: 62 UNI Take II
Posted: May 30, 2012, 11:22 am
by noley99
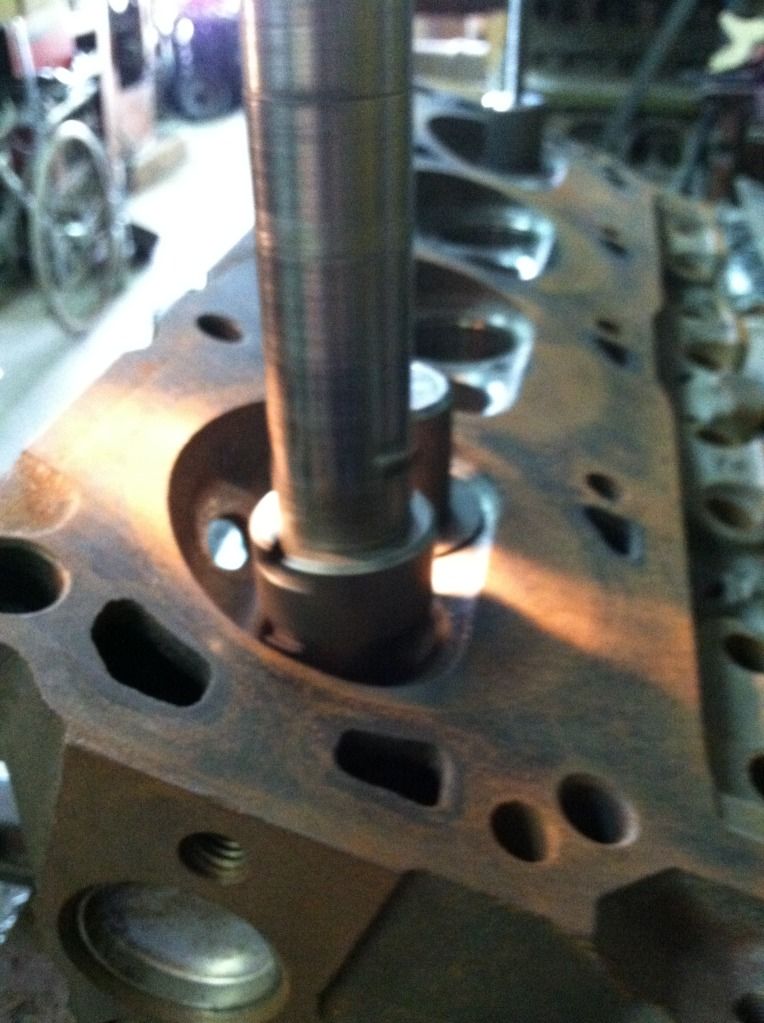
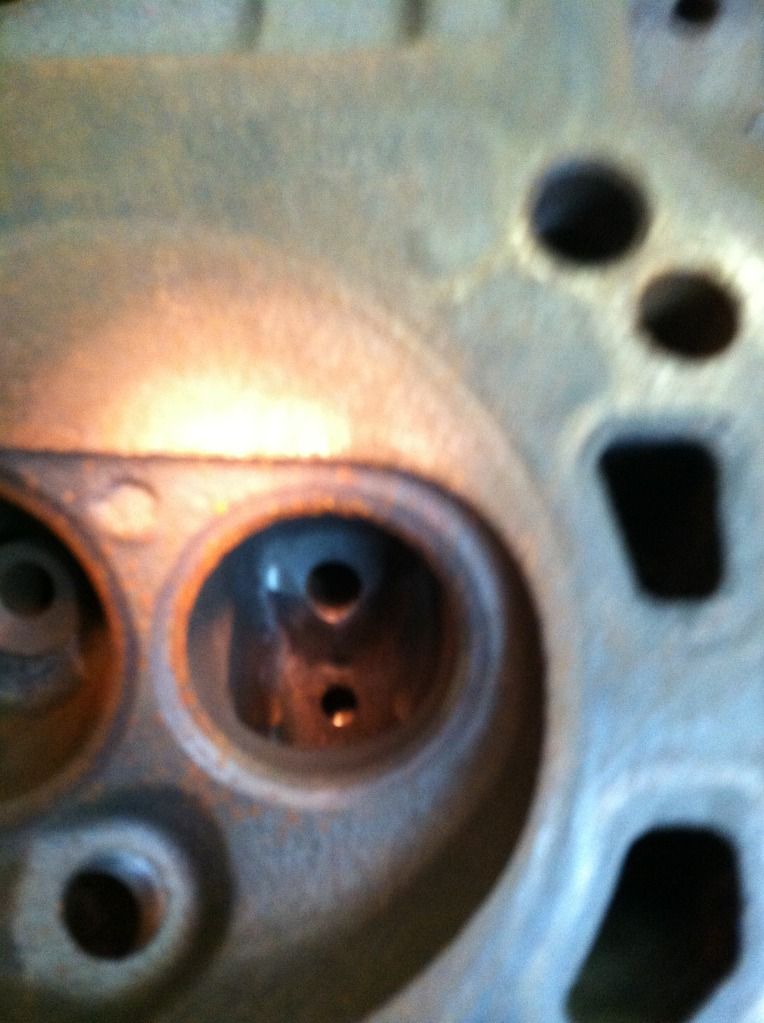
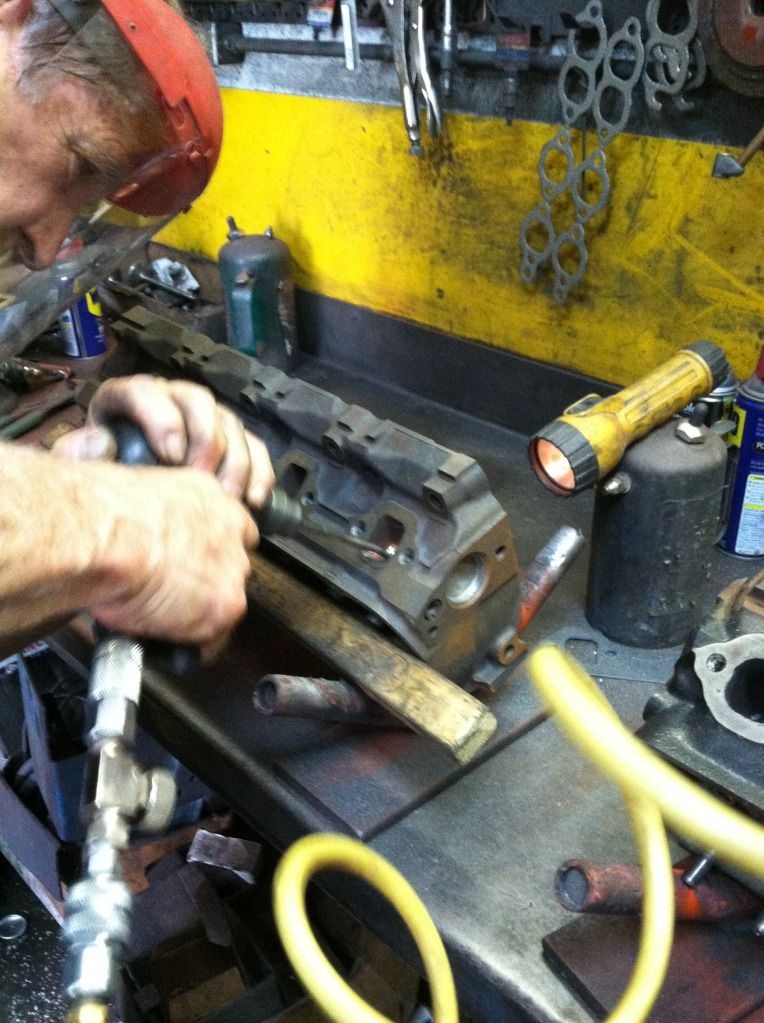
Not much to update as I have been busy with my son's baseball and work but I did manage to get down to my fathers shop over the weekend and get some work done on the engine. Got the heads ported and started with the tootsie roll polish.
I forgot how much work is involved in the heads. I figured out a way to fill in the holes in the exhaust ports from the air pump. Went through the valve chamber and tapped it out and installed a 5/16" plug then got to the porting. (just be careful and don't break off the tap)

A little info on the engine (some may not want to read as I know how this is not conventional and it has Chevy parts involved but I love my fathers creativity)
'94 302 roller
Stock heads ported and polished with screw in studs and guide plates
1.96 Chevy intake valves
1.60 Chevy exhaust valves
400 Chevy Rods w/ARP rod bolts
350 Chevy pistons
Crank offset ground 0.10 to accept the rods
350 Chevy springs with rotating retainers and hardened keepers
Single Plane high rise Pro Comp intake
650 dual line double pumper Holley jetted and modified w/larger bowls
Short tube headers
When finished it will end up being a 308 CI with about 450 HP and 475 FPT at 5000 rpm (according to the computer program). Haven't decided on which cam I'm going with yet so that will have a lot to do with the performance. I want to drive this thing for a while so I'm leaning towards a milder cam but I want that radical, nasty, scare small children and most animal sound and lope.

Before porting
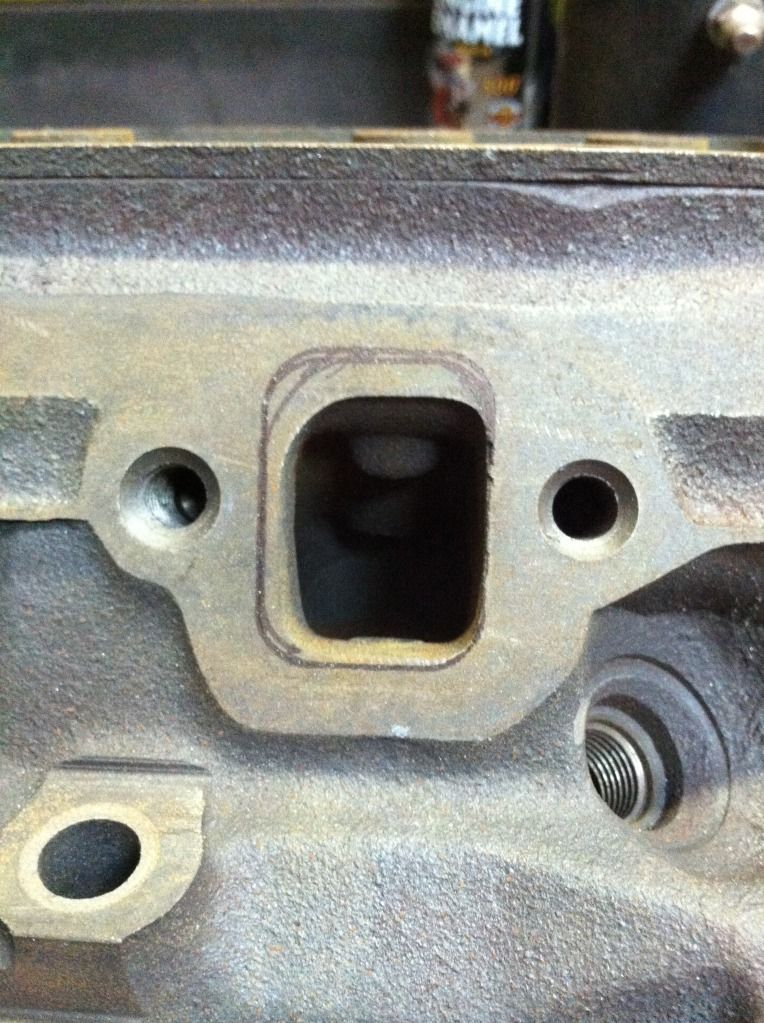
After porting
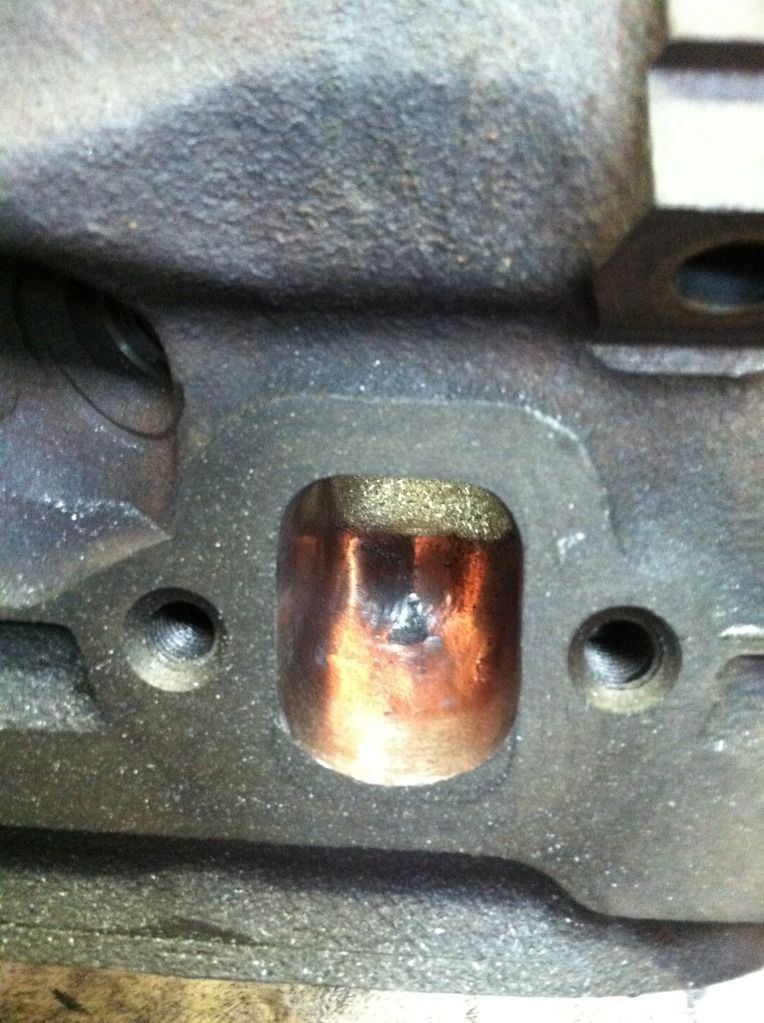
Cutting for the valves
Air pump hole
My Dad working hard
Re: 62 UNI Take II
Posted: June 29, 2012, 9:15 pm
by noley99
Well... I finally got back to it and man was it HOT!
No pics right now but I got the pass side cab mount and floor pan in. What a pain in the arse it was. A lot of modification of the mount I bought and a little on the floor pans. It should be ready to roll out of the garage after I get back from the Keys.
Re: 62 UNI Take II
Posted: August 2, 2012, 9:03 pm
by noley99
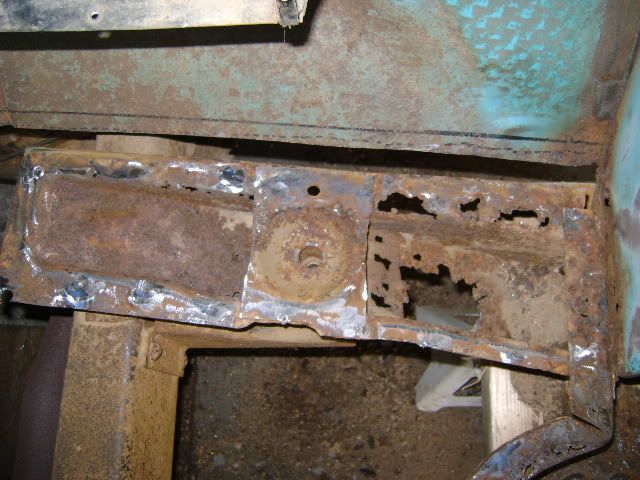
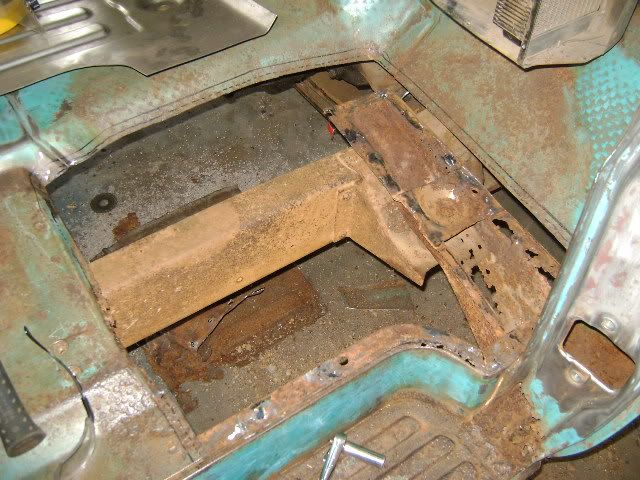
Finally got time to get some work done and the pics up. I know how everyone loves pics.
Not the prettiest welds but effective, still learning the new welder and should have gone with the 0.30 wire earlier.
Lower door jam
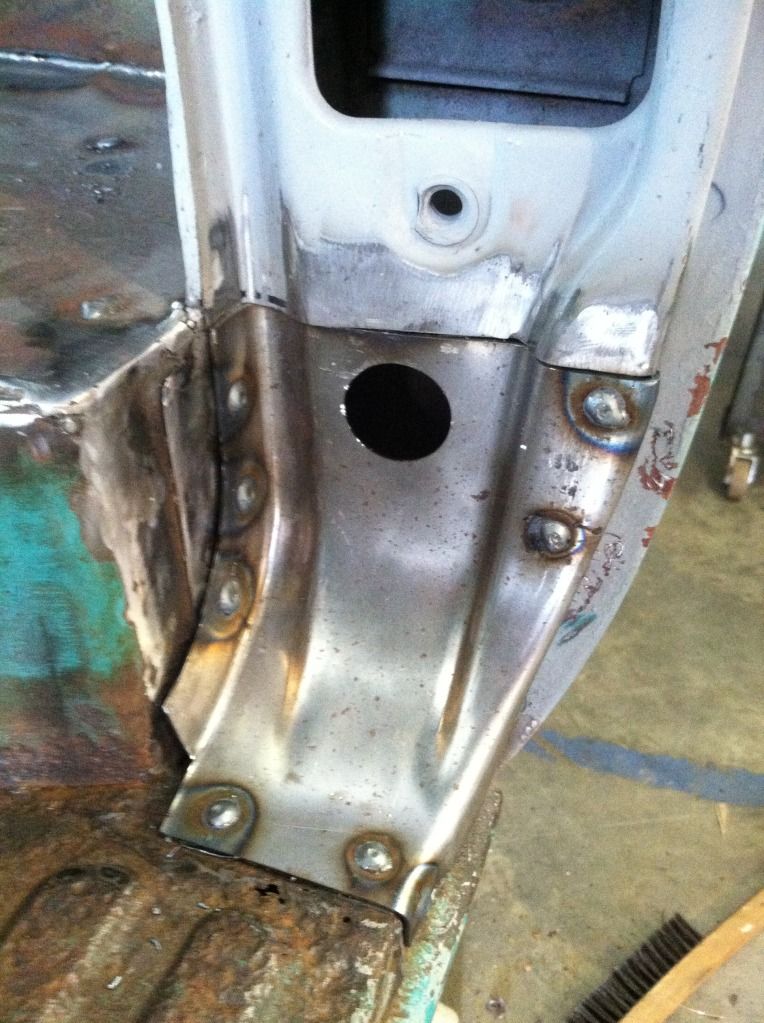
RS floor pan
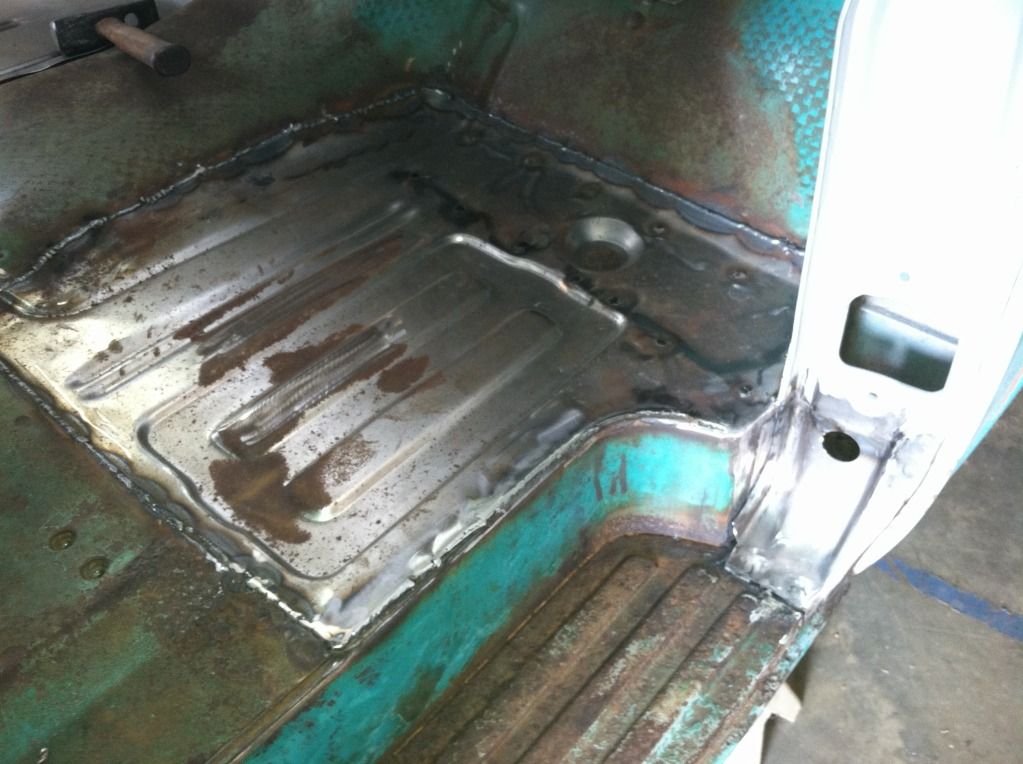
Should have the driver side done tomorrow.
Re: 62 UNI Take II
Posted: August 2, 2012, 9:17 pm
by Leeroy
Looks good, how did the cab mount come up?
I have a stupid question 'cause I havent ever touched cab mounts.... Did you drill the cab mount to floorpan welds out from above or could you get access to them underneath? I couldn't see any drill holes in the mount itself.
Re: 62 UNI Take II
Posted: August 2, 2012, 11:29 pm
by foodstick
I still can't believe you can buy floors, and door jamb parts now.. would have been nice way back when

Re: 62 UNI Take II
Posted: August 3, 2012, 9:16 am
by noley99
Leeroy wrote:Looks good, how did the cab mount come up?
I have a stupid question 'cause I havent ever touched cab mounts.... Did you drill the cab mount to floorpan welds out from above or could you get access to them underneath? I couldn't see any drill holes in the mount itself.
The cab mounts took some work to get fitted as they are not re-popped but hand made from a template. Overall I am happy with the results. This is not going to be a show truck so not too concerned how correct everything looks.
I drilled the welds out from the top the best I could as the rust was pretty bad and couldn't identify where they all were. Ended up cutting and chiseling a lot. I also had to repair where the mount attached to the cab as it was rusted pretty bad. I will try to get pics of that when I get the other side done. That will be in a few weeks as I am starting another 9 day stretch at work

Re: 62 UNI Take II
Posted: August 3, 2012, 7:03 pm
by kstones63
Noley, Check into the .023 or .025 wire. I found that it was even easier to weld with on the thin metal. It seemed to me that I was getting the metal to hot and the .030 wire wouldn't melt fast enough and then it would push through the metal.
Just a suggestion, it helped me.
Kevin
Re: 62 UNI Take II
Posted: August 3, 2012, 8:02 pm
by noley99
kstones63 wrote:Noley, Check into the .023 or .025 wire. I found that it was even easier to weld with on the thin metal. It seemed to me that I was getting the metal to hot and the .030 wire wouldn't melt fast enough and then it would push through the metal.
Just a suggestion, it helped me.
Kevin
I had 0.25 before but had trouble penetrating without going very slow. The 0.30 seemed to do better once I adjusted the wire speed and the amperage. Besides, I bought the 22lb spool

Thanks for the suggestion.
Re: 62 UNI Take II
Posted: August 3, 2012, 8:54 pm
by noley99
Ordered my tank tonight, think it was a pretty good deal with everything included.
http://www.ebay.com/itm/230813713288?ss ... 1439.l2648