
Well with the help of Uncle Skip, I am back on track to the 64 short bed flareside. Guess it only lets me load 3 pictures per posting. Anyay we test fitted the doors the last weekend and I post pictures of that Tuesday. They came out great since we had to put a new cab roof on.
Skip really has encouraged me to keep working on this since this is my 1st build so hats off to him. And since I am painting the truck Bright Ford yellow, Tweety Bird seemed as good of name as any.
64 Tweety Bird
64 Tweety Bird
- Attachments
-
- New rear wheel and tire. Wheel painted Bright Ford Yellow which the complete truck will be painted.
- REAR_1.jpg (119.54 KiB) Viewed 5878 times
-
- Ashtray roughed in
- Dash_4.jpg (110.99 KiB) Viewed 5878 times
-
- Ashtray convented
- Dash_1.jpg (118.77 KiB) Viewed 5878 times
Thanks in advance
DADwood
DADwood
-
Gritsngumbo
- Posts: 5441
- Joined: August 4, 2007, 4:15 pm
- Location: Monroe, Louisiana

Re: 64 Tweety Bird
Suggest you just post a "quick reply" (reply to your own post) and add more pictures. Better than making a new post for each set of pictures.
If you understand what you’re doing, you’re not learning anything.
LITTLE RED: 64 F100 Short Style
BIG RED: 62 F100 Long Uni
BIG “UN": 63 F250 Long Flare
BBW RED: 61 F100 CC BBW Long Uni
CRIMSON CREW: 63 F100 "Stageway" Long Flare Crew Cab
"RANGER": 66 F100 CC Long Flatbed
"AVA" 1963 Avion T-20 Travel Trailer
“Lucille” 1955 New Moon 44’ Travel Trailer
LITTLE RED: 64 F100 Short Style
BIG RED: 62 F100 Long Uni
BIG “UN": 63 F250 Long Flare
BBW RED: 61 F100 CC BBW Long Uni
CRIMSON CREW: 63 F100 "Stageway" Long Flare Crew Cab
"RANGER": 66 F100 CC Long Flatbed
"AVA" 1963 Avion T-20 Travel Trailer
“Lucille” 1955 New Moon 44’ Travel Trailer
Re: 64 Tweety Bird
or host your photos on photobucket and add the links with the "img" button on the create a post screen
1962 Ford Unibody SWB
1953 Ford F100
1967 Ford Mustang
1953 Ford F100
1967 Ford Mustang
Re: 64 Tweety Bird
I'll set up a gallery here if that is the thing to do. Sorry for the rookie mistake.
Thanks in advance
DADwood
DADwood
-
SixtySix Ford

- Posts: 58
- Joined: September 7, 2010, 11:37 pm
- Location: Denver Co.
Re: 64 Tweety Bird
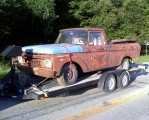
Id like to see some over all pics of the whole truck! 
"Nitrous is like hot girl with STD's. You know you wanna hit it, but your afraid of the consequences."
66 Ford F-100 - Project SickUp
66 Ford F-100 - Project SickUp
-
Uncle Skip

- Posts: 4695
- Joined: July 15, 2006, 8:30 pm
- Location: Pearland, Texas
Re: 64 Tweety Bird
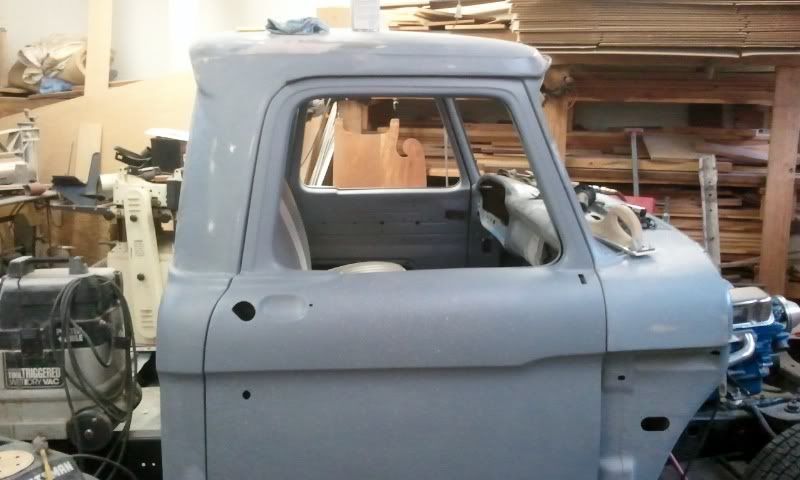
Hear are some shots leading up to where we are now. Anyone say shaved dash? Be sure to take a look at the pictures he's going to be posting later and compare the workmanship from where he started to where he is now on the body work.


Last edited by Uncle Skip on July 1, 2013, 2:41 pm, edited 1 time in total.
I'm not arguing with you. I'm just explaining why I'm right.
Pardon me. Does your deaug bite?
Pardon me. Does your deaug bite?
-
Uncle Skip
- Posts: 4695
- Joined: July 15, 2006, 8:30 pm
- Location: Pearland, Texas
Re: 64 Tweety Bird
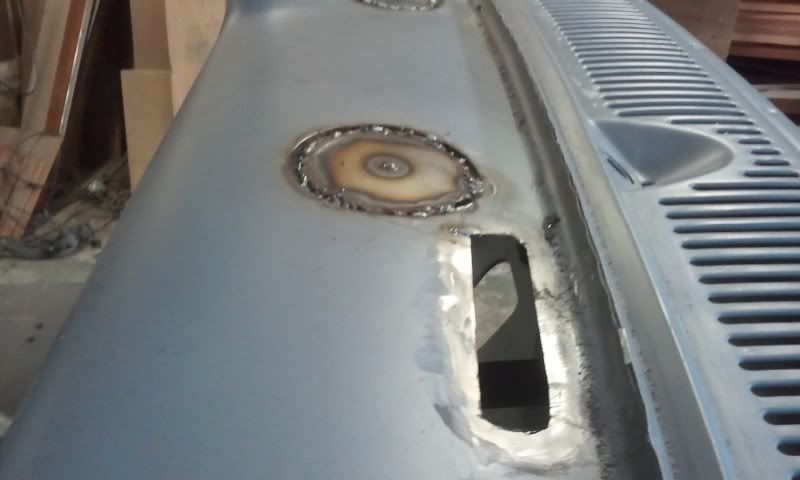
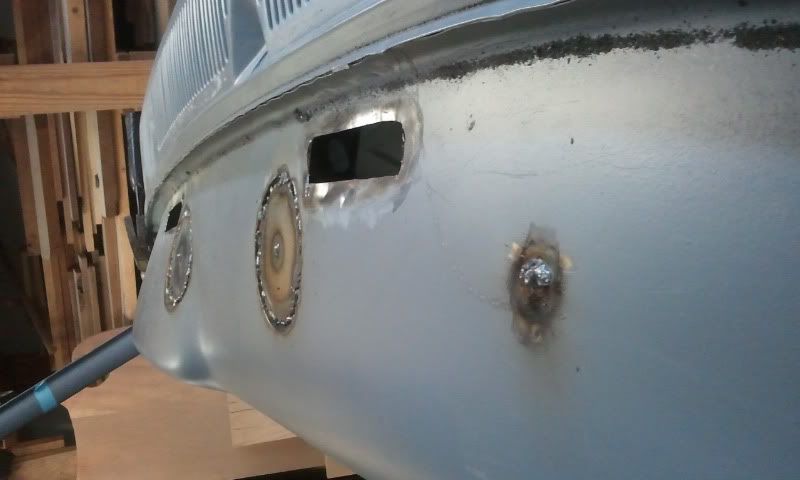
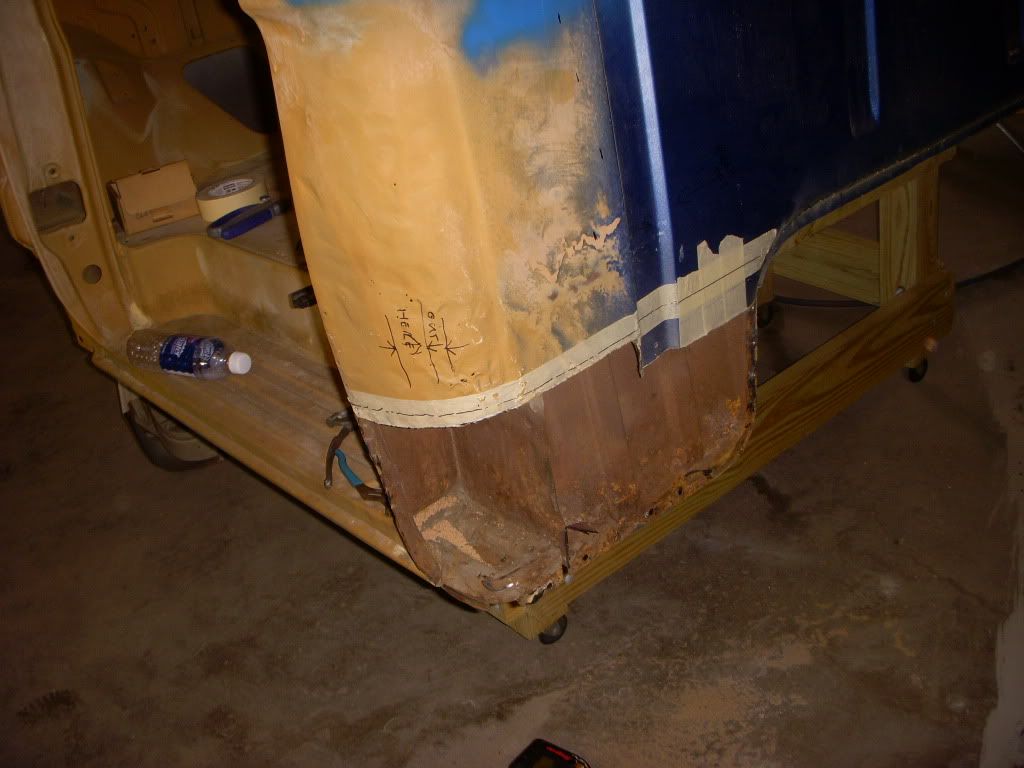
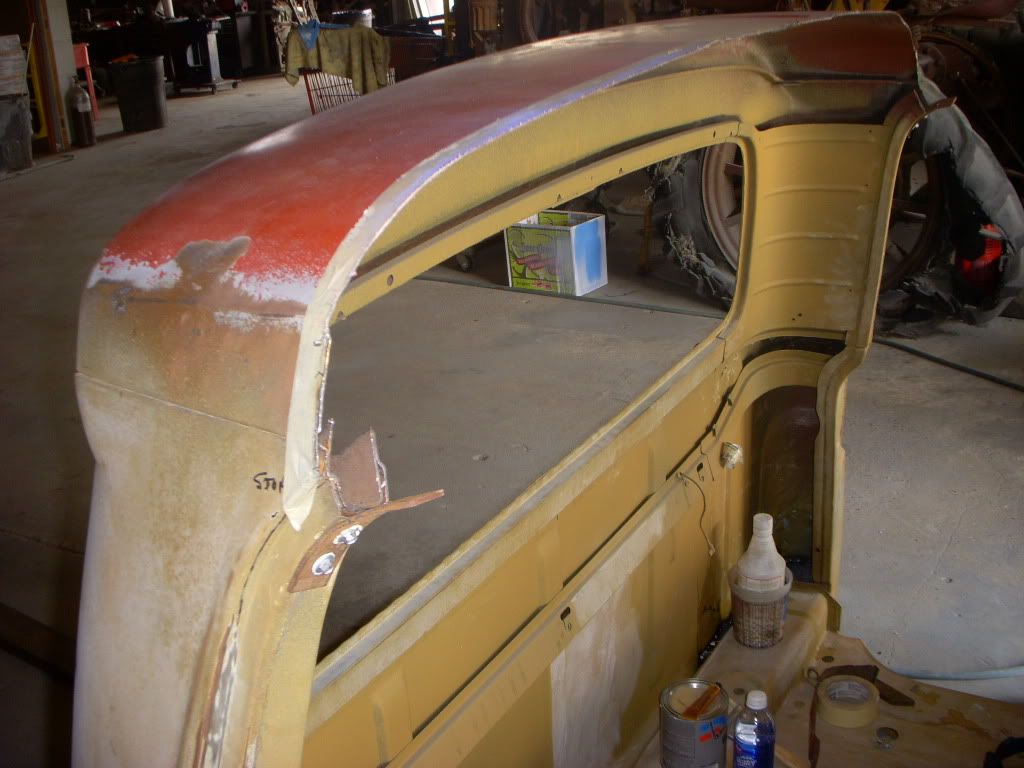
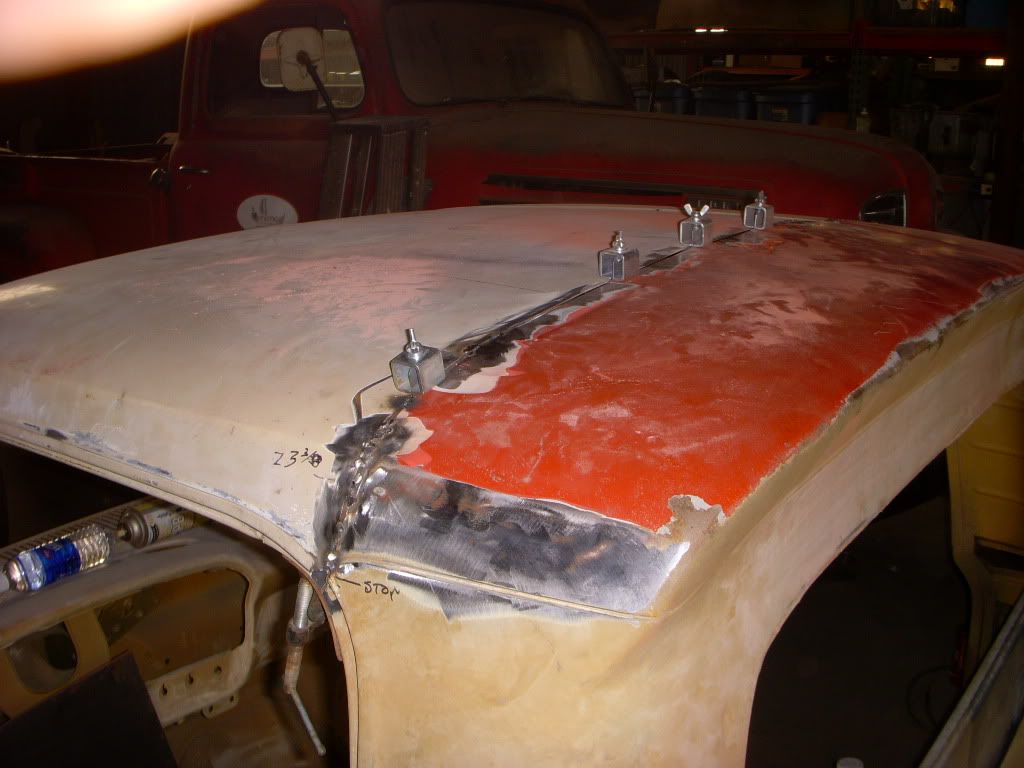
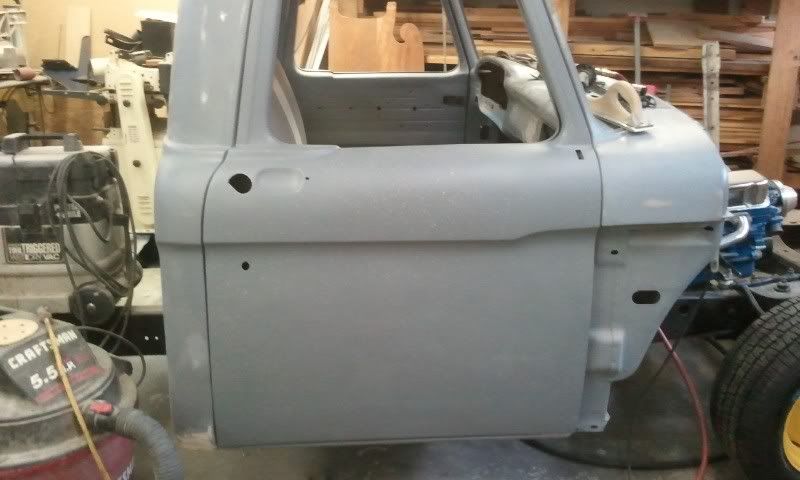
Our top swap came out way better than expected. Check the pictures before and after. The door fitment is better than new. I ain't touching them anymore.
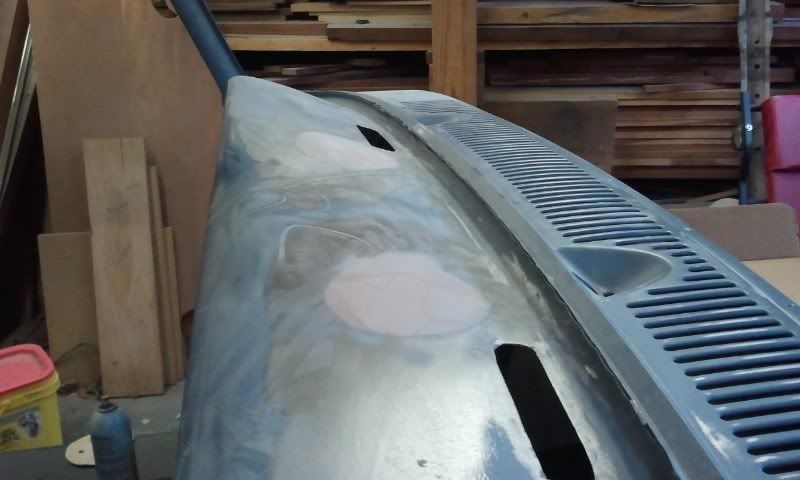
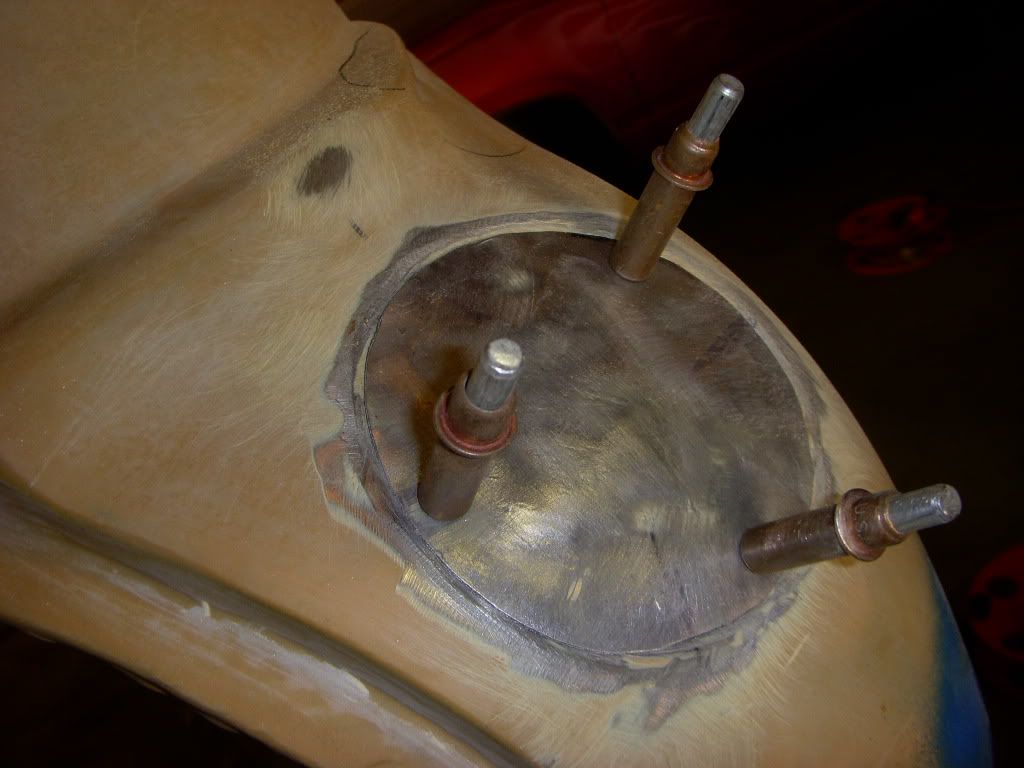
Almost forgot the fuel door block off. I cut the metal insert and formed the contour with a plastic mallet and shot bag and then welded it in place. Next time, I'll use the new panel adhesive instead of welding.
TIME (and progress)..... marches on.


Almost forgot the fuel door block off. I cut the metal insert and formed the contour with a plastic mallet and shot bag and then welded it in place. Next time, I'll use the new panel adhesive instead of welding.

TIME (and progress)..... marches on.
Last edited by Uncle Skip on July 1, 2013, 2:44 pm, edited 1 time in total.
I'm not arguing with you. I'm just explaining why I'm right.
Pardon me. Does your deaug bite?
Pardon me. Does your deaug bite?
-
Gritsngumbo
- Posts: 5441
- Joined: August 4, 2007, 4:15 pm
- Location: Monroe, Louisiana
Re: 64 Tweety Bird
"Panel adhesive"? Tell me more.
If you understand what you’re doing, you’re not learning anything.
LITTLE RED: 64 F100 Short Style
BIG RED: 62 F100 Long Uni
BIG “UN": 63 F250 Long Flare
BBW RED: 61 F100 CC BBW Long Uni
CRIMSON CREW: 63 F100 "Stageway" Long Flare Crew Cab
"RANGER": 66 F100 CC Long Flatbed
"AVA" 1963 Avion T-20 Travel Trailer
“Lucille” 1955 New Moon 44’ Travel Trailer
LITTLE RED: 64 F100 Short Style
BIG RED: 62 F100 Long Uni
BIG “UN": 63 F250 Long Flare
BBW RED: 61 F100 CC BBW Long Uni
CRIMSON CREW: 63 F100 "Stageway" Long Flare Crew Cab
"RANGER": 66 F100 CC Long Flatbed
"AVA" 1963 Avion T-20 Travel Trailer
“Lucille” 1955 New Moon 44’ Travel Trailer
-
Hunter's 64
- Posts: 932
- Joined: January 10, 2011, 4:58 pm
- Location: High Springs Florida
Re: 64 Tweety Bird
I don't own a welding setup, so this is what I used to patch in some small areas in my floor. I'm sold on the stuff. 3M makes good money on it and the required other stuff that goes with though. BUT I bought a set of tubes that at least don't require the applicator gun. You just mix it up like epoxy glue. I think what I used was called "3M structural Adhesive"
-
Hunter's 64
- Posts: 932
- Joined: January 10, 2011, 4:58 pm
- Location: High Springs Florida
-
Uncle Skip
- Posts: 4695
- Joined: July 15, 2006, 8:30 pm
- Location: Pearland, Texas
Re: 64 Tweety Bird
Truthfully, I'd be confident using J-B Weld myself if I ever do it again. Just make sure the surfaces are clean and dry. Use enough so the excess squeezes out and fills the gap. Then, just clean up the excess and skim with BONDO and some glaze.
I love the smell of Bondo in the morning.
I love the smell of Bondo in the morning.
I'm not arguing with you. I'm just explaining why I'm right.
Pardon me. Does your deaug bite?
Pardon me. Does your deaug bite?
-
Uncle Skip
- Posts: 4695
- Joined: July 15, 2006, 8:30 pm
- Location: Pearland, Texas
Re: 64 Tweety Bird
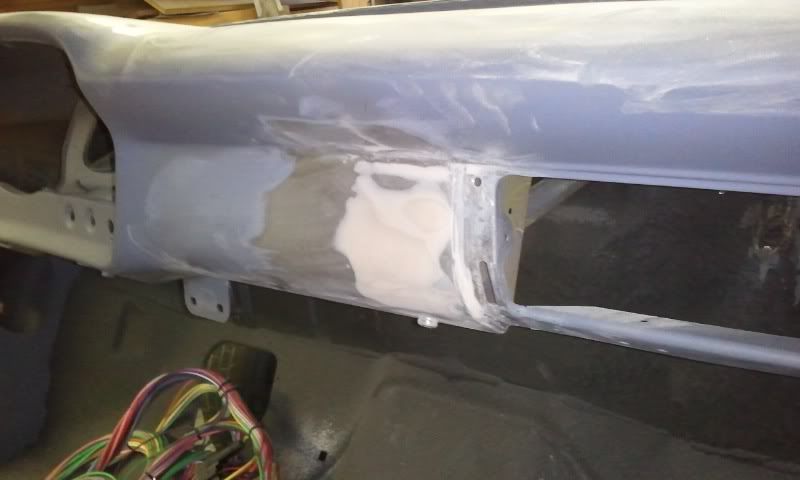
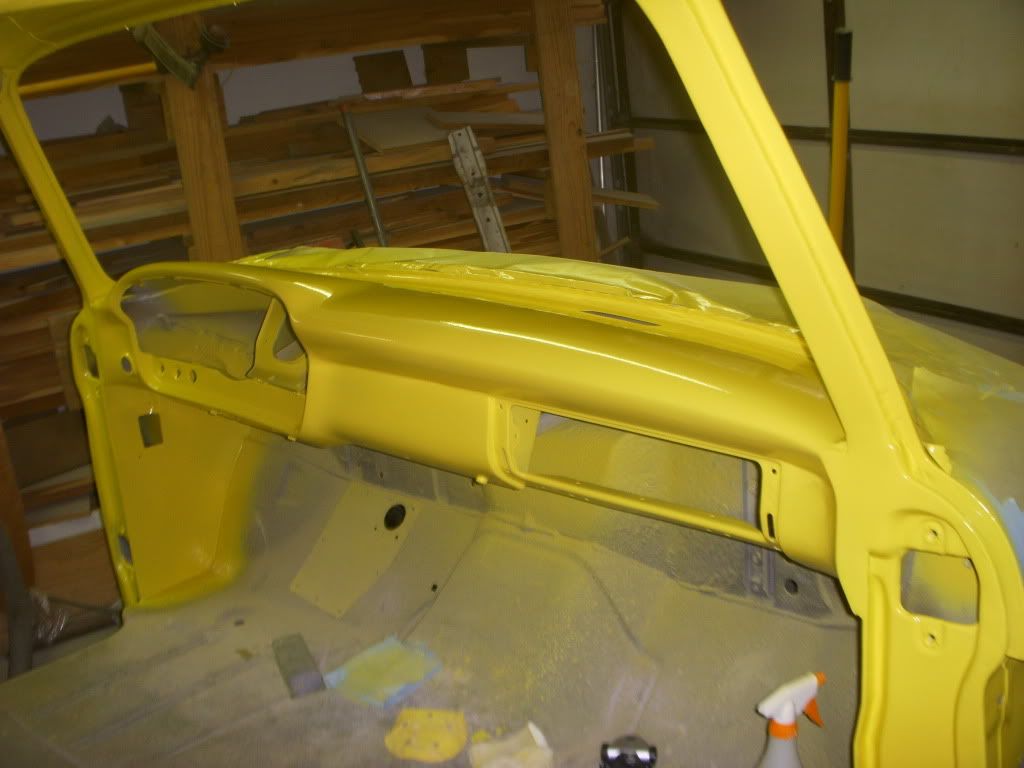
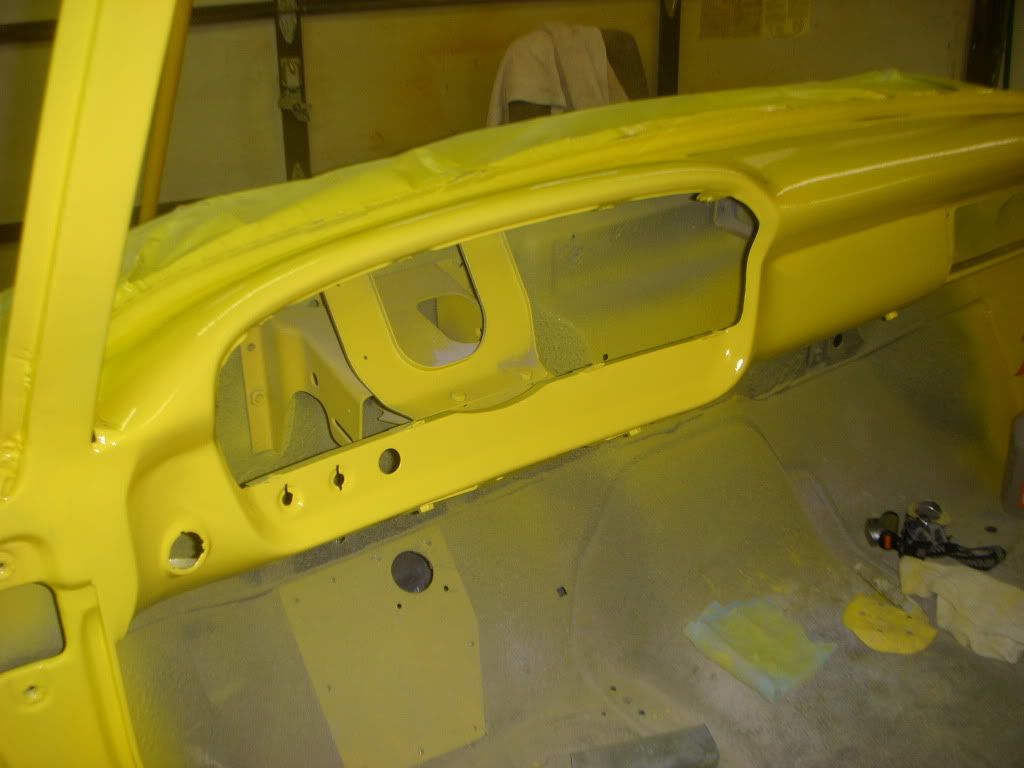
Progress in July. Its grunt time right now getting the body smooth and ready for primer and paint.
Almost time to pre-fit and pre-wire everything, take it all apart again, and then hopefully, shoot some color.
The dash and firewall are pretty much done as you can see.

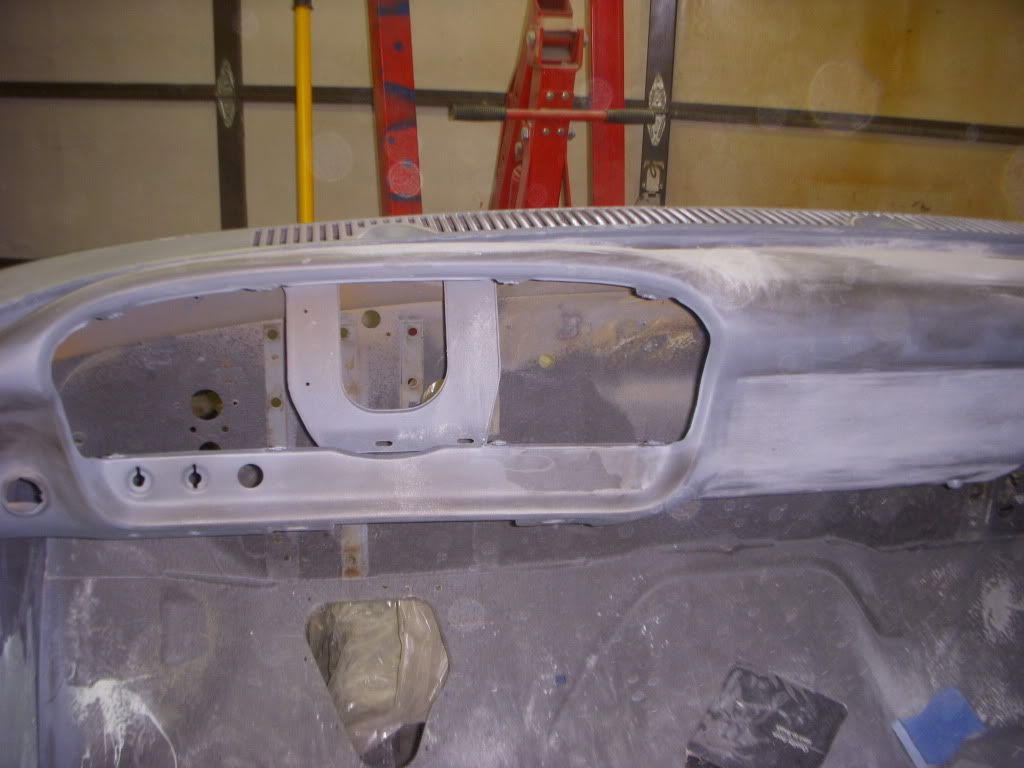
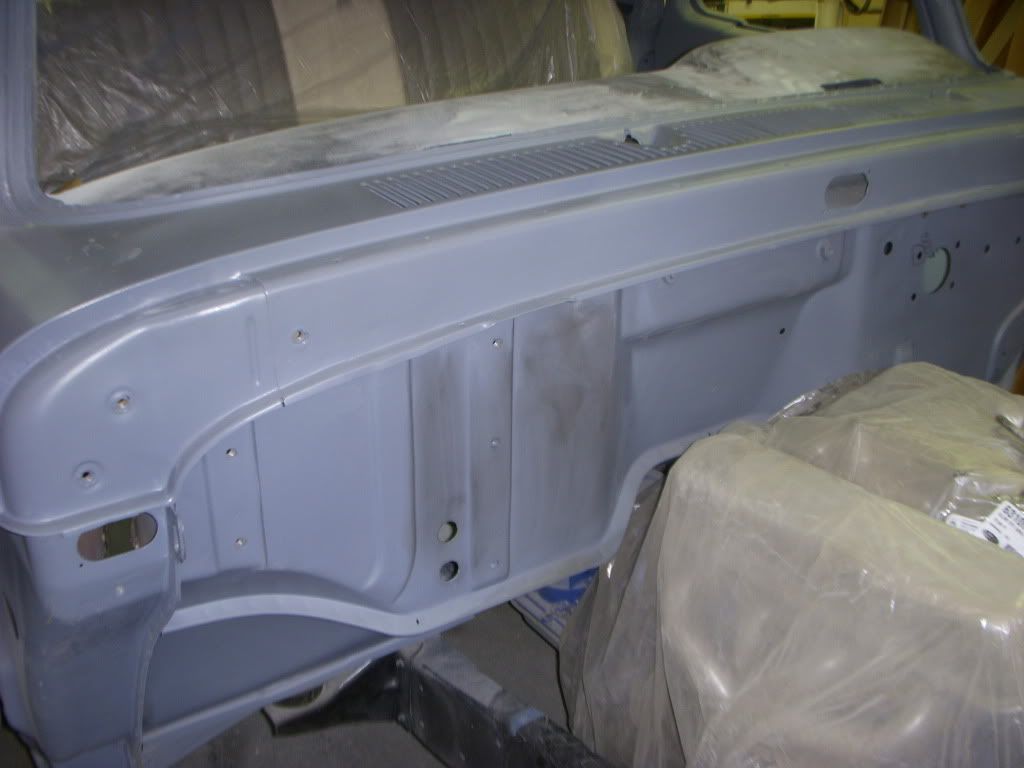
TIME..... marches on.
Almost time to pre-fit and pre-wire everything, take it all apart again, and then hopefully, shoot some color.
The dash and firewall are pretty much done as you can see.


TIME..... marches on.
Last edited by Uncle Skip on July 1, 2013, 2:48 pm, edited 1 time in total.
I'm not arguing with you. I'm just explaining why I'm right.
Pardon me. Does your deaug bite?
Pardon me. Does your deaug bite?
-
jkimbrel65

- Posts: 965
- Joined: July 11, 2006, 8:53 pm
- Location: Athens Al
Re: 64 Tweety Bird
That looks sweet!!!!!!!! Gonna look great with color.
Mike
Mike
I tried being normal once...
was the worst 10 minutes of my life
was the worst 10 minutes of my life
-
1965fordf100

- Posts: 483
- Joined: February 25, 2008, 3:32 pm
- Location: Reno, NV
Re: 64 Tweety Bird
Looking good.
Can't wait to see it when it's done.
J
Can't wait to see it when it's done.
J
1964 F100, 292ci
1963 Buick Wildcat, 401ci
They just don't make them like they used to.
1963 Buick Wildcat, 401ci
They just don't make them like they used to.
-
Uncle Skip
- Posts: 4695
- Joined: July 15, 2006, 8:30 pm
- Location: Pearland, Texas
Re: 64 Tweety Bird
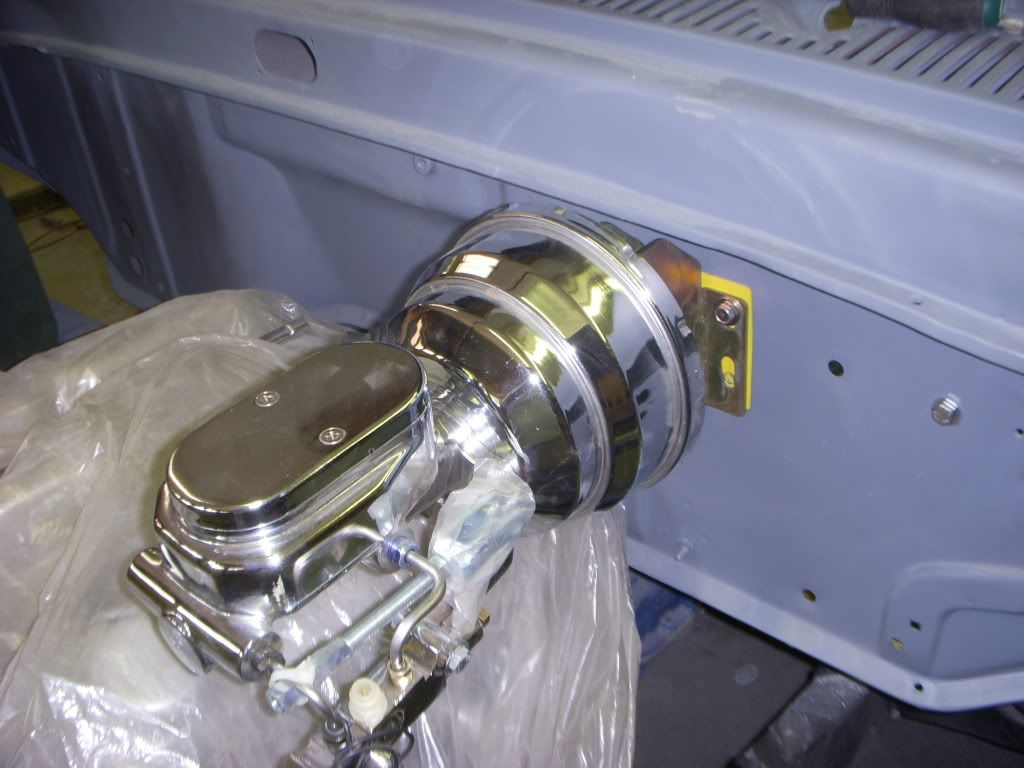
Might not look like much because we took everything back out before closing up shot but we got the floor plate installed and mocked up the steering column to the proper angle. We built an adapter and put in the new column drop.
Then we trial fitted the brake booster and proportioning valve to check clearances, and fabed up the spacer for the brake actuator rod (the yellow thing behind the booster on the firewall) closing the existing hole up to 1.75" so the new pedal seal will close up the opening.
The spacer will now be trimmed down to fit flush with the edges of the master cylinder mounting bracket. No peekee edges.
Not a bad day for two fat old men.
And as a plus, the body is now ready for the final coat of epoxy primer and a couple of coats of filler going on this week.
TIME..... marches on.
Then we trial fitted the brake booster and proportioning valve to check clearances, and fabed up the spacer for the brake actuator rod (the yellow thing behind the booster on the firewall) closing the existing hole up to 1.75" so the new pedal seal will close up the opening.
The spacer will now be trimmed down to fit flush with the edges of the master cylinder mounting bracket. No peekee edges.
Not a bad day for two fat old men.
And as a plus, the body is now ready for the final coat of epoxy primer and a couple of coats of filler going on this week.

TIME..... marches on.
Last edited by Uncle Skip on July 1, 2013, 2:51 pm, edited 1 time in total.
I'm not arguing with you. I'm just explaining why I'm right.
Pardon me. Does your deaug bite?
Pardon me. Does your deaug bite?
Re: 64 Tweety Bird
Looking good.
Mockup work takes a lot of time to get right.
What's brand/model of the booster and MC?
Mockup work takes a lot of time to get right.
What's brand/model of the booster and MC?
-
Uncle Skip
- Posts: 4695
- Joined: July 15, 2006, 8:30 pm
- Location: Pearland, Texas
Re: 64 Tweety Bird
Daryl, time to step up and answer questions. Where did you get the master cylinder? BTW, the firewall brace is being re-located to the inside to keep the firewall clean.
I'm not arguing with you. I'm just explaining why I'm right.
Pardon me. Does your deaug bite?
Pardon me. Does your deaug bite?
-
Uncle Skip
- Posts: 4695
- Joined: July 15, 2006, 8:30 pm
- Location: Pearland, Texas
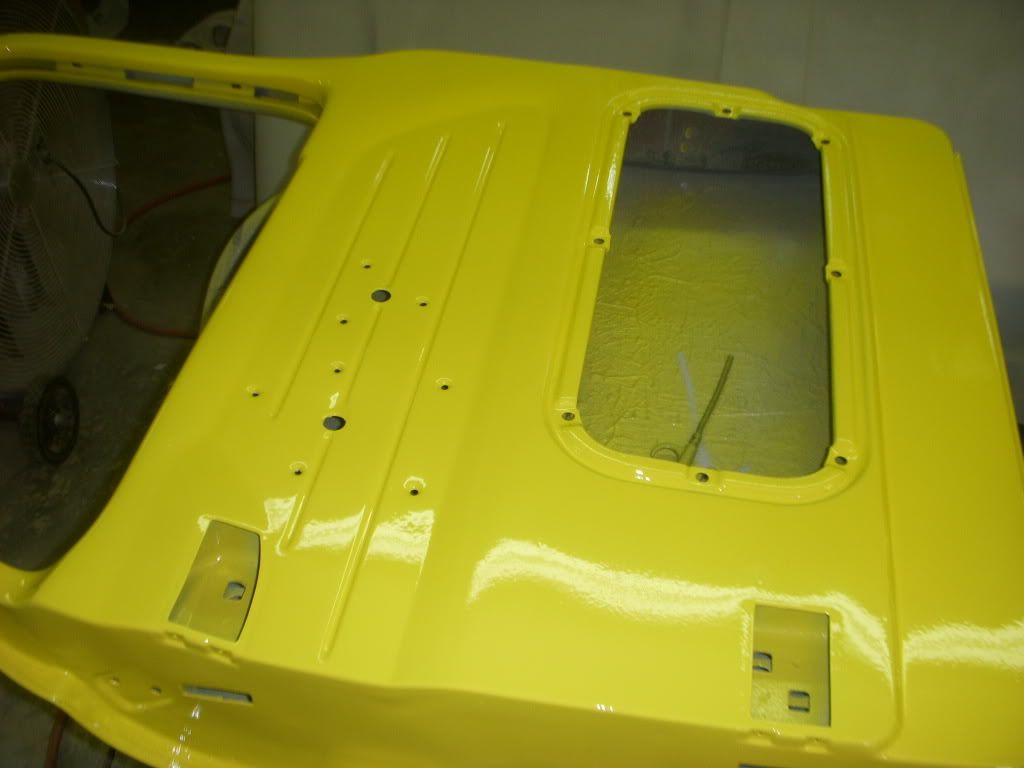
Re: 64 Tweety Bird
Went to see Daryl today and here's the latest. I know one thing for sure. Its damn sure going to be YELLOW. I think he needs to change the name to Screaming Yellow Zonkers. Just sayin'. Nice work D.


Last edited by Uncle Skip on July 1, 2013, 2:54 pm, edited 1 time in total.
I'm not arguing with you. I'm just explaining why I'm right.
Pardon me. Does your deaug bite?
Pardon me. Does your deaug bite?