'62 F100 SWB Step Side - yes another Crown Vic swap

A place just for our project & build threads.

Moderators: Kid, Casey 65

Blanger
Posts: 404
Joined: August 17, 2017, 7:55 am
Location: Indiana
United States of America

Re: '62 F100 SWB Step Side - yes another Crown Vic swap

Post by Blanger »

Not a lot of progress this weekend, again my wife is busy making a living in our shop.

Did have time to work on the exterior of the drivers door on the '62, it had a rotten spot in one corner that I cut out and welded a patch in, but didn't make much more progress.

Image

Image

--------

I had to work on the wife's '65, it has had a idling issue for a few weeks where it is "hunting" for it's base idle, at first I thought it was a vacuum leak because it would idle fine until getting to operating temperature but after getting up to temp the idle would go up and down a few hundred RPM when your foot was off the throttle.

We decided to replace the IAC (idle air control or idle speed control depending on what your working on..lol) it's a little electric stepper motor that bleeds air behind the throttle plates which will raise or lower the idle, it has passages in the throttle body that are prone to carbon up over time.

On the 5.7L it is a little difficult to get to the screws (torx) so I decided to pull the entire throttle body which would make it easy to replace. While taking it off we did see a vacuum elbow that was cracked and could have been the issue, in the end we replaced the IAC and the vacuum connections along with the throttle body to manifold gasket.

I also cleaned the throttle body bores and plates along with the air passages with carb cleaner, the motor has around 130k on it when we built the '65 and had a lot of built up carbon that needed to be removed.

Everything went back together fine, we'll see if it fixes the problem.

Image

--------

One of the issues with slicks has always been the defroster ducts, the originals at the dash were a pressed molded paper design that over the years deteriorates, on the '62 we had nothing left of these but we found these vacuum flanges for woodworking that will work great, the flange is just the right size to fit under the dash opening and use the grill screws to mount it all together. The hose diameter is 2.5" and the hose we found is very similar to the OEM Ford stuff except is clear instead of black, it does have metal that keeps the hose from collapsing.

The flanges were about $5 each and the hose was about a $1 a foot, should work great, I just need to fabricate a way to connect the hoses to the CV heater box which shouldn't be a real big deal.

Image
Image
Image
Image

--------

The '53 C600 has these cowl mounted turn signal lights that I really hope we can rehab them as they are really cool, I'd really like to find some NOS units or at least the lenses but so far I can't find any that are reproduced....so far.

Image
Image

--------

More later.

Jon
Blanger
Posts: 404
Joined: August 17, 2017, 7:55 am
Location: Indiana
United States of America

Re: '62 F100 SWB Step Side - yes another Crown Vic swap

Post by Blanger »

Progress again on the '62 build....but first.

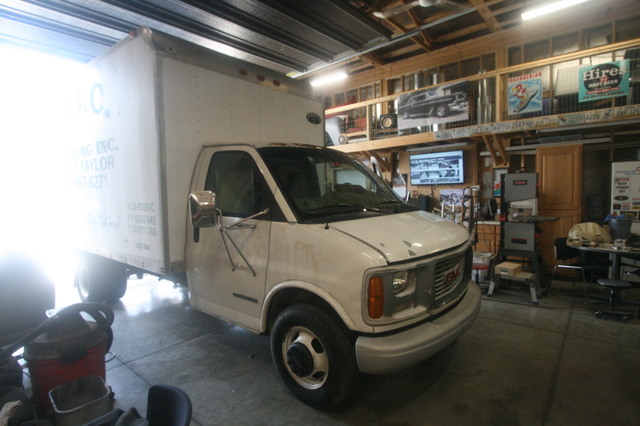
So spent the last two weekends working on the donor for the '53 C600, the 2k GMC 3500 has had issues running both before we bought it and after we bought it, the reason it has been parked for over 2 years has been a running issue which has been that it at times runs poorly. With only 124k on the clock unless it was something really odd it should have been a ignition or fuel problem, but it wasn't.

The Vortec 5.7L (basically just a 350 Chevy) still has a distributor, but does use a crank sensor for the EFI, the distributor not only distributes the spark to the correct cylinder but also acts as a cam sensor for the EFI. So when we got the truck it would start but had no power, checking the fuel pressure it was way low (20 psi when it should have been over 50 psi) so we replaced the fuel pump a few weeks ago which brought the fuel pressure up to the required 55psi.

This engine has what GM calls CSFI (spyder injection) which is notorious for problems with internal leakage, it's a pretty easy fix most of the time but a lot of work in a van, luckily it held fuel pressure for hours after being shut off which eliminates it from the problem list for now.

Replacing the fuel pump got the fuel pressure up where it should be but didn't really solve it's lack of power issue, at this point it could be a lot of things, low compression was pretty high on my list but there was no smoke out the exhaust, and the engine ran like it was being limited in some way electronically.

Then it wouldn't start again, checking it there was no injector pulse and no spark......

This is really getting weird I thought, when I plugged into the OBD2 connector there was no communication with the ECM, so I thought it might be a wiring problem, sitting makes it a prime target for mice to infest and eat the wiring (seen it before), but after hours of looking and probing the wiring found no issues.

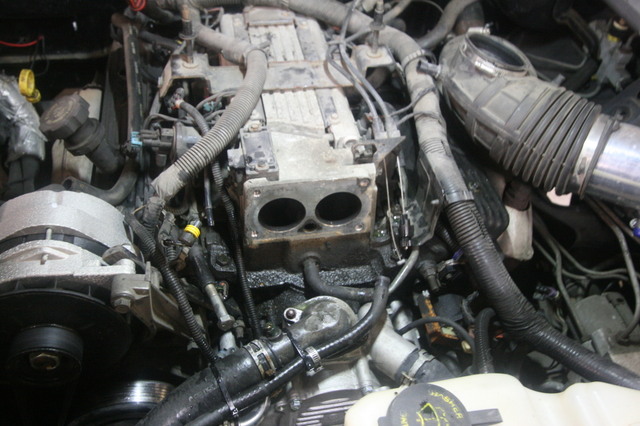
So what is next? ECM itself was my guess, the ECM on these vehicles is located in a piss poor location both for servicing and actually having any real type of longevity.... the reason? GM decided that locating it under the brake master cylinder / hydro boost unit so any leakage from these items drips directly on the ECM, someone thought it was a good idea that in later years got moved over to the inner fender where it was out of harms way unless involved in a collision with the left front fender.....lol (how much could it have cost for the extra wire to put it inside the cab?)

It's a real pain in the ass to remove, lots of hoses in the way and the electrical connectors going to the ECM are locking which is a good thing until you want to disconnect them....lol

I got it out last week and with it on the bench removed a cover for the EPROM and look at what I found...lol

Image
Image

So yeah it's junk, been soaked in brake fluid several times and that has found a way into the unit, the aluminum casting was epoxy coated on the exterior but not on the inside once the brake fluid found a way in it was just a matter of time before it was going to die.

These types of problems are some of the most difficult to find until the ECM dies, there are so many different things that can become issues that seem to manifest then just go away that it will drive you crazy trying to diagnose the problem. I know that the original owner tried to get it repaired and the people who tried to find the problem just didn't know where to look at that time, like I said a failing ECM can cause a lot of unrelated problems that when tracked down are not the issue at all (lots of wasted time), strange error codes or codes that seem to come and go for no good reason, I hate trying to diagnose those types of problems for a customer, there isn't a winner even if you do find the problem because of the number of hours you spend figuring it out....yeah it is fixed in the end but the labor charges in a lot of cases really start to add up.

Lucky for us it died in such a way that nothing but the ECM could be the problem in the end....so I order a new ECM which took about a week to arrive. I had in the back of my mind that if this wasn't it we were going to have to look for another donor or just put a LS engine in it, I hate to make mistakes, my gut told me the problem was going to be easy once it was figured out, I kept going back to the mileage on the clock at that low a mileage it has to be something simple to fix, maybe not find, but fix...yes. Of course if the ECM was changed at any point in its life the miles on the clock could be wrong, when I ordered the new ECM I could have told them 80k instead of the 124k and the new ECM would display 80k on the odometer as long as the title hadn't changed hands to discredit that. (title shows more miles than the odometer)....lol

The new ECM has to be programed (flashed) with the VIN, transmission code, mileage, then when it's installed it has to relearn the crankshaft sensor counts and the passlock (anti-thief) code. It started right up with the new ECM, and once the Passlock info was learned (takes 30 min to go through the sequence) would stay running at idle, then it is a short procedure to relearn the crank sensor.... runs like a top now!

Image

Sometimes in diagnosing stuff you have to be a detective and the more background info you have the better, we knew that this truck had been serviced and tuned up right before it got parked for several years, we were told it had running issues and the tune up was done to correct the issue which it did not...so it got parked.

When we bought it.... it ran, but poorly and lacked power, checking it out it had the low fuel pressure issue which we thought would solve its problems, but it did not. We now think that the ECM was the problem all along and the reason it got parked, the fuel pump was a casualty of it sitting for several years since it was not an original GM fuel pump and had already been replaced once in the vehicles life, at 124k that sounds about right for a fuel pump failure.

The whole thing with the truck was bothering me ever since we got the truck, I didn't want to get very far into that build not knowing if the engine/drivetrain was ok, and spent a lot of time thinking about what to do and what could be the cause.

So I felt it was better to devote the time to finding out it's issues and solving them before I went any further with either of the builds, now I can sleep better knowing what was wrong and that it is fixed, and we have a good donor for the C600!, BTW the ECM will be relocated in the build so it is better protected.... lol

--------

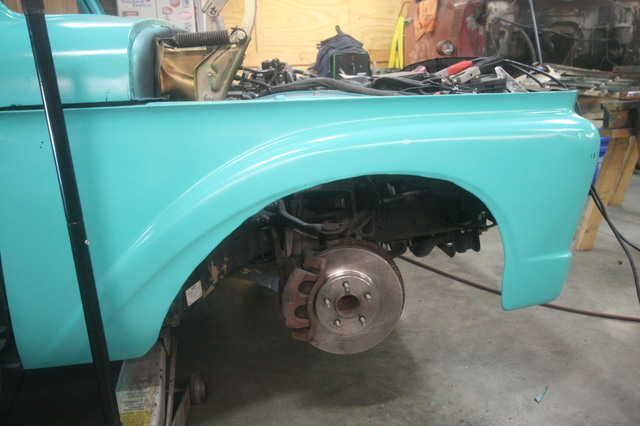
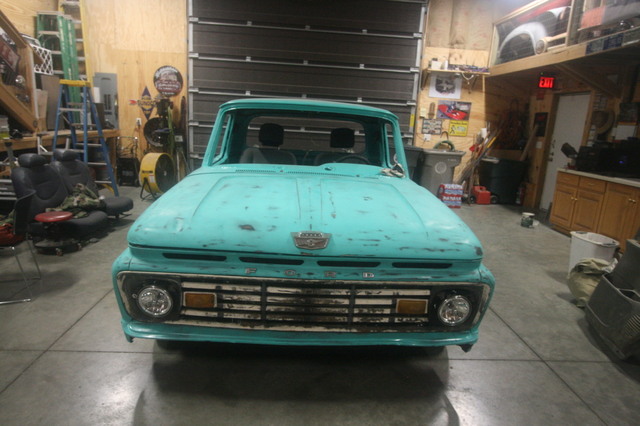
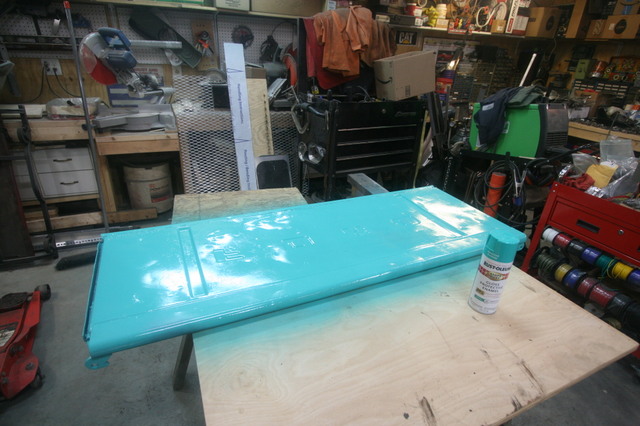
So with that out of the way and off my mind I can go back to the '62, yesterday I got the exterior of the drivers door stripped, spread a little filler on it, sanded, primed, and painted a nice minty green...lol

Image
Image

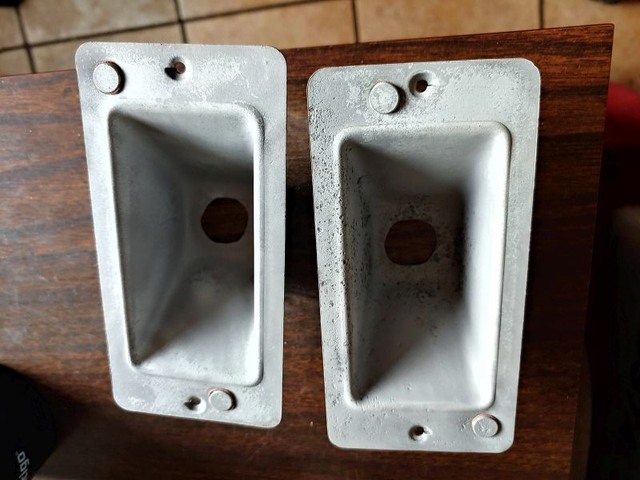
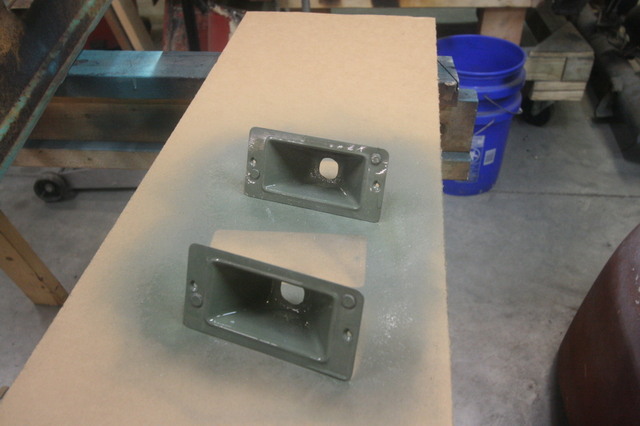
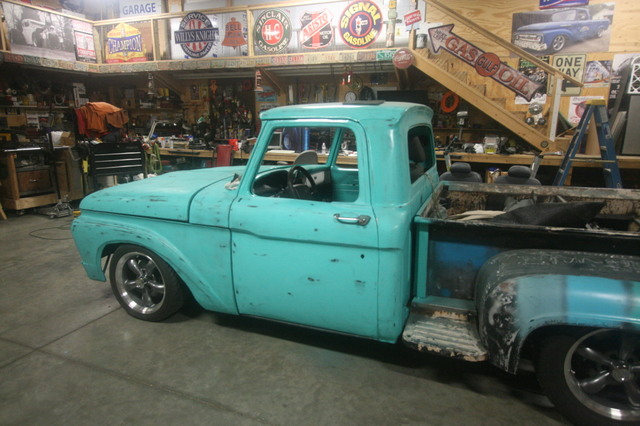
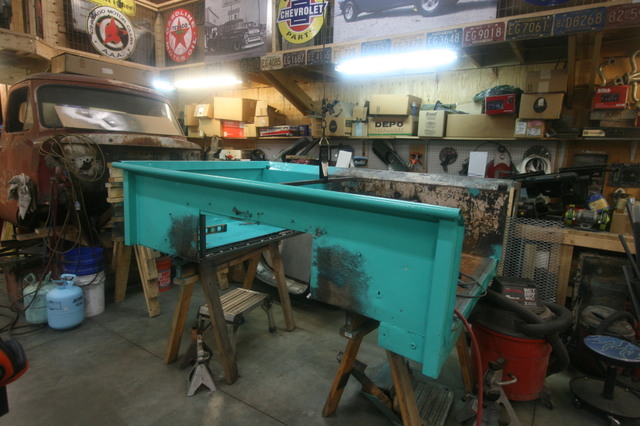
I hope to get that door hung next week then start on the passenger door, we plan to get the window gaskets soon and get the back glass and windshield installed shortly, then I need to prolly go back to the rear fenders on the bed and get them sorted out, the filler panels on the rear of the bed put back on, and it stripped of all the old paint, and the hood sorted out.... still lots to do! lol

Jon
Blanger
Posts: 404
Joined: August 17, 2017, 7:55 am
Location: Indiana
United States of America

Re: '62 F100 SWB Step Side - yes another Crown Vic swap

Post by Blanger »

Not a lot of progress in the last few weeks, the wife is still busy with work which is a good thing business-wise but isn't helping the '62 move ahead. lol

Did do a few things, first being separating the grill from the upper valance, I do this so I can wire the headlights and turn signals then just put the grill back into the opening, it's just easier for me to do it that way, the upper valance is already bolted to the front fenders and aligned so the grill just fits in it's opening as it should, makes it much easier to do the wiring this way.

The other thing is prolly going to surprise a few of the purest in the group and that is that I opened up the wheel openings (made them larger) for the front fenders. I did this after looking at the 1 ton front fenders that were on the truck my brother bought, the '09 CV has a wider stance and the wheels we bought didn't really help with tire rub as much as I thought they would. The 1 ton truck fenders (wish I could have just found a couple used fenders but that wasn't going to happen without buying another whole truck which we don't need) have a much larger wheel opening and after driving the '62 around in the parking lot the tires rub worse than either of the other two trucks, something was going to have to be done.

Image

If any of you followed Fred's build on YouTube you saw how he stretched his fenders by widening the area of the wheel opening shoving the lip out towards the curb that gave him enough area in the wheel house for the wheels to turn lock to lock and not rub on the lip of the fender, it was a good idea but more work than I wanted to do. After looking at the 1 ton fender wheel openings I thought making the opening bigger would be a better option for our build and the simplest way to solve our issue.

They turned out ok, not great but plenty good enough for what we wanted and are trying the do, the end result gave the tires plenty of clearance to turn without hitting the fender lip and don't look that bad, since we are building a rust-o-mod it really doesn't matter in the end. After cutting out the wheel opening I folded the edge in to reproduce the lip which will help from cutting the tire if I would have left a raw edge.

Image

-------

So next I'll get the wiring for the front lighting taken care off, I did pull the turn signal housings out of the grill so they could be modified with new sockets, sand blasted and painted, all the wiring for the lights will be "plug-in" we have bought "weather pack" connectors in 2 and 3 wire male-female plugs which will make installation and removal a easy thing to do. Then passenger door rehab and mounting, and back to the bed.

Image
Image

Jon
SteveCanup
Posts: 1096
Joined: November 7, 2014, 11:08 pm
Location: Wytheville, Virginia
United States of America

Re: '62 F100 SWB Step Side - yes another Crown Vic swap

Post by SteveCanup »

Wondering how that "trimmed" front fender will look with the tire back in place. Unique idea on how to get necessary clearance. There's another guy on here that cut the front fenders along the top and added some metal to make them wider...
Here's the link to his build thread....you might want to see what he did...viewtopic.php?f=32&t=35565
1964 F-100
Image
Blanger
Posts: 404
Joined: August 17, 2017, 7:55 am
Location: Indiana
United States of America

Re: '62 F100 SWB Step Side - yes another Crown Vic swap

Post by Blanger »

SteveCanup wrote:Wondering how that "trimmed" front fender will look with the tire back in place. Unique idea on how to get necessary clearance. There's another guy on here that cut the front fenders along the top and added some metal to make them wider...
Here's the link to his build thread....you might want to see what he did...viewtopic.php?f=32&t=35565
Thanks Steve I'll check it out....

(edit: so the link is correct, that is how Fred did his front fenders also....thanks!)

It looks fine to me with the wheel installed (I forgot to upload to hosting so I could post the picture), I'll post a picture the next time, I could have extended the fender to make it wider and did consider doing that but didn't really want to go to that much trouble, I think when the truck is finished not many people will even notice what I did.

-----

As a side note: It's coming up on two years driving the Uni everyday, I've had more people than I can count ask about the truck and tell me they see it on the street driving around, they ask questions but what has really surprised me the most is that very few people actually get or understand what we did, I've tried just saying it was a "body swap" or something similar. They always look puzzled and normally ask did you use the CV motor? or what motor did you use? all the while they are staring at a 4.6L, I guess it's a legitimate question, but it to me isn't a difficult concept to grasp just swapping the bodies of vehicles...still not many understand what the truck is or what we did. :D

BTW great job you did on your garage!

Jon
Blanger
Posts: 404
Joined: August 17, 2017, 7:55 am
Location: Indiana
United States of America

Re: '62 F100 SWB Step Side - yes another Crown Vic swap

Post by Blanger »

Short Time.....

Got a few things taken care of on the '62 build before another job for my wife showed up...lol

First for Steve.....

Here's a pic of the wheel in the cut out fender wheel opening.....

Image

Note: I will smooth out the lip of the wheel opening when I get to it.

Then I got the front turn signal / marker light housings rehabbed and new sockets installed.

Image
Image
Image
Image

I got all the front end wiring completed, headlights, halos, turn signals, and running lights, everything is "plug in" with weather pack connectors.

Image

I also mounted the lower valance separating it from the grill, making the grill a single unit to install with just a few bolts. This will make anything in that area I have to do in the future much easier because I can remove the grill easily by just removing a couple bolts and unplugging the wiring.

More to come, I forgot to picture the drivers door which is hung and just needs to be put back together, as soon as I can make some dust in the shop I'll get the passenger door taken care of also.

Jon
SteveCanup
Posts: 1096
Joined: November 7, 2014, 11:08 pm
Location: Wytheville, Virginia
United States of America

Re: '62 F100 SWB Step Side - yes another Crown Vic swap

Post by SteveCanup »

Jon...the wheel looks great in the wheel opening. Great job on the front end wiring...gives me ideas about mine.
1964 F-100
Image
Blanger
Posts: 404
Joined: August 17, 2017, 7:55 am
Location: Indiana
United States of America

Re: '62 F100 SWB Step Side - yes another Crown Vic swap

Post by Blanger »

Update:

So it's been awhile since I posted anything about the '62 build, there has been progress in spurts because of my wife's business booming...lol

I think where I left off I had just finished the front end wiring for the lighting, that part is complete, we then wanted to get the doors and hood stripped, primed and painted then hung on the truck... which also is completed.

Image
Image
Image
Image

We are now ready to install the windshield and rear glass, gaskets are ordered and as soon as they arrive we'll get them installed..

Then it's on to the bed, I need to finish stripping one side, prime and paint it, then get the bed mounted to the chassis for the last time. We still need to wire the rear lighting (have new lights) and back up camera, then straighten out the rear fenders where we widened them with a little fiberglass and filler.

We spent a little time last week scuffing the paint to remove the shine and start a little aging / weathering, it really needs to sit out in the sun / weather for a month or so which is coming as soon as we get the doors rebuilt and the glass installed in them.

Image
Image
Image

------

I've also in some of my spare time replaced the brake pads & rotors on the Uni, they were getting thin and since we didn't touch them during the build of that truck they were due after two years of daily driving.

Also have done some work on the next build ('53 C600) which was stripping the firewall of all the old stuff from the original truck, and ordered the parts to replace the front brakes on the '2k G3500 donor chassis, both projects are making headway just not at a constant pace..lol

More to come.

Jon
SteveCanup
Posts: 1096
Joined: November 7, 2014, 11:08 pm
Location: Wytheville, Virginia
United States of America

Re: '62 F100 SWB Step Side - yes another Crown Vic swap

Post by SteveCanup »

It's coming together nicely! I like the patina'd paint...it looks great!
1964 F-100
Image
Blanger
Posts: 404
Joined: August 17, 2017, 7:55 am
Location: Indiana
United States of America

Re: '62 F100 SWB Step Side - yes another Crown Vic swap

Post by Blanger »

SteveCanup wrote:It's coming together nicely! I like the patina'd paint...it looks great!
Thanks Steve, some might question the wisdom of going to all the trouble of painting something, then sanding it off on purpose...lol

Jon
Blanger
Posts: 404
Joined: August 17, 2017, 7:55 am
Location: Indiana
United States of America

Re: '62 F100 SWB Step Side - yes another Crown Vic swap

Post by Blanger »

Just a brief note... (no pics but will post pictures next time)

So....we have the windshield and back glass reinstalled, new tinted windshield, have the window regulators converted with the Saturn power window motors, wing windows rebuilt with new rubber gaskets.

On one of the wing windows I had a post broken off at the bottom, all the research I did said you could remove the glass but the chances of the glass breaking was very high, so I decided to try to just weld a new stud to the frame which I was able to do with little to no problem at all. I used a carriage bolt that I ground the head down shaping it to fit into the hole in the frame, covered the glass so sparks and splatter wouldn't hurt it and welded the stud in place....worked like a charm.

So currently we are putting the doors back together with all the new rubber/felt parts, I have the power window switches to wire up and install in the doors, after that is done the truck/cab will be weather tight so it can spend time outside getting the paint aged. :o

Hope everyone has a safe and happy 4th of July!

Jon
SteveCanup
Posts: 1096
Joined: November 7, 2014, 11:08 pm
Location: Wytheville, Virginia
United States of America

Re: '62 F100 SWB Step Side - yes another Crown Vic swap

Post by SteveCanup »

Anxiously awaiting the pics! I did the same with my wing window...but I managed to get the glass out without any problems. Most do not realize how easy it is to fix those with a new bolt....
1964 F-100
Image
Blanger
Posts: 404
Joined: August 17, 2017, 7:55 am
Location: Indiana
United States of America

Re: '62 F100 SWB Step Side - yes another Crown Vic swap

Post by Blanger »

Sorry it's been awhile since any updates on the '62 flareside build but there has been a lot going on in my life the last few months and my wife has been very busy using the shop for her business which has limited our time on this build.

But.... we have made some progress.

First thing is I wanted to get the bed off the truck and get it stripped of paint, primed then painted green. While the bed was off I took the time to modify a trailer hitch for the '62 and get it installed, cleaned up the remainder of the wiring running back to the rear and do some figuring on how we wanted the bed floor configured which will dictate where the fuel filler will be installed once the bed is back on the truck.

Image
Image


We decided the bed floor would be stepped just covering the CV suspension and fuel tank, this is different from either of the other trucks we have built and should make the bed more usable since we don't really plan on putting a bed cover on this truck like the others...this truck/CV will be used more as a truck, think ElCamino! lol.

Image

So with the bed stripped of paint I built the inner structure that will cover the CV suspension and fuel tank, just like the other build I used 1x1 square tubing to make a frame that will prolly attach wood panels to (we have yet to decide what we are covering the bed floor with, but will prolly be treated wood like before).

Image

Then primed the bed black and painted it green, it will get scuffed to take the shine off and add ageing like the cab and dog house after the paint has fully cured.

Image

Image

Some of the other things we have finished in the last few months was installing the door locks, installing the door weatherstripping, trimmed the front fender wheel openings again to get more clearance when turning, ordered a new front bumper (not installed yet) and all the stuff for the fuel filler so it can be installed once the bed floor is installed.

We then got the bed sat back on the CV chassis and bolted down hopefully for the last time...lol

Once it was installed we could get started on the rear lighting which is where we are working now, I still have more work to do in that area but when it's complete we'll just need to do the bed floor, tailgate, and the rear fenders to pretty well finish the exterior of the truck.

Image
Image
Image

Then it will be back to the interior and finishing this project up....... We still have that '53 COE to build that is shoved back in the corner for now...lol

Jon
SteveCanup
Posts: 1096
Joined: November 7, 2014, 11:08 pm
Location: Wytheville, Virginia
United States of America

Re: '62 F100 SWB Step Side - yes another Crown Vic swap

Post by SteveCanup »

I understand about life getting/being "busy"...but, the truck is coming along great. I've been watching and waiting for updates...
1964 F-100
Image
Blanger
Posts: 404
Joined: August 17, 2017, 7:55 am
Location: Indiana
United States of America

Re: '62 F100 SWB Step Side - yes another Crown Vic swap

Post by Blanger »

SteveCanup wrote:I understand about life getting/being "busy"...but, the truck is coming along great. I've been watching and waiting for updates...
Thank you Steve, actually besides being busy we have been laying the ground work so I can retire from my day job (I'm 63), it's been and still is kinda' stressful waiting on everything to fall into place after being set in motion, and I'll be very happy if it all plays out as expected.

Jon
Blanger
Posts: 404
Joined: August 17, 2017, 7:55 am
Location: Indiana
United States of America

Re: '62 F100 SWB Step Side - yes another Crown Vic swap

Post by Blanger »

2020 Update:

So its been awhile since I've made a post about the '62 Flairside build, a lot of this have been accomplished since my last post and to catch everyone up I'll probably break this up into a couple posts.
First let me say I hope everyone had a Merry Christmas and that the New Year is going good.

------

So I left off we were finishing the bed with the rear lighting, after that was done we moved on to the bed floor. Unlike the last two builds this time we used pine boards (1"x 5-6"), we wanted something different on this truck. The boards were painted black on the bottom of the boards with several coats of oil base paint. The top of the boards were burnt to bring out the grain with a torch, then stained, and sealed with 4 coats of oil base urethane sealer.

Image
Image
Image
Image

The logo was created by making a paper mask that was applied before staining and removed before sealing the wood planks. I think most of you will get the logo being a "Slick" on a "Crown Vic" thus making it a "Crown Slick" lol.

Image
Image
Image
Image

All the planks were pre-fitted and drilled for mounting, removed finished then reinstalled. With the bed floor completed we moved on to the tailgate, removing the old paint, etch priming, black primer, then a coat of mint green. We replaced the bed chains with new units from Dennis Carpenter (zink plated) and the metal latch made into the tailgate had to be welded and reground to the correct profile so the new chains would actually latch and hold, a lot of years of wear caused the metal to wear to the point the latches just wouldn't hold.

Image
Image

Yeah the trailer hitch is totally finished and wiring for lights done, truck look pretty cool pulling the trailer...lol
The fuel filler installed.....

Image
Image

Next post will cover the rear fenders which was a job I've been putting off for a long time, but they are finished as you will see and look good enough for this build.

Jon
User avatar
04sd
Posts: 228
Joined: February 24, 2016, 7:55 pm
Location: Lehigh Valley, Pennsylvania
United States of America

Re: '62 F100 SWB Step Side - yes another Crown Vic swap

Post by 04sd »

Looking good.
Are you planning on actually retiring or are you going to start building trucks to sell?
Bill
1966 F100 Camper Special, now a short bed 4x4.
https://www.ford-trucks.com/forums/1644 ... build.html
SteveCanup
Posts: 1096
Joined: November 7, 2014, 11:08 pm
Location: Wytheville, Virginia
United States of America

Re: '62 F100 SWB Step Side - yes another Crown Vic swap

Post by SteveCanup »

I love the way the bed turned out...nice! Can't wait to see it with the fenders installed.
1964 F-100
Image
Blanger
Posts: 404
Joined: August 17, 2017, 7:55 am
Location: Indiana
United States of America

Re: '62 F100 SWB Step Side - yes another Crown Vic swap

Post by Blanger »

04sd wrote:Looking good.
Are you planning on actually retiring or are you going to start building trucks to sell?
Bill,

Well retire....yes I did retire at the end of November, building trucks to sell..... no, I don't think so. I've had several people ask about building them a truck but once you factor in the labor cost at a reasonable rate most folks decide it's too much money, then I think a lot of people have "unreasonable expectations" and building them a truck would be a problem for me. We do have this '53 COE that will get built this year then we plan to buy a plasma CNC table (4'x8') to build custom signage, decorative art, and various other items that we will sell..... So I won't be sitting around watching the boob tube...lol

Jon
Blanger
Posts: 404
Joined: August 17, 2017, 7:55 am
Location: Indiana
United States of America

Re: '62 F100 SWB Step Side - yes another Crown Vic swap

Post by Blanger »

SteveCanup wrote:I love the way the bed turned out...nice! Can't wait to see it with the fenders installed.
Thanks Steve,

Yeah that post is coming right up!

Jon
Post Reply