My 63 Unibody

A place just for our project & build threads.

Moderators: Kid, Casey 65

BobbyFord
Posts: 289
Joined: December 12, 2007, 8:58 pm
Location: So Cal

Re: My 63 Unibody

Post by BobbyFord »

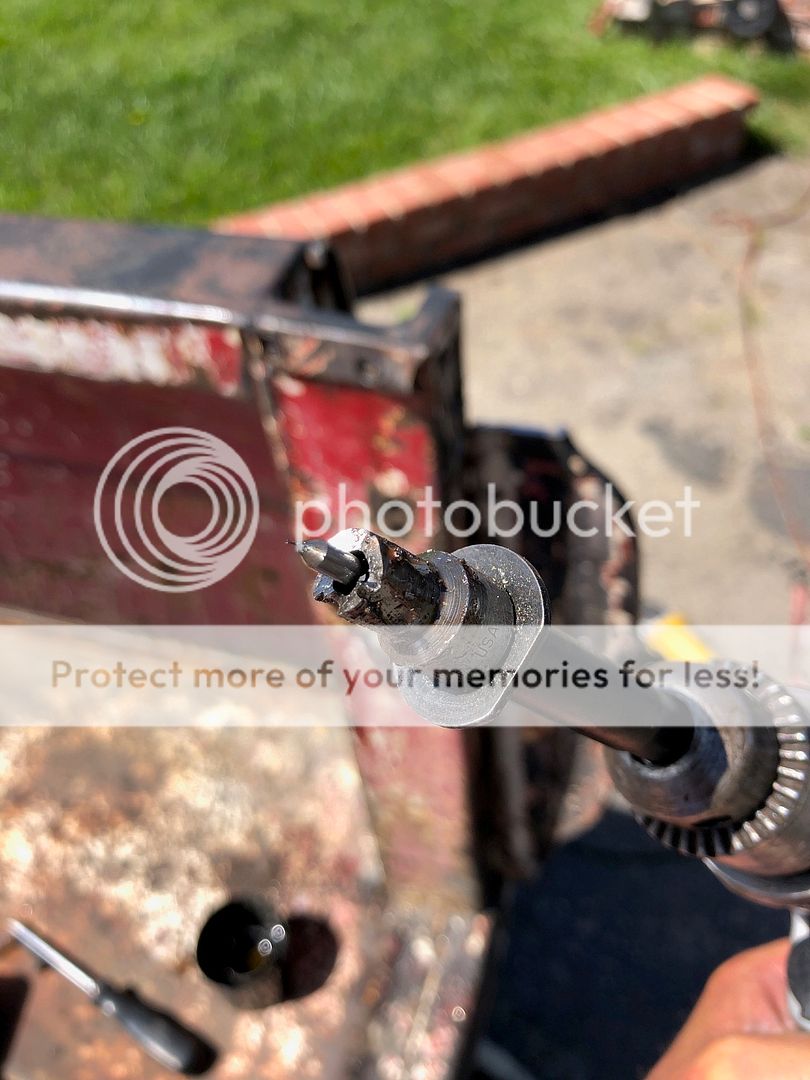
I cut the spot welds and removed the damaged bed corner.
Image

Image

Image

The factory replacement corner doesn't fit exactly right so I'm going to modify it and see if I can get it to fit a little better.
BobbyFord
Posts: 289
Joined: December 12, 2007, 8:58 pm
Location: So Cal

Re: My 63 Unibody

Post by BobbyFord »

I got the area behind the bed corner cleaned and sealed. I used weld-through primer on the mating surfaces.
Image

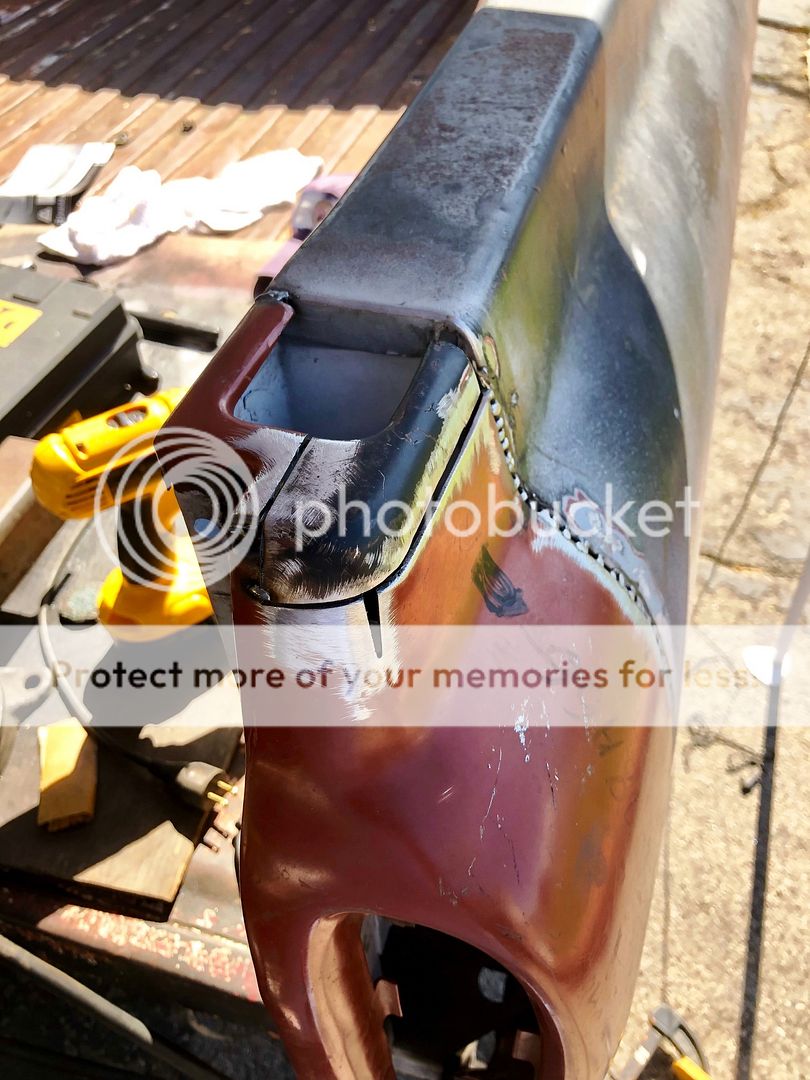
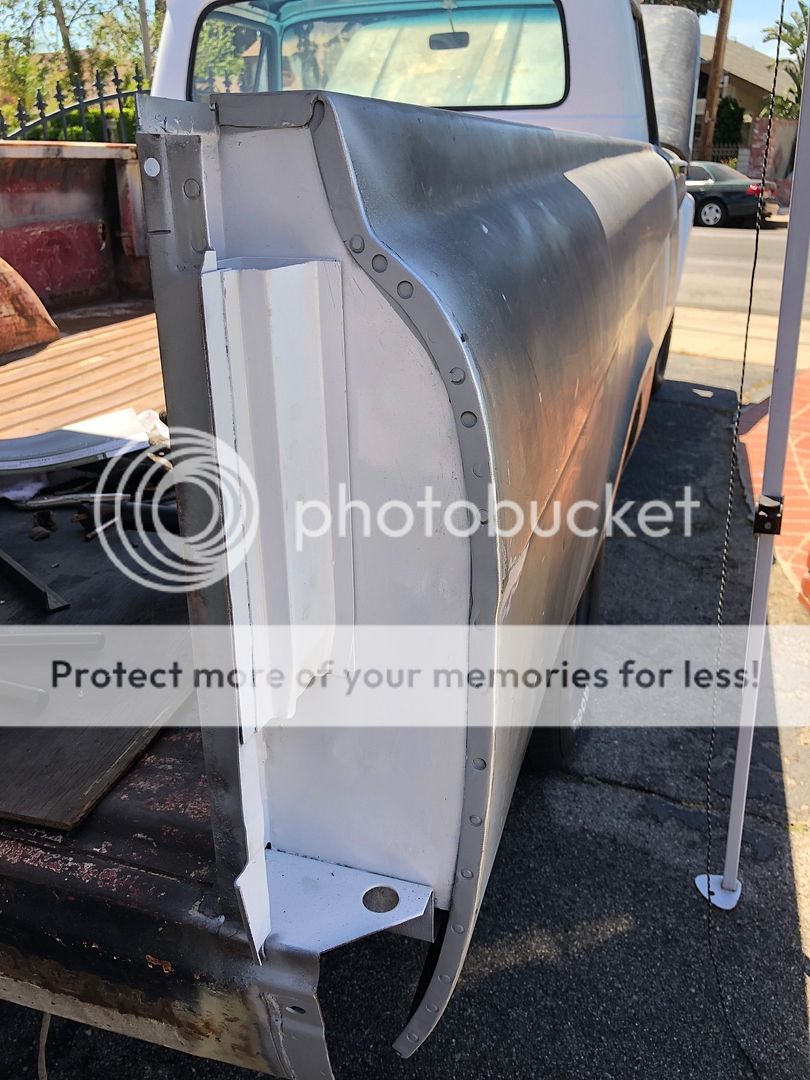
The replacement part didn't fit in a few places so I had to cut it and massage it a bit. I used part of the top outer edge of the old bed corner. I've got a bit of grinding to do. Got rid of the stake hole.
Image

Image

Image
claybreaker 144
Posts: 20
Joined: September 1, 2016, 8:43 pm

Re: My 63 Unibody

Post by claybreaker 144 »

What brand spot weld cutter are you using? Look like a rota broach but never seen one with a center drill in it.
62 Unibody Short Bed Soon To Have CV Swap
62 T Bird
66 Elcamino
BobbyFord
Posts: 289
Joined: December 12, 2007, 8:58 pm
Location: So Cal

Re: My 63 Unibody

Post by BobbyFord »

claybreaker 144 wrote:What brand spot weld cutter are you using? Look like a rota broach but never seen one with a center drill in it.
It’s not a drill, is a spring loaded centering pin. You first center punch the spot weld and then use the pin to guide the cutter. It’s Blue-Point. I like it, just gotta remember to use a little oil to save the cutter.
Last edited by BobbyFord on April 14, 2019, 6:45 pm, edited 1 time in total.
BobbyFord
Posts: 289
Joined: December 12, 2007, 8:58 pm
Location: So Cal

Re: My 63 Unibody

Post by BobbyFord »

I don't know why Photobucket is making my photos larger than they need to be. I need to find a better hosting site.
Did some grinding today. Got a little more grinding to go. It's at least closer to being able to be body worked. I welded in the other stake pockets, too.
Image

Image

Image
BobbyFord
Posts: 289
Joined: December 12, 2007, 8:58 pm
Location: So Cal

Re: My 63 Unibody

Post by BobbyFord »

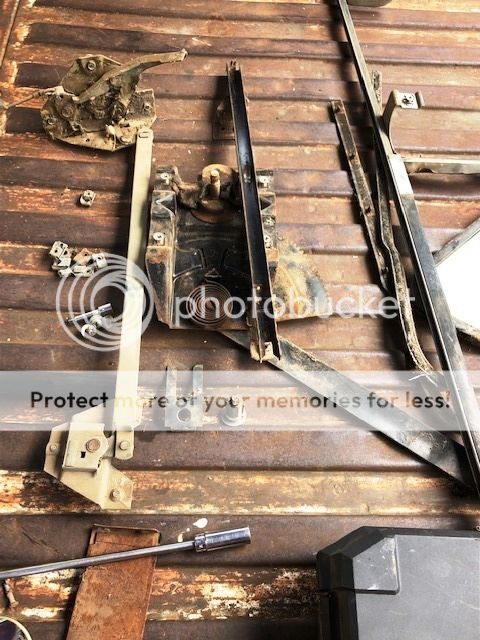
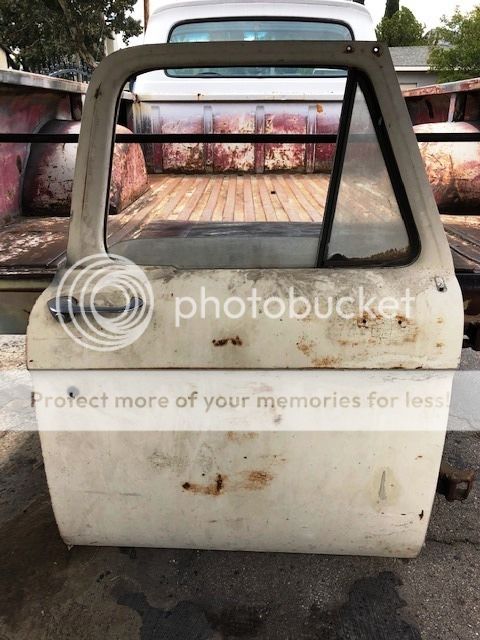
Someone cut speaker holes in my current doors so I have a nice set of straight, rust free replacement doors. Disassembled the right door today so I can weld up the mirror holes and send it off to the blaster. Meanwhile, I'll disassemble and service the window regulator and get the latch assembly cleaned up and lubed. I already have all of the weatherstrips and window liners (some of it NOS.) I think I have some NOS door handles, too.
Image

Image

Image
BobbyFord
Posts: 289
Joined: December 12, 2007, 8:58 pm
Location: So Cal

Re: My 63 Unibody

Post by BobbyFord »

Just ordered a new warranty tag for the replacement door from Marti. 8)
Also, waiting to hear from Sacramento if they ok'd assigning a pair of vintage 1963 California black plates that I took off of another truck that is no longer alive.
BobbyFord
Posts: 289
Joined: December 12, 2007, 8:58 pm
Location: So Cal

Re: My 63 Unibody

Post by BobbyFord »

I was bored and had some Dynamat…
Image
BobbyFord
Posts: 289
Joined: December 12, 2007, 8:58 pm
Location: So Cal

Re: My 63 Unibody

Post by BobbyFord »

Just got offered $4K for my truck. It actually made me chuckle. :D
shipwrecked
Posts: 1464
Joined: December 29, 2012, 10:06 pm
Location: Yorktown VA
Contact:
United States of America

Re: My 63 Unibody

Post by shipwrecked »

I haven’t even thought about what I would do if someone offered me $$ for my truck.
The months may change, but I am always APRIL
'63 F100 Custom Cab 223inline 6, 3speed manual- mostly stock
https://www.youtube.com/coastiereid
Truck has been home in CA,OR,WA,NJ,VA since it's birth in San Jose Jan63
BobbyFord
Posts: 289
Joined: December 12, 2007, 8:58 pm
Location: So Cal

Re: My 63 Unibody

Post by BobbyFord »

shipwrecked wrote:I haven’t even thought about what I would do if someone offered me $$ for my truck.
Exactly. I have had this truck for too long to sell it now.
BobbyFord
Posts: 289
Joined: December 12, 2007, 8:58 pm
Location: So Cal

Re: My 63 Unibody

Post by BobbyFord »

I’m redoing my seat now because the driver seating area is torn and I want to drive this truck while I’m working on it but I don’t want to further damage the foam.
The seat is plain black vinyl right now. Going to go with two-tone blue.
I ordered upholstery from Stock Interiors, some high density foam, Dacron batting, Camie 303 spray and a pair of C.S. Osborne hog ring pliers.
I already stripped the seat and repaired several broken spring anchors.
I’ll line the frame and springs with heavy felt.
User avatar
04sd
Posts: 228
Joined: February 24, 2016, 7:55 pm
Location: Lehigh Valley, Pennsylvania
United States of America

Re: My 63 Unibody

Post by 04sd »

Can you post some pics of your seat then and let us know how it worked out. I need a blue seat cover for my truck and first hand feedback would be great.
Bill
1966 F100 Camper Special, now a short bed 4x4.
https://www.ford-trucks.com/forums/1644 ... build.html
BobbyFord
Posts: 289
Joined: December 12, 2007, 8:58 pm
Location: So Cal

Re: My 63 Unibody

Post by BobbyFord »

04sd wrote:Can you post some pics of your seat then and let us know how it worked out. I need a blue seat cover for my truck and first hand feedback would be great.
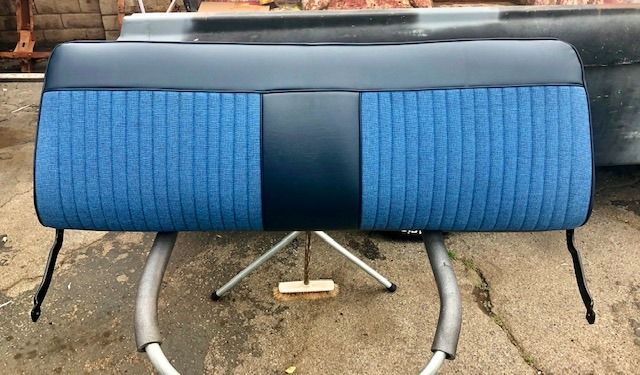
Absolutely. The company offers vinyl with vinyl inserts, vinyl with cloth and vinyl with velour..
My seat is a 73-79 seat.
BobbyFord
Posts: 289
Joined: December 12, 2007, 8:58 pm
Location: So Cal

Re: My 63 Unibody

Post by BobbyFord »

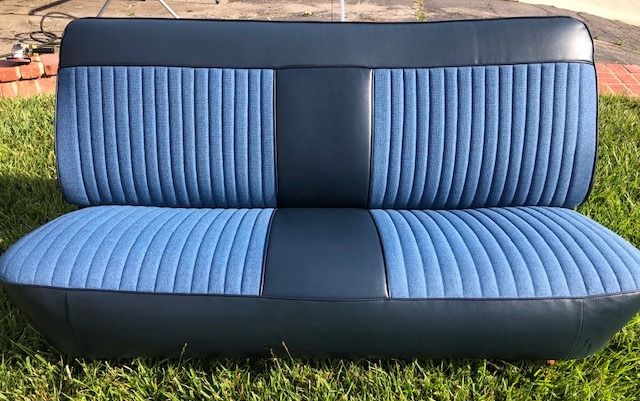
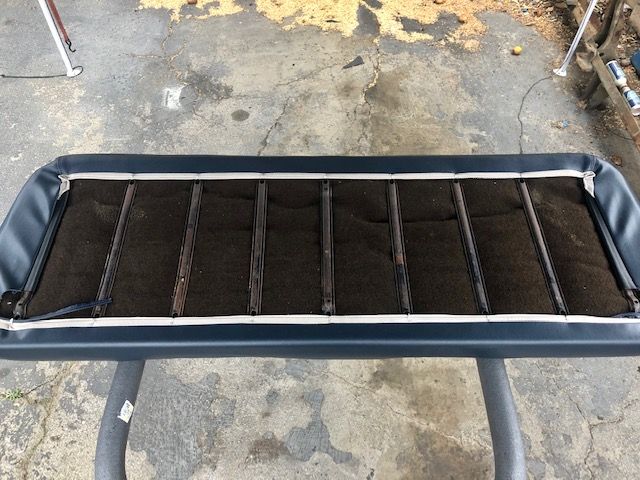
Foamed the backrest today and got the upholstery installed. Overall, I'm happy with the way it turned out, I've never built foam that extensively, I should've taken pics of the process but I was too involved. The contour of the upholstery widens from top to bottom, I had to build out the front of the lower corners where the backrest will meet the seat. I don't really have any foam shaping tools so I tapered it by hand with a pair of titanium Fiskars shears.I used zero Dacron polyester batting because it won't be here until tomorrow :D but I trimmed the foam well enough that I really don't have any noticeable waves or wrinkles in the vinyl. The seating area is going to be a little more difficult because it needs more extensive foam work, plus I have to make sure that when I mount the halves together the center vinyl lines match up.
This is vinyl with cloth inserts. If you're thinking about doing this make sure you get some Osborne hog ring pliers and quality round steel hog rings. The pliers that come with the upholstery are junk and the hog rings are basically office staples.
That Camie 303 spray is for real.
Image

Image
BobbyFord
Posts: 289
Joined: December 12, 2007, 8:58 pm
Location: So Cal

Re: My 63 Unibody

Post by BobbyFord »

Damn, the bottom section of the seat is proving more difficult than the backrest. So much foam to rebuild. The seat upholstery is baggy in the front corners. Through trial and error I finally found an effective method of shaping foam. 40 grit flap wheel on a 4" grinder has been really effective.
With the frame and spring repair I figure I'll have 40 hours into this seat redo when it's all said and done.
grump
Posts: 959
Joined: September 14, 2006, 6:47 pm
Location: ohio

Re: My 63 Unibody

Post by grump »

It's going to look really nice when you get it done,that will make all those hours worth it. Good work.
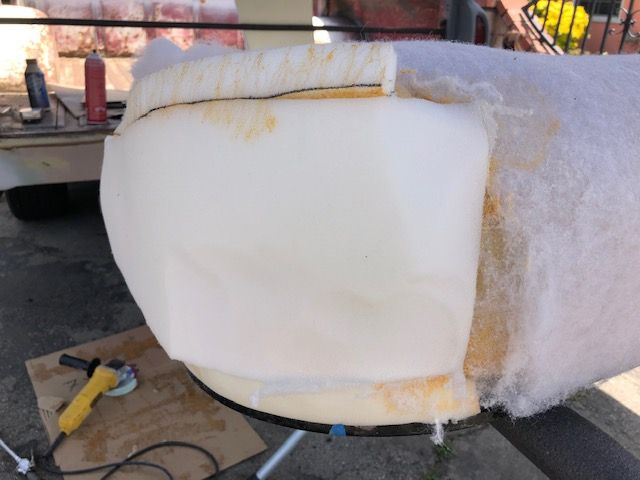
BobbyFord
Posts: 289
Joined: December 12, 2007, 8:58 pm
Location: So Cal

Re: My 63 Unibody

Post by BobbyFord »

grump wrote:It's going to look really nice when you get it done,that will make all those hours worth it. Good work.
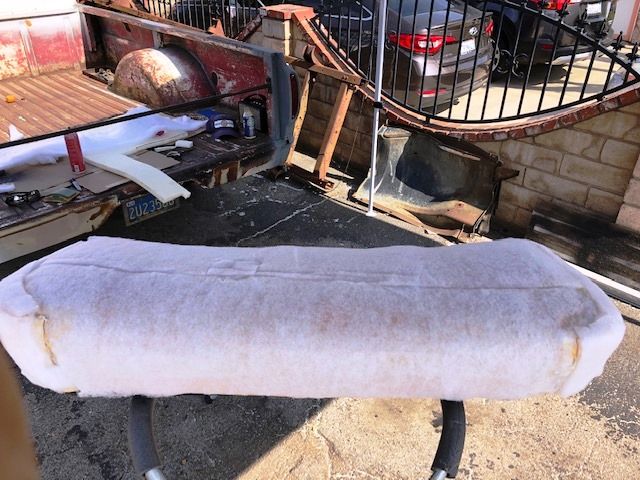
Thank you.
BobbyFord
Posts: 289
Joined: December 12, 2007, 8:58 pm
Location: So Cal

Re: My 63 Unibody

Post by BobbyFord »

Good grief, 5 more hours on the seat bottom.
Built out the front corners and the top of the sides. Tapered the foam down to the frame. Wasn't good enough. Had to build out and taper another inch in the front corners. I covered everything afterward with Dacron polyester batting.
Added 1/8" round mild steel in the bent corner sections of the bolster piping. I didn't take any pics of that area because I was already over it.
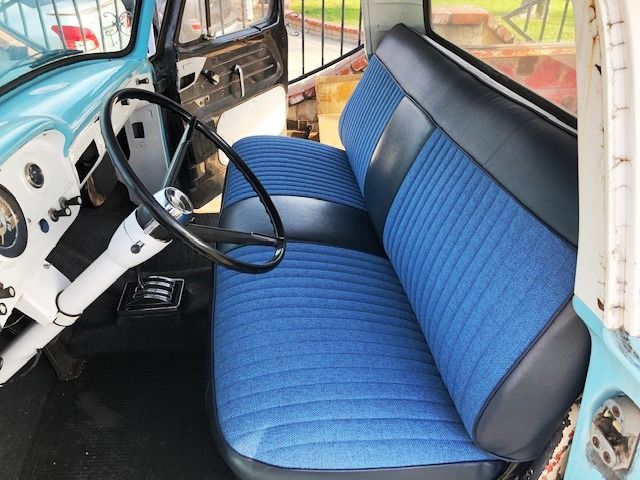
The lines don't exactly line up on the seat back and seat bottom but it's going to have to be good. No wrinkles and no bagged out corners.
The seat is firm and awesome. I know something changed because I have to adjust my mirrors.
Corner shaping...
Image
Full batting, had to be sectioned on the corners to be able to add and reshape foam...
Image
Lines line up good enough...
Image
Image
Jerry D
Posts: 380
Joined: November 29, 2006, 4:38 pm
Location: Woodstock, Il
United States of America

Re: My 63 Unibody

Post by Jerry D »

Nice work!
Post Reply