
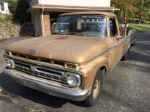
Frankenstein's Monster - 65 F600
Re: Frankenstein's Monster - 65 F600
No idea on how the pins come out.
Bill
1966 F100 Camper Special, now a short bed 4x4.
https://www.ford-trucks.com/forums/1644 ... build.html
1966 F100 Camper Special, now a short bed 4x4.
https://www.ford-trucks.com/forums/1644 ... build.html
-
MattEturbo

- Posts: 53
- Joined: September 15, 2016, 1:10 pm
- Location: Jacksonville,NC

Re: Frankenstein's Monster - 65 F600
04sd - I am going to try and get those leaf spring mounts off this weekend to bring into work and use their bearing press. Hopefully my work gets their new press on Monday that way they have something to practice on. Some of the technicians that I work with are a little special/drama queens.

This is how far I have gotten on the fire wall. I hope to get some more work done on that as well this weekend. On Sunday the temperature is suppose to be nicer, so hopefully I can start measuring out the step notch for the frame. This way I can order parts on Sunday and hopefully have them by the following weekend.
This is how far I have gotten on the fire wall. I hope to get some more work done on that as well this weekend. On Sunday the temperature is suppose to be nicer, so hopefully I can start measuring out the step notch for the frame. This way I can order parts on Sunday and hopefully have them by the following weekend.
-
MattEturbo
- Posts: 53
- Joined: September 15, 2016, 1:10 pm
- Location: Jacksonville,NC
Re: Frankenstein's Monster - 65 F600
Of course plans are meant to be broken. The only true work I managed to get done this past weekend was rotating the frame in my driveway
giving me the ability to make the frame level with the driveway. I was then able to take my measurements for the step notch. Then I drew this
up to request some quotes from local companies, since of coarse this truck is too big to use anything universal that I was able to find online. I have
yet to hear back from anybody yet on prices.

Last night I was able to once again weld on the firewall. I'm closing up all the holes that I do not plan on using. I have one more hole to weld
shut in these images. I forgot to make a template and it was getting late so I figured I could do it tonight or this coming weekend since I will
have off and part of Saturday all to myself.


One more thing. I measured the ceiling and the floor to get a quote from my local Line-X place. I am still waiting on a quote from them as well.

giving me the ability to make the frame level with the driveway. I was then able to take my measurements for the step notch. Then I drew this
up to request some quotes from local companies, since of coarse this truck is too big to use anything universal that I was able to find online. I have
yet to hear back from anybody yet on prices.
Last night I was able to once again weld on the firewall. I'm closing up all the holes that I do not plan on using. I have one more hole to weld
shut in these images. I forgot to make a template and it was getting late so I figured I could do it tonight or this coming weekend since I will
have off and part of Saturday all to myself.
One more thing. I measured the ceiling and the floor to get a quote from my local Line-X place. I am still waiting on a quote from them as well.
-
MattEturbo
- Posts: 53
- Joined: September 15, 2016, 1:10 pm
- Location: Jacksonville,NC
Re: Frankenstein's Monster - 65 F600
Well I did that drawing on graphing paper and the measurements are not precise on some of them. I found out last night because I transferred the measurements into full size on a piece of cardboard. So I am sure I will be getting questions from the companies I have asked for quotes. However the measurements are not that far off, from what I thought they were. Here is the corrected
dimensions.

dimensions.
-
MattEturbo
- Posts: 53
- Joined: September 15, 2016, 1:10 pm
- Location: Jacksonville,NC
Re: Frankenstein's Monster - 65 F600
The lovely weather here is holding me back from touching the frame. So I have only been able to work on what I have in the garage.
I finally finished welding up the passenger's side of the fire wall. Then I started working on the passenger's side lower rear cab corner.
I double checked the cuts and alignment marks before I did anything. With everything still lining up I started spot welding everything in place.
I did burn through in a couple of areas, so I decided to stop for the night.


I do plan on finishing up this corner tonight. Then if the weather is nice after my son goes to sleep I may just go and work on the frame some.
The metal company wants entirely way too much to make the frame notch plates (<$600!!!) and line-x told me until he sees pictures of my trucks cab he isn't
quoting any less than $1000 but they do plenty of truck beds for the company I work with for $400.
I finally finished welding up the passenger's side of the fire wall. Then I started working on the passenger's side lower rear cab corner.
I double checked the cuts and alignment marks before I did anything. With everything still lining up I started spot welding everything in place.
I did burn through in a couple of areas, so I decided to stop for the night.
I do plan on finishing up this corner tonight. Then if the weather is nice after my son goes to sleep I may just go and work on the frame some.
The metal company wants entirely way too much to make the frame notch plates (<$600!!!) and line-x told me until he sees pictures of my trucks cab he isn't
quoting any less than $1000 but they do plenty of truck beds for the company I work with for $400.
Re: Frankenstein's Monster - 65 F600
I did the inside of an open top Bronco years ago with Durabak. Looked good for the time I had it and it comes in a bunch of different colors. I used a gray that looked nice with my gray interior and yellow body.
https://www.durabakcompany.com/?gclid=E ... gIa_vD_BwE
https://www.durabakcompany.com/?gclid=E ... gIa_vD_BwE
Bill
1966 F100 Camper Special, now a short bed 4x4.
https://www.ford-trucks.com/forums/1644 ... build.html
1966 F100 Camper Special, now a short bed 4x4.
https://www.ford-trucks.com/forums/1644 ... build.html
-
MattEturbo
- Posts: 53
- Joined: September 15, 2016, 1:10 pm
- Location: Jacksonville,NC
Re: Frankenstein's Monster - 65 F600
I finally was able to have my wife pick up the steel plate needed to make my step notch. The following day I had off of work so I was able to trace out my template and then measured out the straight pieces. Then of coarse more rain/snow and Valentine's Day.
This past weekend I was able to get all the straight pieces cut out before I ran out of cutting discs. While I was doing the cutting, my wife was helping with drilling out the rivets that hold the leaf spring mounts on. She was only able to break one of my step drill bits.
Re: Frankenstein's Monster - 65 F600
I used this stuff to coat internal areas of my frame and body. No idea how well it works since I can't see in most places but figured it was better than nothing. It did run out any holes, drip on the floor, etc., so be prepared.
https://www.eastwood.com/eastwood-inter ... rosol.html
https://www.eastwood.com/eastwood-inter ... rosol.html
Bill
1966 F100 Camper Special, now a short bed 4x4.
https://www.ford-trucks.com/forums/1644 ... build.html
1966 F100 Camper Special, now a short bed 4x4.
https://www.ford-trucks.com/forums/1644 ... build.html
-
MattEturbo
- Posts: 53
- Joined: September 15, 2016, 1:10 pm
- Location: Jacksonville,NC
Re: Frankenstein's Monster - 65 F600
04sd - Do you think that I should go ahead and spray it before or after I take the frame to get sandblasted and painted?
Re: Frankenstein's Monster - 65 F600
I did all my frame mods and welding first. Then sandblasted. Then painted. My frame was mostly rust free though and very few areas boxed in. Any areas boxed in unless completely sealed, no holes, etc., will get sand in them and it's a pain to get out.
Bill
1966 F100 Camper Special, now a short bed 4x4.
https://www.ford-trucks.com/forums/1644 ... build.html
1966 F100 Camper Special, now a short bed 4x4.
https://www.ford-trucks.com/forums/1644 ... build.html
-
MattEturbo
- Posts: 53
- Joined: September 15, 2016, 1:10 pm
- Location: Jacksonville,NC
Re: Frankenstein's Monster - 65 F600
On my way inside the house after work yesterday I took a quick look at the frame where the leaf spring mount was. It looks like from years of sitting in woods, moisture and more than likely mice made a home in between the frame and mount. So there are holes rusted through the frame on both sides where the leaf spring mounts are located. Now I am trying to figure out the best coarse of action. Should I just treat the rust that's there and make some plates that would cover the holes and weld them in? Or should I cut it out completely and weld in some plates? From what I can tell now from further inspection, it's at all the rear spring mount locations.
Re: Frankenstein's Monster - 65 F600
I'd cut it out and weld in a piece and then plate it on the inside so when you bolt the mounts back on you are bolting through both layers.
Bill
1966 F100 Camper Special, now a short bed 4x4.
https://www.ford-trucks.com/forums/1644 ... build.html
1966 F100 Camper Special, now a short bed 4x4.
https://www.ford-trucks.com/forums/1644 ... build.html
-
MattEturbo
- Posts: 53
- Joined: September 15, 2016, 1:10 pm
- Location: Jacksonville,NC
Re: Frankenstein's Monster - 65 F600
While I was cutting the plate metal the other day I killed my angle grinder by accidently pressing too hard.  I'm pretty sure that it was a HF special that was over ten years old anyways. So I figure that it was about due for an update anyways. I did some research and ended up buying a new Dewalt 11amp angle grinder. The Dewalt one definitely has some torque to it. I have yet to be able to try it out on cutting the metal though. Hopefully all goes well with that. I think Friday and Saturday are suppose to be nice to be working outside so I plan to try some more cutting and rivet removing on those days.
Re: Frankenstein's Monster - 65 F600
New tools are always good. Harbor Freight does make some OK tools but I bought a cheap HF angle grinder years ago to carry in a service truck for occasional use and there is no comparison to a good one.
Bill
1966 F100 Camper Special, now a short bed 4x4.
https://www.ford-trucks.com/forums/1644 ... build.html
1966 F100 Camper Special, now a short bed 4x4.
https://www.ford-trucks.com/forums/1644 ... build.html
-
MattEturbo
- Posts: 53
- Joined: September 15, 2016, 1:10 pm
- Location: Jacksonville,NC
Re: Frankenstein's Monster - 65 F600
Lets just say that the Dewalt angle grinder definitely makes a world of difference. I'm now cutting through that metal like butter almost. I've gotten enough plates cut out so far to do one side of the notched frame. I think what I am going to do for the rear of the notch is cut off the old rusted through metal back. Then buy some rectangular tubing and bolt/weld it in as needed. I've decided to ditch the leaf spring idea for now and possibly do a 4-link suspension in the rear since I planned on using air bags anyways. What do you guys think?
-
MattEturbo
- Posts: 53
- Joined: September 15, 2016, 1:10 pm
- Location: Jacksonville,NC
Re: Frankenstein's Monster - 65 F600
I decided to take a little break from working on the rear of the frame. So I decided to design and make some front bumper mounts. I haven't decided if I want to make a custom bumper or use something close to factory. The bumper that came with the truck is twisted on both ends. Probably from hitting things on the farm. I did get a front bumper that looked similar off of a bread truck from the local junk yard but not too sure if I'm still wanting to use it.
-
MattEturbo
- Posts: 53
- Joined: September 15, 2016, 1:10 pm
- Location: Jacksonville,NC
Re: Frankenstein's Monster - 65 F600
4/17 - I had my brother make a trip to Gulfstream Steel to purchase myself a 20' 3"x4"x1/8" rectangular tube. That night I measured out pieces for rear of the notch and cut them to length. My though behind this design is to give it better ground clearance when entering a steep driveway or something of the sort.

Today - After work I am planning on finishing welding the RR cab corner. I just have a small area to finish. After that I am going to have to change my welding wire over to weld the 1/8" steel. Then I plan to cut 2 2x4 pieces of wood to 28" to use as braces in between the 2 rear frame rails that I have to weld together at the rear. This way everything should stay square when ready to weld.
Today - After work I am planning on finishing welding the RR cab corner. I just have a small area to finish. After that I am going to have to change my welding wire over to weld the 1/8" steel. Then I plan to cut 2 2x4 pieces of wood to 28" to use as braces in between the 2 rear frame rails that I have to weld together at the rear. This way everything should stay square when ready to weld.
-
MattEturbo
- Posts: 53
- Joined: September 15, 2016, 1:10 pm
- Location: Jacksonville,NC
Re: Frankenstein's Monster - 65 F600
4/20 - My son stayed awake longer than anticipated, so I wasn't able to do as much as I wanted. I did however get to finish up the passenger's side rear cab corner. I was definitely having issues with it burning through last night. But it is finished for now. I'm going to do all my welding before cleaning them all up.


I was also able to lay out the rear of the frame how I wanted and strapped it all into place like I wanted. Before finishing up for the night I converted my Mig back over to do the thicker metal. I decided to wait until tonight to weld the frame, that way I have a fresh mind and eyes. I'm starting to get excited because I am finally able to see some progress being made.


I was also able to lay out the rear of the frame how I wanted and strapped it all into place like I wanted. Before finishing up for the night I converted my Mig back over to do the thicker metal. I decided to wait until tonight to weld the frame, that way I have a fresh mind and eyes. I'm starting to get excited because I am finally able to see some progress being made.
-
MattEturbo
- Posts: 53
- Joined: September 15, 2016, 1:10 pm
- Location: Jacksonville,NC
Re: Frankenstein's Monster - 65 F600
.
 Since my last update, I have been able to get all the pieces of the LH notch tacked into place.


Last night I was able to get the frame prepped for the RH notch to be tacked. I plan on attaching all the plates tonight after work. Then hopefully if its not too late I'm going to cut the old rear frame off. Then tomorrow if the rain is gone by the time I get home I'll be attaching the new rear frame to the end of the notches. I have to get all this done by Saturday morning because I am taking the frame somewhere to get professionally welded for strength purposes.


Last night I was able to get the frame prepped for the RH notch to be tacked. I plan on attaching all the plates tonight after work. Then hopefully if its not too late I'm going to cut the old rear frame off. Then tomorrow if the rain is gone by the time I get home I'll be attaching the new rear frame to the end of the notches. I have to get all this done by Saturday morning because I am taking the frame somewhere to get professionally welded for strength purposes.
-
MattEturbo
- Posts: 53
- Joined: September 15, 2016, 1:10 pm
- Location: Jacksonville,NC
Re: Frankenstein's Monster - 65 F600
Last night my little helper wanted to get a little frisky. He saw me hammering a bracket off the frame so decided to grab one of my smaller hammers and go to town. Then he found my welding helmet. Crazy thing is it almost fits him on the smallest setting. I'm sure by this time next year I'll probably be teaching him actually how to use it.
After the kid went to sleep, I got to go to work. I finished up the RH notch. I finished it a lot sooner than I originally thought so I went ahead and off the part of the old frame that I am no longer going to be using.
Today, it's raining cats and dogs so I doubt I will be able to do anything on the truck tonight. I did however bring a couple pieces of metal to bend for the under side of the notches. I figured it would be easier to do that at work with the acetylene torch instead of putting it in a vice and making all sorts of noise. So far I am looking to be on schedule for having it all ready for Saturday.