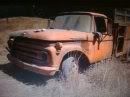
Rusty 63 F100 + 04 CV PI
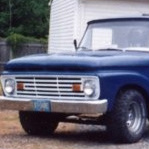
Yeah, she's a keeper. But to be fair the garage was full of my crap before we got married... though that doesn't stop her from hinting her mustang should have a roof over its head! If & when the market improves here, I'll build us a house with a much bigger garage. Til then, I'll keep banging elbows & waxing her car every other month.
Dropped the rear axle, e-brake cables, and the rest of the exhaust today. Then spent some time cleaning the garage & sorting tools. It's amazing the mess my garage gets! Lost the weekend & yesterday to yard/house work in prep for company coming to visit (the wife cracked the whip!).
Next on the agenda we're going to start in with the air saw to cut out patch panel steel and I'm thinking about dropping the rest of the frame out from under the body & then hauling the hulk of the body off for scrap.
Then I need to buy, borrow or rent a plasma cutter to slice the bits I want/need off the frame scraps - like misc mounts, brackets & especially the mounts for the rear of the lower control arms. Most guys doing these swaps have a custom bracket made out of 3/16 plate. Hanging out on the creeper under the car, I realized there's actually a plate just like that - already there, held in position inside the frame rail with a locating pin (sticks thru the frame & into control arm bracket) and a star-drive bolt/set screw. I figure why make a new one when I can cut the frame & pull out a FoMoCo original! ;o)
Actually I found one of the local rental centers has a plasma cutter & I can rent it over the weekend (counts as one "day") for under $50. Think that's the route I'll go unless I spot something good on CL....
Next on the agenda we're going to start in with the air saw to cut out patch panel steel and I'm thinking about dropping the rest of the frame out from under the body & then hauling the hulk of the body off for scrap.
Then I need to buy, borrow or rent a plasma cutter to slice the bits I want/need off the frame scraps - like misc mounts, brackets & especially the mounts for the rear of the lower control arms. Most guys doing these swaps have a custom bracket made out of 3/16 plate. Hanging out on the creeper under the car, I realized there's actually a plate just like that - already there, held in position inside the frame rail with a locating pin (sticks thru the frame & into control arm bracket) and a star-drive bolt/set screw. I figure why make a new one when I can cut the frame & pull out a FoMoCo original! ;o)
Actually I found one of the local rental centers has a plasma cutter & I can rent it over the weekend (counts as one "day") for under $50. Think that's the route I'll go unless I spot something good on CL....


-
thenephilm
- Posts: 543
- Joined: June 25, 2009, 9:06 pm
- Location: Cincinnati

Minor (very minor) progress
Ok, so I've spent the last 2 weeks bouncing between working and spending time with visiting family / enjoying "Spring Break"... got some free time today to clean up the garage and create some space to be able to work.

Yeah - now the short-bed of ole Rusty is holing her own front fenders, rad support & grille, the 63 & 04 wheel wells, and all 4 doors from the CV... and the steering column/shaft, and a bunch of bits & pieces. Fun!
I did that so I can have some free space to move things around & get the front end up under the frame rails.

And here's the CV ready for the butcher's knife... not long now & I'll be hard at work getting that front end & drive train installed!

Yeah - now the short-bed of ole Rusty is holing her own front fenders, rad support & grille, the 63 & 04 wheel wells, and all 4 doors from the CV... and the steering column/shaft, and a bunch of bits & pieces. Fun!
I did that so I can have some free space to move things around & get the front end up under the frame rails.
And here's the CV ready for the butcher's knife... not long now & I'll be hard at work getting that front end & drive train installed!
-
Anthony

Ok, so we got to spend the afternoon in the garage! Cut some patch metal out of the car, including these cool little curvy cowl patches:

Then cut out a big patch panel...

LOL - figure at scrap rates, that's some cheap metal in case I need to patch anything...
I also cut out the piece on the passenger firewall where the wire harness goes thru - just in case I can't get the right size holesaw later to fit the grommets.

Next step will be to get most of the firewall where the master cylinder & steering column mount - figure that way I'll have all the holes for the ecu, harness plugs, etc to go thru. Still trying to decide where to cut.
So I changed gears & got the jack stands under the body so I could drop what's left of the frame down from under the body. That worked well, so I could finally get the brake lines out. Next up will be getting the fuel line & vapor line off the passenger frame rail.
Ok, so now I'm at a point where I'm trying to decide how much effort I put into cutting patch metal out of the CV, since I've got a line on a rust free '64 cab.... and my '63 cab is VERY rusty.... hmmm
What do you guys think? he wants $400 for the cab (includes column, seat, front & rear glass... and it's an uncut dash w/ original am radio) - have a look:

No rust over/around the windshield like I have in places

No rust in the rear cab seam...

Solid steps...

Waiting for more/better pics & plan to go get it Monday (he's out of town this weekend), but here's a tiny pic from the front:

So, like I said, he wants $400 for the cab, $800 gets the cab with the doors, and the front end sheet metal. Sounds like he bought it for the bed & the drivetrain - no engine, trans or rear axle....
I know my cab needs floor pans & front cab mounts, work to the door jambs, steps, area over the windshield & also on the roof near the rear seams.... easily more than $400 worth of patch panels & umpteen hours of welding. He said the doors have some odd cuts in them - though I haven't seen them yet - are the doors & front end sheetmetal worth another $400? I'm inclined to offer $600 for the whole shebang. What do you think?
Then cut out a big patch panel...
LOL - figure at scrap rates, that's some cheap metal in case I need to patch anything...
I also cut out the piece on the passenger firewall where the wire harness goes thru - just in case I can't get the right size holesaw later to fit the grommets.
Next step will be to get most of the firewall where the master cylinder & steering column mount - figure that way I'll have all the holes for the ecu, harness plugs, etc to go thru. Still trying to decide where to cut.
So I changed gears & got the jack stands under the body so I could drop what's left of the frame down from under the body. That worked well, so I could finally get the brake lines out. Next up will be getting the fuel line & vapor line off the passenger frame rail.
Ok, so now I'm at a point where I'm trying to decide how much effort I put into cutting patch metal out of the CV, since I've got a line on a rust free '64 cab.... and my '63 cab is VERY rusty.... hmmm
What do you guys think? he wants $400 for the cab (includes column, seat, front & rear glass... and it's an uncut dash w/ original am radio) - have a look:
No rust over/around the windshield like I have in places
No rust in the rear cab seam...
Solid steps...
Waiting for more/better pics & plan to go get it Monday (he's out of town this weekend), but here's a tiny pic from the front:
So, like I said, he wants $400 for the cab, $800 gets the cab with the doors, and the front end sheet metal. Sounds like he bought it for the bed & the drivetrain - no engine, trans or rear axle....
I know my cab needs floor pans & front cab mounts, work to the door jambs, steps, area over the windshield & also on the roof near the rear seams.... easily more than $400 worth of patch panels & umpteen hours of welding. He said the doors have some odd cuts in them - though I haven't seen them yet - are the doors & front end sheetmetal worth another $400? I'm inclined to offer $600 for the whole shebang. What do you think?
-
Anthony
I'd offer the 6 and you can always haggle up. When you say front sheet metal, is that the hood, core support, fenders, inner fenders gravel pan, and header along with the grill?? If this is all included in the "front sheet metal" price around here $400 would be cheap. $800 for all wouldn't be bad if the rust on the front end was like the rust on the cab. (or lack there of) I have alot of $'s in my cab with the patch panels not including the hours of labor. but then again, rust free isn't in our vocabulary around here... 
bottom line is that it sounds like a deal to me.... just my
bottom line is that it sounds like a deal to me.... just my

Started off by cleaning the gas tank - the thing is always in my way and it was just FILTY! Looked like they overfilled the rear axle, so the breather tube had blown gear lube all over the tank which had attracted loads of road grime.... hit it with the simple green, rubbed it down & hosed it off. No more dirty hands & shins!

Next I got to dropping the rear half of the frame down from under the body. Actually, I had intended to drop it completely, but it's hung up under the rear quarters - from the hit it took, the frame pretzel'd outward, and the quarters bent in & under, almost locking them together. Anyway, so I dropped the front end of the remaining frame so I could unbolt the fuel lines & brake lines. Brilliant design. I'm sure someone who knows these cars could've done it without - but how was escaping me & so...

Next I picked up the reciprocating saw & hacked out the driver's chunk of firewall - so I have all the holes to run the wires & computer thru. Again, I figure I can either weld these pieces in, or use them for templates, but since the body has to go, I'm taking what I *might* need later...

Next I turned my attention to getting some elbow room near the 63 itself - which meant I needed to move the engines. I'd sorta built a wooden engine stand for the 302 & figured I'd put casters under it so I could roll it around. Last trip to HF, they had little furniture dollies for $8, or the casters for $4 each. Hmm. I got two dollies for the price of 4 casters. Figured I'd use them if I could, and if not, just take the casters off & do my own thing. After seeing the guys on powerblock setting their dual cam Marauder engine flat on the floor on the oil/trans pans, I thought hmmm... now this isn't a permanent or long term solution, but gives me a little mobility this weekend:


I kept it hooked to the hoist in case it rocked off the dolly.
So I left the 4.6 sitting there & went to lift the 302 - and got this:

Bear in mind, before I pulled the 302/c4, I dropped the pan, drained it & wiped it clean, then put it back on, and when I pulled engine/trans, I tilted it up & drained the rest out the tail-shaft into a big plastic bin. I figured it was dry. Not so. I apparently had another quart or two of mystery ATF waiting to waste my time. Times like this it pays to have a cat & a supply of kitty litter. Cleaned up that mess & simple greened the floor - all good.
And the point of all of that? To get to this - I swear I could taste the frame sitting on the CV front end when the phone rang to tell me we were gonna be late for the party if I didn't get my a' in the shower. Oh well, today's another day!

Next I got to dropping the rear half of the frame down from under the body. Actually, I had intended to drop it completely, but it's hung up under the rear quarters - from the hit it took, the frame pretzel'd outward, and the quarters bent in & under, almost locking them together. Anyway, so I dropped the front end of the remaining frame so I could unbolt the fuel lines & brake lines. Brilliant design. I'm sure someone who knows these cars could've done it without - but how was escaping me & so...
Next I picked up the reciprocating saw & hacked out the driver's chunk of firewall - so I have all the holes to run the wires & computer thru. Again, I figure I can either weld these pieces in, or use them for templates, but since the body has to go, I'm taking what I *might* need later...
Next I turned my attention to getting some elbow room near the 63 itself - which meant I needed to move the engines. I'd sorta built a wooden engine stand for the 302 & figured I'd put casters under it so I could roll it around. Last trip to HF, they had little furniture dollies for $8, or the casters for $4 each. Hmm. I got two dollies for the price of 4 casters. Figured I'd use them if I could, and if not, just take the casters off & do my own thing. After seeing the guys on powerblock setting their dual cam Marauder engine flat on the floor on the oil/trans pans, I thought hmmm... now this isn't a permanent or long term solution, but gives me a little mobility this weekend:
I kept it hooked to the hoist in case it rocked off the dolly.
So I left the 4.6 sitting there & went to lift the 302 - and got this:
Bear in mind, before I pulled the 302/c4, I dropped the pan, drained it & wiped it clean, then put it back on, and when I pulled engine/trans, I tilted it up & drained the rest out the tail-shaft into a big plastic bin. I figured it was dry. Not so. I apparently had another quart or two of mystery ATF waiting to waste my time. Times like this it pays to have a cat & a supply of kitty litter. Cleaned up that mess & simple greened the floor - all good.
And the point of all of that? To get to this - I swear I could taste the frame sitting on the CV front end when the phone rang to tell me we were gonna be late for the party if I didn't get my a' in the shower. Oh well, today's another day!
-
Anthony
-
quietwyatt
- Posts: 513
- Joined: January 8, 2010, 3:56 am
- Location: york
Only got a few hours in the garage today - hotter that hades out there - spent the whole time sweating! Funny since most of the country is probably still cold, right?
So I managed to drop the frame down onto the front end. Sweet. Here's a pic:

I measured, and it should drop another 3 inches with the drive train & sheet metal back on it.
I bolted the frame back up under the body so I can get the carcass outta here soon, then started some exploring. A while back I was looking at the frame rails & realized that the rear of the lower arm bolted through the frame to an insert inside the frame. Most guys take the bracket off the lower arm & take it to a metal fabricator and have plates made to attach to the frame. I figured why pay to make something that's already here? Free works for me. So I had my way with the frame rail and a fresh blade in the sawsall...
Open Sesame:

Looky inside:

Here's the piece out to see - suspension (under) side

& frame (top) side

Here's the piece bolted up to the suspension with the piece of frame rail in between - as it would be.

And a close up:

Now what guys usually do is loosen the nut at the back of the control arm & rotate the bracket so this whole thing is parallel to the underside of the frame rail. I'm thinking that I can use '04 frame metal to box this piece up to the underside of the '63 frame rail - sandwiching the insert between the new bits & the stock rail. Your thoughts?
Oh yeah - fun stuff - more pics of the donor body I'll be getting this week:


Looks just a *little* more solid than the body I've got now....
So I managed to drop the frame down onto the front end. Sweet. Here's a pic:
I measured, and it should drop another 3 inches with the drive train & sheet metal back on it.
I bolted the frame back up under the body so I can get the carcass outta here soon, then started some exploring. A while back I was looking at the frame rails & realized that the rear of the lower arm bolted through the frame to an insert inside the frame. Most guys take the bracket off the lower arm & take it to a metal fabricator and have plates made to attach to the frame. I figured why pay to make something that's already here? Free works for me. So I had my way with the frame rail and a fresh blade in the sawsall...
Open Sesame:
Looky inside:
Here's the piece out to see - suspension (under) side
& frame (top) side
Here's the piece bolted up to the suspension with the piece of frame rail in between - as it would be.
And a close up:
Now what guys usually do is loosen the nut at the back of the control arm & rotate the bracket so this whole thing is parallel to the underside of the frame rail. I'm thinking that I can use '04 frame metal to box this piece up to the underside of the '63 frame rail - sandwiching the insert between the new bits & the stock rail. Your thoughts?
Oh yeah - fun stuff - more pics of the donor body I'll be getting this week:
Looks just a *little* more solid than the body I've got now....
-
64shortbed
- Posts: 291
- Joined: April 15, 2010, 12:25 am
- Location: Paso Robles, Ca
Yeah - I gues the PO (cop, maybe?) Had his daughter in the back seat... crayons, hairbands, little 25c toys from the candy machine. Thought the crayon might come in handy so it didn't hit the bin. Lol. Good eye!quietwyatt wrote:Is that a crayola I see laying on the frame?
Looking good. Lots of work ahead.
Wyatt
Thank you, sir!64shortbed wrote:I've enjoyed reading about your project tonight. You seem to be gifted with both mechanical and writting skills. Looking forward to see the finished product.
I inherited the gift of gab from my old man (when he let's me get a word in, LOL) and honed the writing skills @ UF.

-
ebentraywick
- Posts: 580
- Joined: November 22, 2009, 1:40 pm
- Location: ukiah ca