foodstick wrote:I bet he could build a nice stepside box with an old rolling dumpster, and a couple 55 gallon drums !
Comes from growing up dirt poor. When I was a kid in high school I would never have had anything if I didn't figure out a way to make it from something else.
Kinda like an old friend of mine used to say. He said "I've done so damn much for so damn long with so damn little I think I could do damn near anything with damn near nothin'.
Don't have patterns to sell. I used the old headliner pieces as patterns. They were in pretty bad shape and real brittle. Several of the corners broke off during the remake process. Actually though, I could make some patterns later as the new headliner will have to come back out for painting the inside of the cab. I'll keep that in mind. Yeah, I was disappointed in the dimpling of the chrome trim as well as all the screws holding the door panel trim on. Those were like that when I bought the truck and I plan on replacing them in the future. The chrome edge trim on the floor by the steps is damaged too and I've found a source for new ones. So, all of that will someday be new. your idea of some kind of backing behind the screws is a good one. I'll be doing that for sure. I got a bit worried while covering all the pieces thinking I was going to run out of fabric before everything was done so I went shopping for a small cubicle divider with matching material. Whoa, did I find out those are expensive. Average price for just a 2' by 4' section was $499. Luckily there was enough material to do what I needed. Close though, just scraps left. The one I found must have been an older one as it had 3/4" square steel tube for a frame. All the new stuff is plastic. I saved the tubing from the frame to make the support frame when I put a mustang tank under the bed.
Love those little square trucks
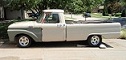
64 F100 short cust. cab
Custom built Harley FXSTC
2000 supercharged Bonneville
Wow! That looks really professional. No one would ever guess that that was nothing other than an upholstery shop job. Very cool, and crafty!! I love it!
For the door panels I used the original plastic ones and contact cemented the fabric directly on them. Here's a pic of a couple of tools that are real handy for sticking fabric to things. The wooden roller I got at Menards. It was in the section for laying tile. The other is just one of those bead rollers for rescreening aluminum windows. It worked perfectly for pushing the fabric into the slots on the door panels.
Love those little square trucks
64 F100 short cust. cab
Custom built Harley FXSTC
2000 supercharged Bonneville
Yippeeee!!! they threw out 3 more of those cubicle walls at work and I brought all three home.... with this great idea I am going to try and fix the Dodges interior..... Thanks for the creative idea!!!!
The armrests were left over from restoring a 62 Mercury Monterey I did years ago. They are the ones for the back doors. They mount with three screws and the front two line up with the original armrest mounting holes perfectly so I only had to drill one hole for each. The non fabric parts I just painted to match the interior. I have quit smoking so I'm giving thought to trying to convert the ash trays to cupholders. Right now the one on the drivers side is full of quarters for the car wash and newspaper machines.
By the way, if you are looking for paint to match the tan part of an interior like mine look for Krylon in the khaki color. I used it on my steering column too.
Oh yes, another thing I forgot to mention. When you strip material off those cubicle walls they may have a thin layer of foam on the back of the fabric. You will need to strip that off. It reacts to the contact cement, melts down and won't let the fabric stick to the masonite. It's too thin to be of much use anyway. My cab is soundproofed so I didn't need another layer of anything under the fabric. Also, I pulled the fabric around the edges of the masonite and used Gorilla tape to hold the excess to the back of the pieces. Gives them a nice finished and thicker look.
Now I have to consider doing another headliner for the 62 F350 tow truck I just bought. I'm going to run a want ad in the local paper saying I want to buy used cubicle walls to see if there are any more around. New ones are just too expensive. If not I will be shopping for fabric.
Looking forward to hearing how your interior goes Anthony.
Love those little square trucks
64 F100 short cust. cab
Custom built Harley FXSTC
2000 supercharged Bonneville

Comes from growing up dirt poor. When I was a kid in high school I would never have had anything if I didn't figure out a way to make it from something else.