Posted: April 7, 2009, 2:06 am
Page 2 of 7
Posted: April 7, 2009, 10:10 am
I'm gonna start removing the old floor this week. Gonna be a busy weekend but I hope to make some progress on the truck.DCarr wrote:,Jason.Tailgate to rollpan worked out well-feature line sets it off. When's the floor going in?
Posted: April 9, 2009, 7:44 pm
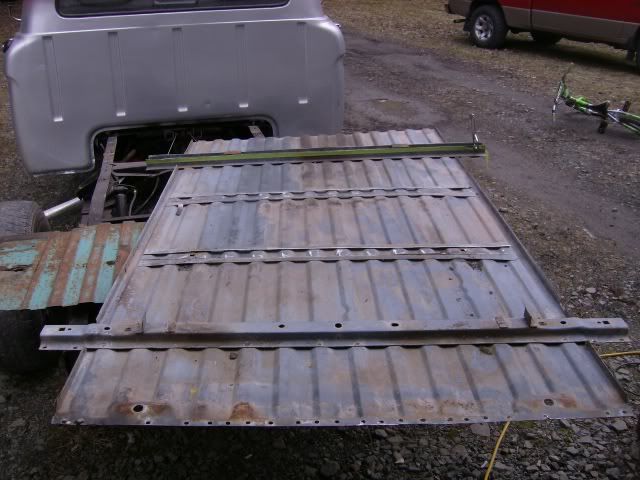
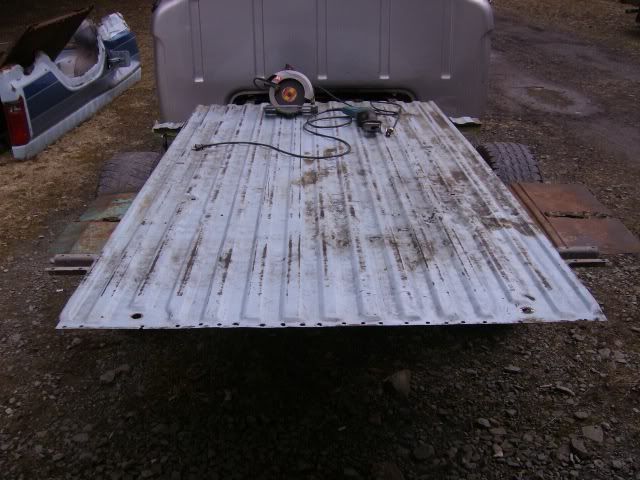
Today I removed most of the floor. While installing my first new crossmember I ran out of welding gas  so I decided to get some prep work done on the donor floor.

Posted: April 10, 2009, 10:31 pm
Did you drill the spotwelds,Jason? Or did you use another method?Thanks,David.
Posted: April 11, 2009, 3:26 pm
I left about 1" of the old floor at the perimeter to attach the new corner pieces. At the inside (center side) of the tubs I cut flush with the floor and added 2" strips to the back of the tubs to attach the new floor to. This will allow me extra space to leave the donor interior bed side flange attached. This saved me drilling out hundreds of spot welds.DCarr wrote:Did you drill the spotwelds,Jason? Or did you use another method?Thanks,David.
This is the x-member infront of the whell tubs. It is too tall for the slick so I cut it in half...........................
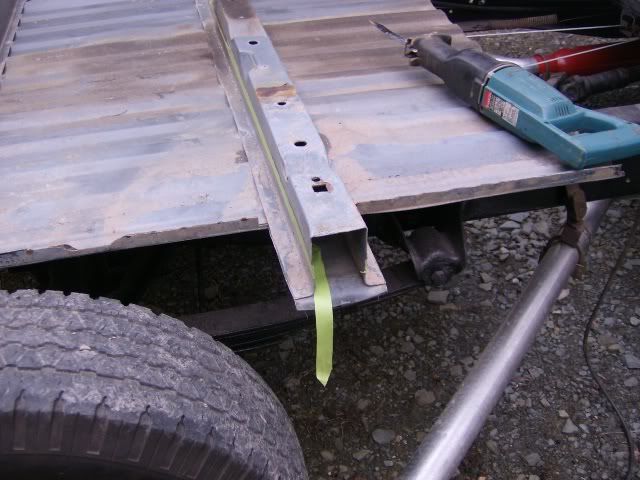
Flipped it over......................
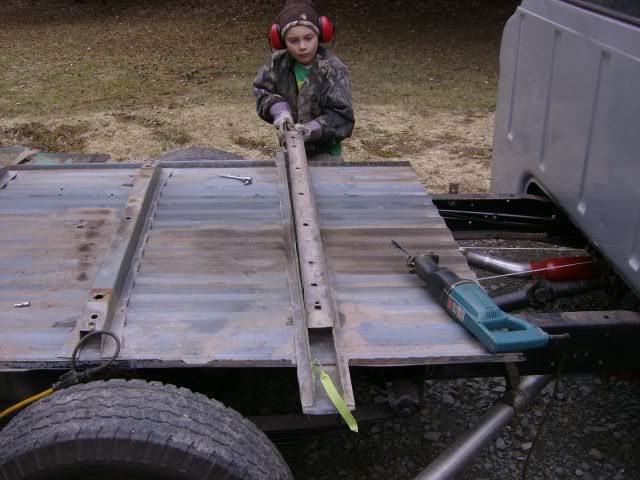
And pressed it into itself. I'll weld it along the edges and use some good old Henery Ford bed blocks.
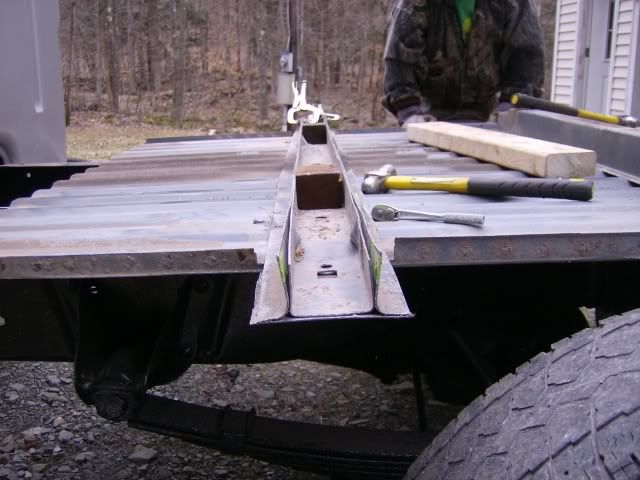
The two donor x-members between the wheel tubs are also too tall so I just cut them off and will install a different style.
It needs some cleaning for welding but she's pretty much ready to go in. That's my new favorite tool, a metal cutting blade on a circular saw..
Posted: April 11, 2009, 3:38 pm
I am impressed!! So you want to make a trip to Omaha? Bring plenty of Yuengling too and I'll pay for it, I have a grill. 
Posted: April 12, 2009, 7:09 am
Greg, You do realize if I brought "PLENTY" of Yuengling no work would get done... 
Posted: April 12, 2009, 8:26 am
Very nice. I wish I would have done mine that way. Maybe later I will after I have the official "how to replace your bed floor" manual from jwh f-100 publishing..  .. I'm looking forward to the finished pics.. Keep up the great work.. Anthony
Posted: April 12, 2009, 1:31 pm
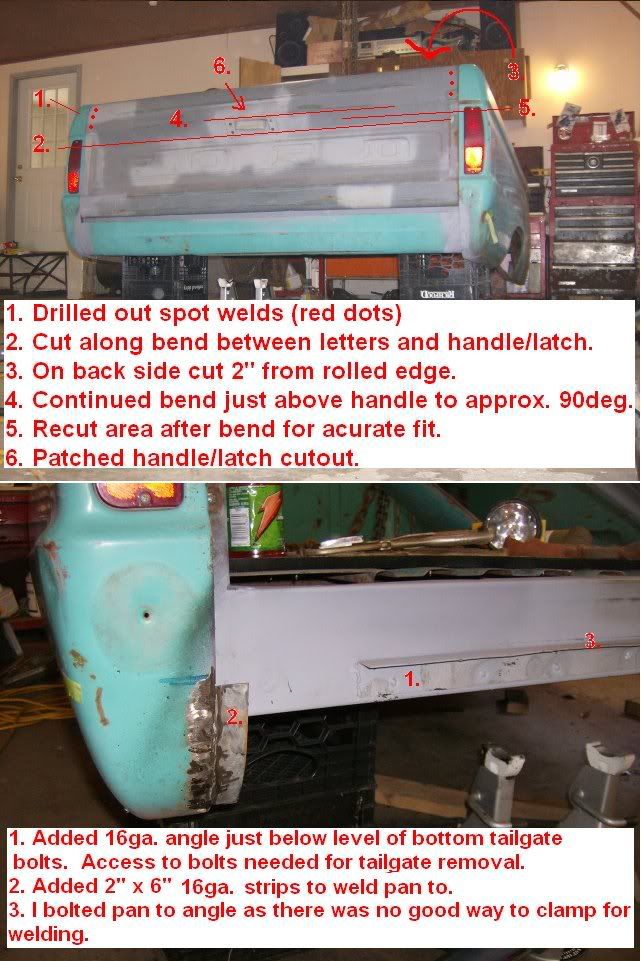
Wow!jwh f-100 wrote:crey, It is the top edge of the tailgate...crey wrote:Hey man, that roll pan looks killer!
Do you have any pics of what you did to get that on there?
What part of the gate did you cut to get that exact result?
Uhh... Thanks??!!??!!
I guess if I can't get that right, I have no business working on my truck.
Thanks much, that's friggin awesome!
Posted: April 19, 2009, 11:02 am
Posted: April 20, 2009, 4:15 pm
Installed the corner pieces infront of the wheel tubs and my fuel filler door. It needs a bit of finish work but I'm pleased with the results. For the rear corners on the floor I need to use the sheet metal break at work so they will need to wait.

I need to shift my tank a bit so my fuel filler doesn't hit a crossmeber. So I thought I'd take this oppourtunity to mount my tank correctly. Fabbed up the bracket now I need to drop the tank.

I need to shift my tank a bit so my fuel filler doesn't hit a crossmeber. So I thought I'd take this oppourtunity to mount my tank correctly. Fabbed up the bracket now I need to drop the tank.
Posted: April 20, 2009, 6:52 pm
Jason, you're doing a swell job with the metalwork so far! How is your fuel hose going to run to the tank?
Posted: April 20, 2009, 7:13 pm
Thanks!Max wrote:Jason, you're doing a swell job with the metalwork so far! How is your fuel hose going to run to the tank?
Gonna use this hose. [albumimg]2620[/albumimg]
I plan to use the '86 filler neck but not the "plastic bucket". To mount the neck I'm going to make two vertical cuts on the interior bed side then bend it out toward the door making a slanted plate to mount the neck to. After every thing is hooked up I'l just add some type of cover. Still trying to figure out the cover. I want something that will look like it should be there.
Posted: April 27, 2009, 6:04 am
I got my tank installed with the "Uncle Skip" bracket above. I should have done this the first time.

Geez, everthing is all dusty and scratched. Looking forward to get a final coat of paint on everything.

Geez, everthing is all dusty and scratched. Looking forward to get a final coat of paint on everything.
Posted: May 16, 2009, 6:55 pm
Got my fuel filler neck and cover installed today..
The "bucket" is the interior bed side after a couple cuts and a couple bends.


Now that my cover is installed I can weld in the last corner of the bed. I have one other small repair on the bed then I'll flip it over and apply some rust converter on the back of the bedsides and then coat every thing.
The "bucket" is the interior bed side after a couple cuts and a couple bends.
Now that my cover is installed I can weld in the last corner of the bed. I have one other small repair on the bed then I'll flip it over and apply some rust converter on the back of the bedsides and then coat every thing.
Posted: May 16, 2009, 9:18 pm
man, you do good work. keep it up!
Posted: May 22, 2009, 2:22 pm
I had a pretty good day in the garage. Last two corners of the floor are in..


Posted: May 22, 2009, 2:31 pm
is that a mustang tank and how many gals are they?
Posted: May 22, 2009, 2:36 pm
That one is a 16 but I think 16,18, and 22 are available.
Posted: May 22, 2009, 4:02 pm
but its a mustang tank or from what vehicle i should say