Page 4 of 11
Posted: September 27, 2010, 2:43 pm
by SixtySix Ford
I don't think it would be hard to raise the floor in these trucks and the floor of the bed....I think the hardest part would be the radiator support, grill and bumper. I do plan on trying this idea on my 66 so we'll see how it pans out!
Posted: September 27, 2010, 8:10 pm
by foodstick
I have been HAMMERING on the inside bed paint today ! Kid stopped by to see if I was getting to many paint fumes, and help me with a small inner rear wheel well fender project..
Well, I just went out and put the first coat on the front of the floor, I should be doing the second coat around 9:30, then I can do the first coat on the back floor, and maybe the second coat before midnight..that will be it for inside the box..except the suspension cover lid...
I decided not to go crazy with any putty work on the inner wheel wells, they are a little lumpy..not like when I bought it though..

Its time to start getting things done instead of never starting the PERFECT build, I am building a driver....It has sat to long !!!
might have some pics later tonight....
Posted: September 28, 2010, 11:09 pm
by foodstick
well in all its shiny, and a lil lumpy glory ! hahah

Posted: September 28, 2010, 11:42 pm
by rwhistles
Looks dang fine to me considering what you had to work with.Just keep it up.
Posted: September 29, 2010, 8:51 pm
by Kid
looks good. We need to spend some time in the garages this winter.
Posted: September 29, 2010, 9:40 pm
by ezernut9mm
i need to come up and learn things and stuff. lol. great work guys.
Posted: September 29, 2010, 10:12 pm
by foodstick
Maybe we can grab a dirty burger ...
Hey? wheres Corey?
Posted: October 2, 2010, 1:03 am
by BackyardRest
Greg D wrote:Watching your build has me considering stretching a Crn Vic frame and stuffing under my Uni.
I have an absolute CHERRY 87' Crown Vic if you are semi-serious....
Perfect running and driving car too. Arizona Choice undercarriage...
Posted: October 5, 2010, 7:34 pm
by foodstick
Posted: October 5, 2010, 9:16 pm
by MadMaxetc
I don't remember Bubbles being at SSI!?!?
Posted: October 5, 2010, 9:28 pm
by foodstick
Oh yeah ! he was there !
He recently designed these rubber splash shields for the rear of my truck. I was planning on adding them to the rear inner wheel wells.. And when I spotted a brand new mudflap laying at the gas station, EUREKA ! someone had donated the materials !


Posted: October 6, 2010, 11:01 pm
by foodstick
Couple more pics with the tank/suspension hood back on..


Posted: October 6, 2010, 11:02 pm
by foodstick
Also here is the modified heater box (with inlayed hubcap) thought I would see how it looks up under the dash..

Posted: October 7, 2010, 8:12 pm
by rickairmedic
That looks pretty um " Slick " there Lance

.
Rick
Posted: October 22, 2010, 5:39 pm
by foodstick
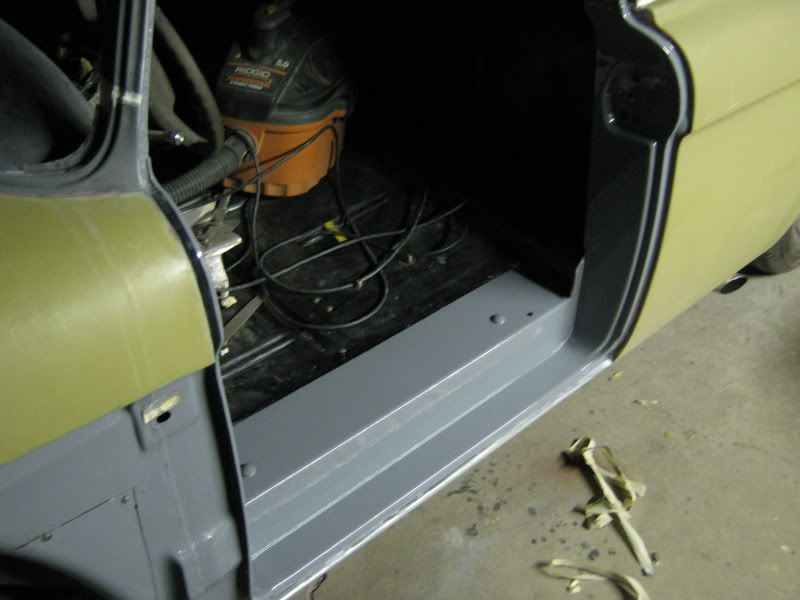
Well after off and on work for quite awhile sanding, cleaning,puttying,caulking I started painting the door jambs on the ole LTD uni today.. One coat on so far ( POR 15 of course )

Gonna try to make it tough in those jambs, not show car worthy , hahah
Anyhow, need paint brushs, and a few supplies before the second coat is ready ! off to Home depot...
Posted: October 22, 2010, 6:52 pm
by randyr
foodstick wrote:maybe some cheering up ? I need it after looking at old pics...

Ahhh on the road back !

Hey Foodstick, did you buy a replacement end cap or refab the old one? Do you have any more pics of this part of your project?
Awesome truck! Your project is not for the faint of heart, tho! LOL!
Posted: October 22, 2010, 8:03 pm
by foodstick
These were old parts, off a long bed..didn't line up right for a short bed..
Skip was correct above...cut your old corner skin off so you can drill the spot welds from the outside..remove no more metal than needed when drilling spot welds..
Your donor parts ( if they are off a truck) not new...can be cut ahead of the seam, and drilled from the front or (inside) ..I would slowly take the old stuff off..kind of see how it fits. then figure out the best easiest way to prep the new parts..lots of test fitting..and you will want the gate on for at least some of the realignment and welding..to keep it correct.
Yeah, I look back at my old pics and forget how rough it was.
Oh yeah, somewhere in hints and tricks is a quarter panel job Kid and I did, it is almost the exact one you will need to do..some good pics for you.
I have a corrupt disc with more pics..but it isn't cooperating I am afraid.

Posted: October 22, 2010, 8:09 pm
by foodstick
Anyhow as to old beater.. i HAVE SOME UPDATED PICS !
They even make me smile
I am not sure if I have mentioned this in the thread above, but I am going white over grey on the finished truck. So that way I can use lots of por for the durability of the box,engine area, and door jambs.. This truck is not gonna be a garage queen ..not enough garage !!

Posted: October 22, 2010, 8:12 pm
by randyr
foodstick wrote:These were old parts, off a long bed..didn't line up right for a short bed..
Skip was correct above...cut your old corner skin off so you can drill the spot welds from the outside..remove no more metal than needed when drilling spot welds..
Your donor parts ( if they are off a truck) not new...can be cut ahead of the seam, and drilled from the front or (inside) ..I would slowly take the old stuff off..kind of see how it fits. then figure out the best easiest way to prep the new parts..lots of test fitting..and you will want the gate on for at least some of the realignment and welding..to keep it correct.
Yeah, I look back at my old pics and forget how rough it was.
Oh yeah, somewhere in hints and tricks is a quarter panel job Kid and I did, it is almost the exact one you will need to do..some good pics for you.
I have a corrupt disc with more pics..but it isn't cooperating I am afraid.
Thanks Foodstick! That's good info. Too bad about the corrupt disc

Posted: November 15, 2010, 9:09 pm
by fire truck
random question time... can you measure the distance from the top of the valve cover to the top of the cowl please?
