I love it Foodstick!!!
Ltd Uni project , 62 short..on a 87 crown vic (Ltd)
A man like myself.... pick the worst thing you can find and spend years pouring love and personality into it.... I'm glad I am not the only one starting with the proverbial "hopeless case"!!!!
I love it Foodstick!!! a lot of people that I know just don't get it.... but I love the idea of getting something that nobody thought was doable and bringing it back to life..... with time and patience, anything is possible.... Keep those pics rolling in, I am enjoying seeing the progression of your Uni.....
I love it Foodstick!!!


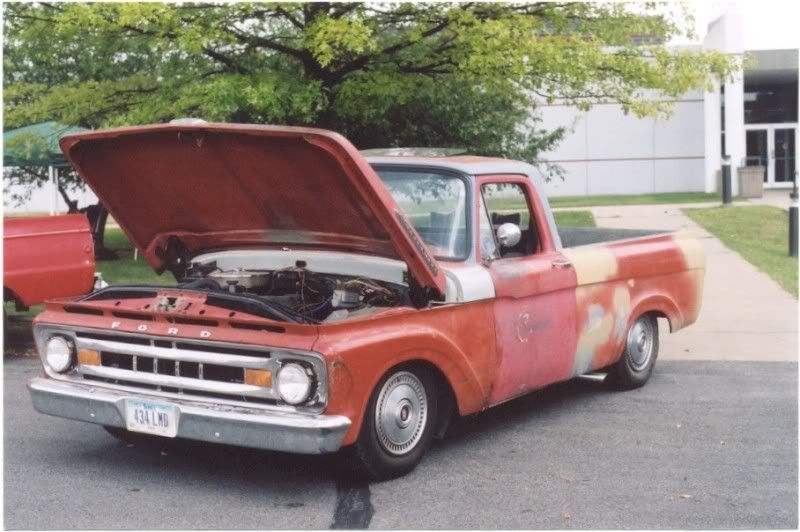
You know whats the funny thing? I found this truck earlier on in the club years, and there are so few uni's around here..and I had only seen a couple rough ones..I truly believed this was a great truck to start with, Little did I realize there were still so many better ones a couple days drive away..I would have been better off going that route..but I am what I am I suppose 
I remember the weekend we went and brought that home. We waited out an ice storm here on Saturday and went and got it on Sunday, heck all of our roadtrips have been memorable. The truck looks great in pics but if you seen it from the beginning it is amazing how it is coming along. The truck is sweet to drive also, corners like a car and rides like a dream.
-
rickairmedic
- Posts: 1394
- Joined: July 19, 2006, 9:27 pm
- Location: Louisville,Ky

-
SixtySix Ford

- Posts: 58
- Joined: September 7, 2010, 11:37 pm
- Location: Denver Co.

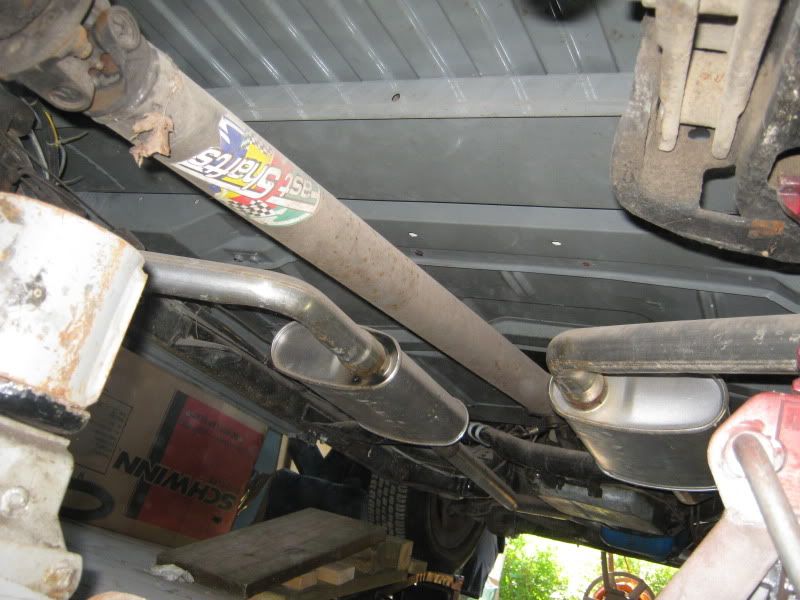
I snubbed the frame, and welded on a big plate each side..this gave me area to WORK OUT where I would need to put a mount for the radiator support.. I wasn't sure exactly where I would be until I hung the front end on, and crawled under to locate the mount area. After I was done the large square plates were not in the way of anything so I left them alone...

Also I mounted the radiator to the plates on the bottom, this let me remove and install the front end ..A LOT for test fitting and things without unhooking the radiator..it can stay on the vehicle without the rad support. the radiator does bolt to the support at the top..with sme short bars..it could have been done a little fancier, but works well.


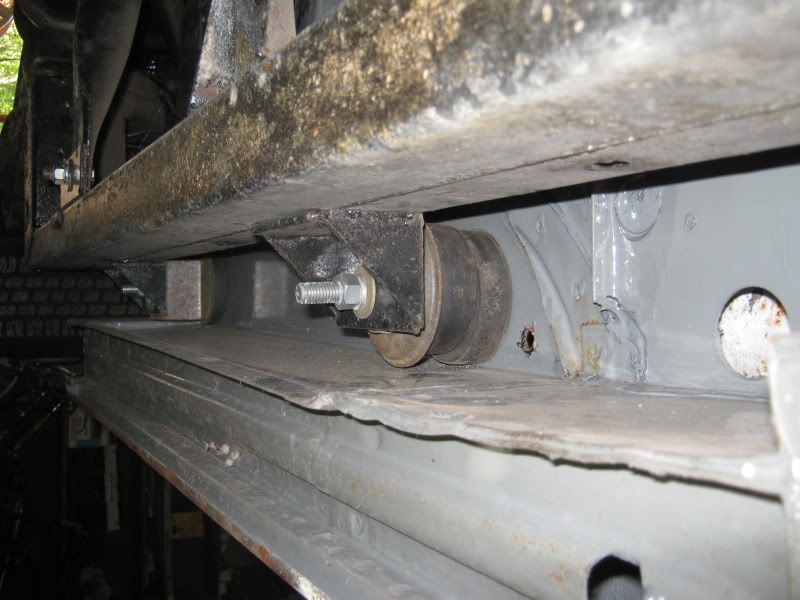
here you can see a bodymount in front of the rear wheel, there is also one behind the rear wheel, but further back...

On the back of the frame where I snubbed it off I welded a plate on, with 2 large nuts welded inside...That way I have hard points to mount a bumper, with no need to put a wrench on the backside...I HATES doing that !


On the back of the frame where I snubbed it off I welded a plate on, with 2 large nuts welded inside...That way I have hard points to mount a bumper, with no need to put a wrench on the backside...I HATES doing that !
Here you can see the room between the frame and the traditional cab mounting area..it almost looks funny hanging open like that, With the splash pans in it not only looks pretty stock, But I have the pans trimmed to sit down nice and clean over the ltd front suspension.
I think I have ten body mounts in total..prolly overkill,but it makes it corner stiff tying that frame to the solid unibody...
sorry the pic is sideways..

I think I have ten body mounts in total..prolly overkill,but it makes it corner stiff tying that frame to the solid unibody...
sorry the pic is sideways..
Last edited by foodstick on December 28, 2010, 1:22 pm, edited 1 time in total.
A couple shots underneath...
I wish I had gone all out on the LTD frame sometimes, but the year was ending quick and it got a real quick wire wheel, and por paint job, Personally I think the por is ten times better if you don't leave rust underneath. My frame was kinda rough, it had been an unmarked cop car and it looked like it had been driven across everything BUT roads...
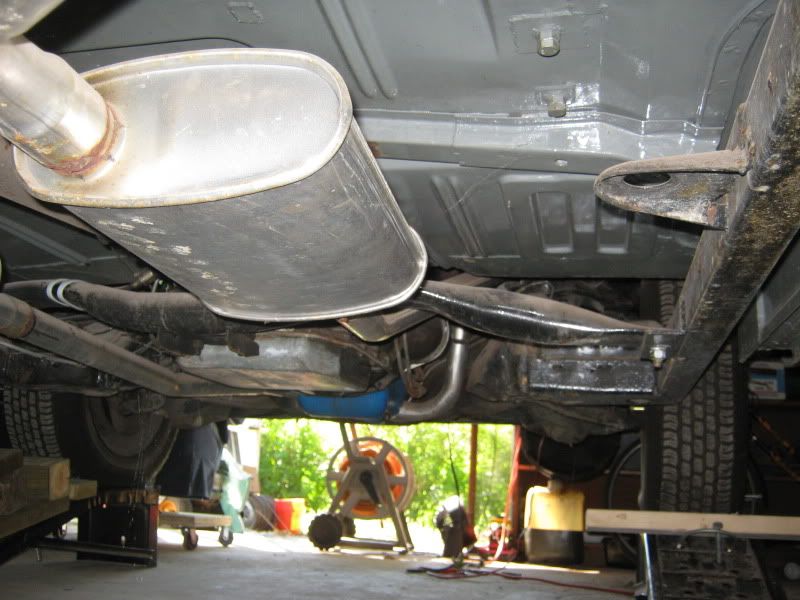
I didn't use the LTD stock bodymount in the above shot..it could have been maybe..but there were better places to build mounts. I didn't cut the tab off however,,as you can see its not like it was in the way of anything..Besides it might make a good spot to hide the last can in the cooler ..at future slickstock events !
I wish I had gone all out on the LTD frame sometimes, but the year was ending quick and it got a real quick wire wheel, and por paint job, Personally I think the por is ten times better if you don't leave rust underneath. My frame was kinda rough, it had been an unmarked cop car and it looked like it had been driven across everything BUT roads...
I didn't use the LTD stock bodymount in the above shot..it could have been maybe..but there were better places to build mounts. I didn't cut the tab off however,,as you can see its not like it was in the way of anything..Besides it might make a good spot to hide the last can in the cooler ..at future slickstock events !
-
SixtySix Ford
- Posts: 58
- Joined: September 7, 2010, 11:37 pm
- Location: Denver Co.
I agree! I would like to see more shots of how it sits and assembly shots tooAnthony wrote:did I miss the pick of it all assembled and driving??? I was hoping to see the stance the LTD gave to her.....
"Nitrous is like hot girl with STD's. You know you wanna hit it, but your afraid of the consequences."
66 Ford F-100 - Project SickUp
66 Ford F-100 - Project SickUp
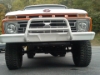
That radiator & core support mounting just begs to become a tilt front end. 
1964 F 100 - I am going to do "something" with it.......
viewtopic.php?f=32&t=15942
1987 Mustang LX Convertible, 2.3 Auto - cruiser.
1994 F 150 XLT 2WD
~ Yes - I adopted another cat..............
Cam L Milan,
You'll be missed my friend.
viewtopic.php?f=32&t=15942
1987 Mustang LX Convertible, 2.3 Auto - cruiser.
1994 F 150 XLT 2WD
~ Yes - I adopted another cat..............
Cam L Milan,
You'll be missed my friend.