Page 1 of 20
PFM's 65 Crew Cab F250
Posted: July 22, 2009, 3:00 pm
by PFM-64f100
I figured it was time to do my own thread for my 65 Crew Cab build, I do like reading others folks threads and
seeing there process.
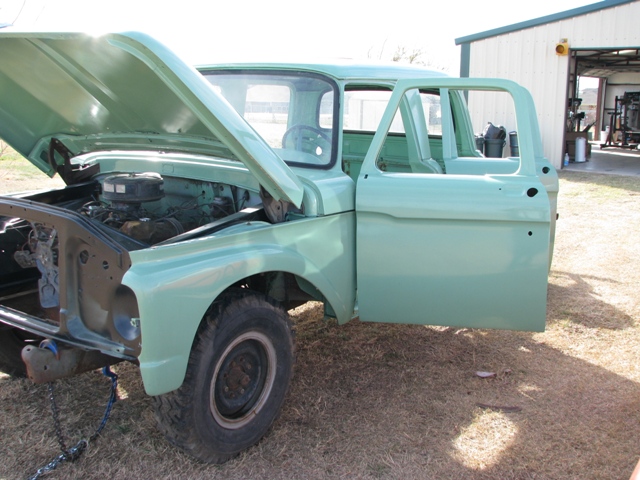
It all started back one day in November 2008, I was looking around on Craig’s and found this 65 F250 Crew Cab for sale. Off went a quick email (I thought I was to late the ad had been up for 2 days already) and got a response. Later that week I was sending a deposit for the truck and the guy even delivered from CT to TX for an additional fee. For him to deliver was cheaper then I could do it or have it done so it all worked out.
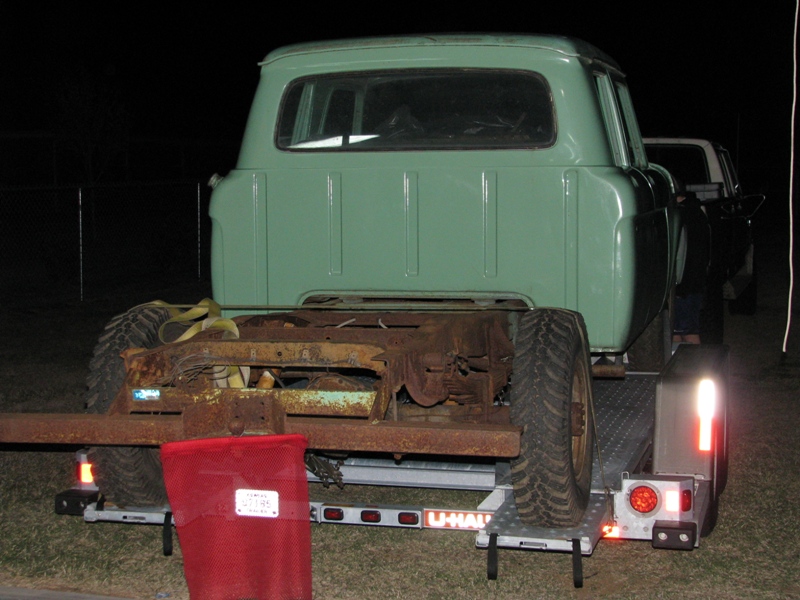
On November 30, 2008 about 11:45 pm he drives into my drive way with the crew on a U-Haul Trailer. The truck was a little to long for the trailer so he just used the ramps and an Extension of the trailer. It looks like something I would have done also but hey it made it.
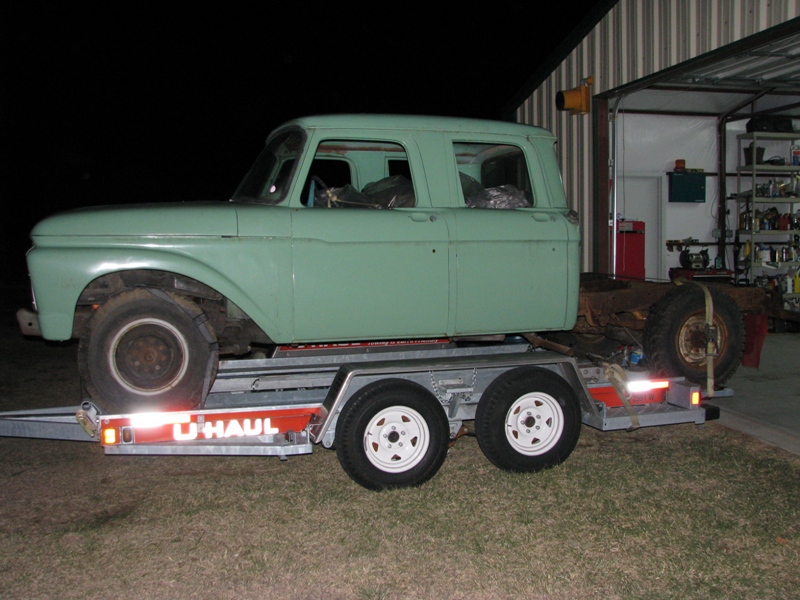
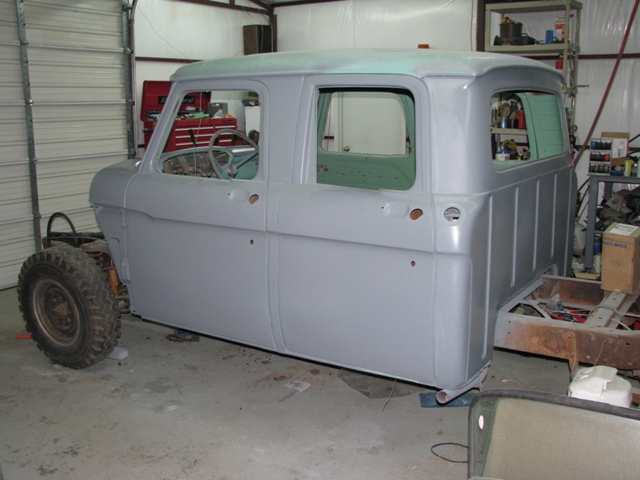
It came with no Bed but that was ok I have an extra one sitting out back. The paint job was done by a Tech school and they did an ok job but there were little bits of rust starting under all the paint. It looks like to me they didn’t prep it to good or they just painted over surface rust. Long story short this thing needs to be taken back to bare metal and repainted. That is what I am doing.
And for anyone wanting to look at more pictures this is my link to the Crew Cab page tons of pictures out there.
http://www.purpleflyingmonkey.com/CrewCab/index.html
Posted: July 22, 2009, 3:00 pm
by PFM-64f100
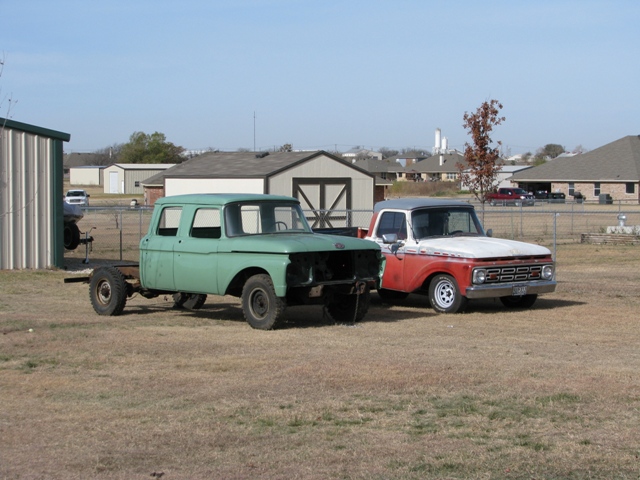
The first thing I needed to do was give her a bath. She had been sitting outside some but mostly stored inside. There was tree sap and just plain dirty after that long trip. So I used the starter to move it in and out of the shop. The 352 engine needed the carb rebuilt in order to run and I just didn’t even try to fire it up plus no radiator. I had to put both my trucks side be side and get some pics...
She cleaned up decent and now it was time to start taking it apart. After all I am taking it back down to bare metal.
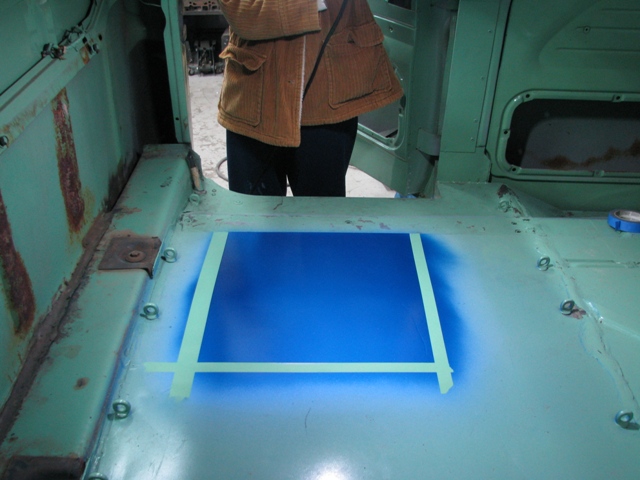
First I wanted to see what color I wanted so I painted a test patch. “Bright Atlantic blue” is what I had around and I like that color.
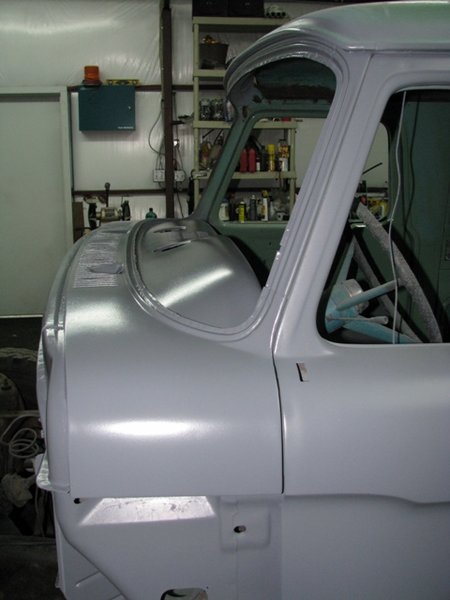
Next I started stripping paint there sure is a lot of surface area to this truck. Of course I removed the glass and front clip before stripping the paint just to make it easier.
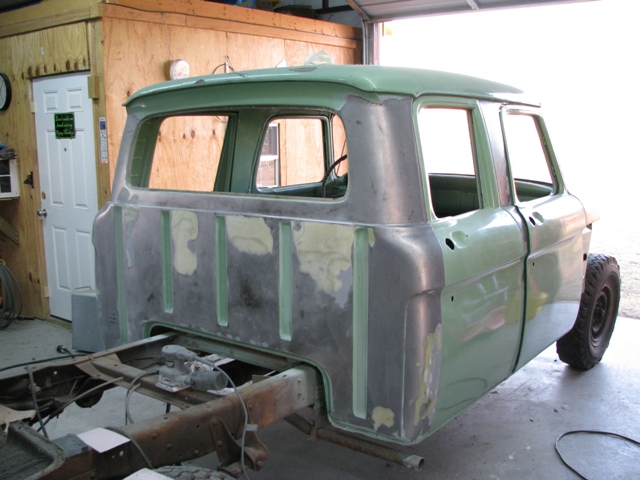
One side at a time I took my time and shook my head every time I would see the small rust fly with the sander. The good thing is it didn’t hurt the metal and was just surface rust, but it could have been worse in a couple years.
Posted: July 22, 2009, 3:01 pm
by PFM-64f100
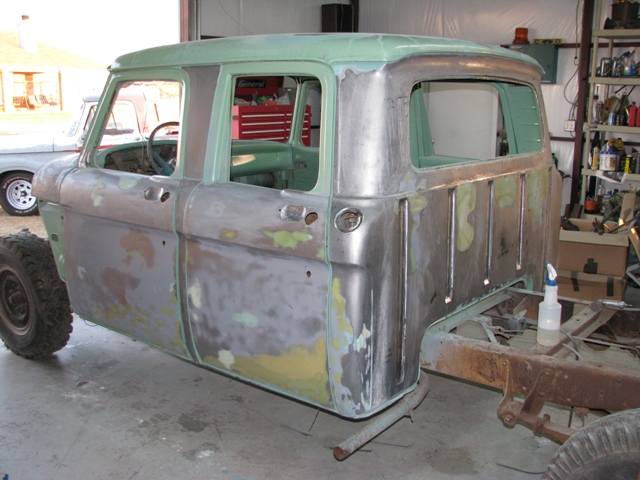
The PPG Epoxy primer works very well and is easy to spray just follow the mixing instructions and don’t listen to your buddy that says you have to add thinner to everything… geee paint has changed in the 20+ years since that buddy painted aircraft. Slow work on the paint stripping but it’s getting there.
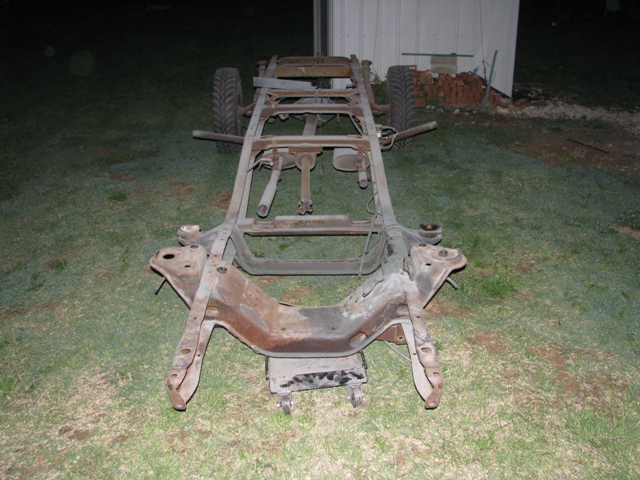
In March I was looking for a mid 70’s parts truck so I could grab the front suspension, disc brakes and power steering. I found that truck on Craig’s list for $400. The truck even had a 351c motor in it. The motor was locked up but that’s ok I sold it at the pate swap meet in April.
More paint stripping I got some help from another buddy out of OK he hooked me up with some plastic disc with little fingers all over it that they use to strip aircraft with. These little disc work out great they take the paint off and leave the metal. It even takes off rust, you have to work at it a little longer but that’s ok. He’s a great buddy and a very nice person.
This is what it looks like after using those disc. A heck of lot better than sandpaper.

Epoxy goes on smooth with a good smooth surface.
Posted: July 22, 2009, 3:01 pm
by PFM-64f100
Posted: July 22, 2009, 3:01 pm
by PFM-64f100
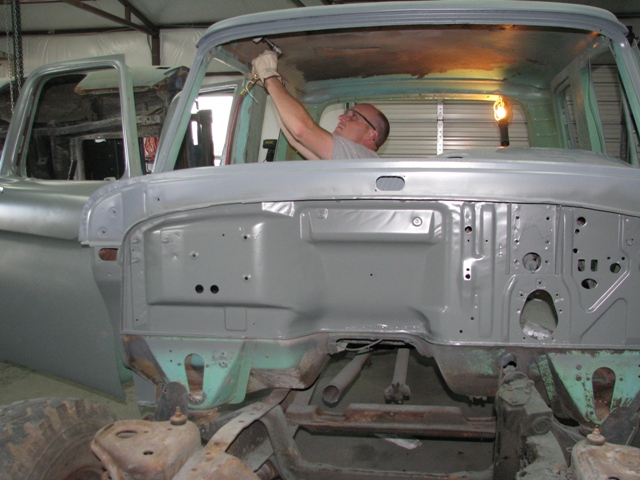
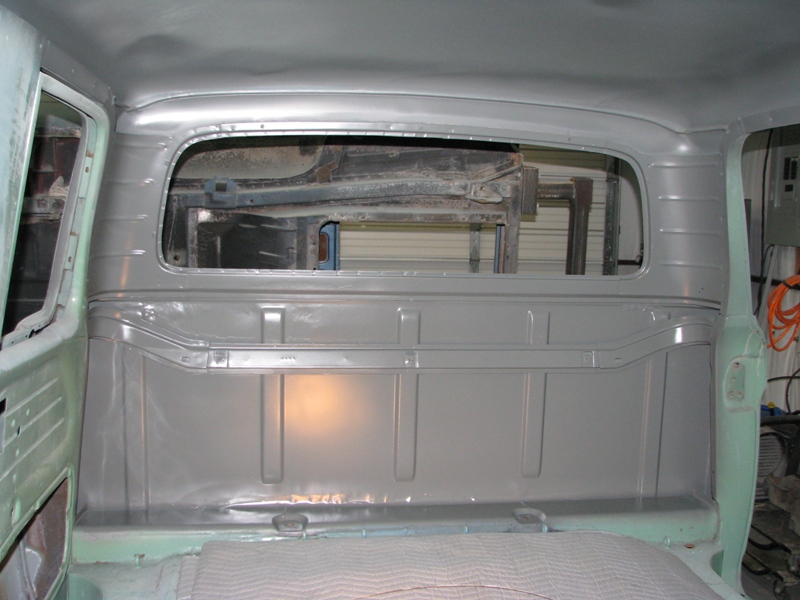
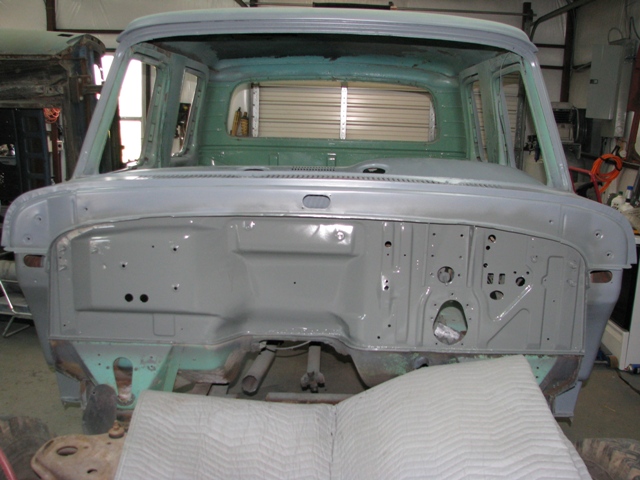
Next I removed the rest of the stuff from the dash lots of little parts and of course removed the old tired wire harness that had been hacked to death. Removed the pedal assembly and even the wiper motor, sanding under the dash was not fun but it two got done. I have pictures up for some of the removal but that’s where they stop for now. I need to update the web page to show how it looked inside the cab floor before and after.
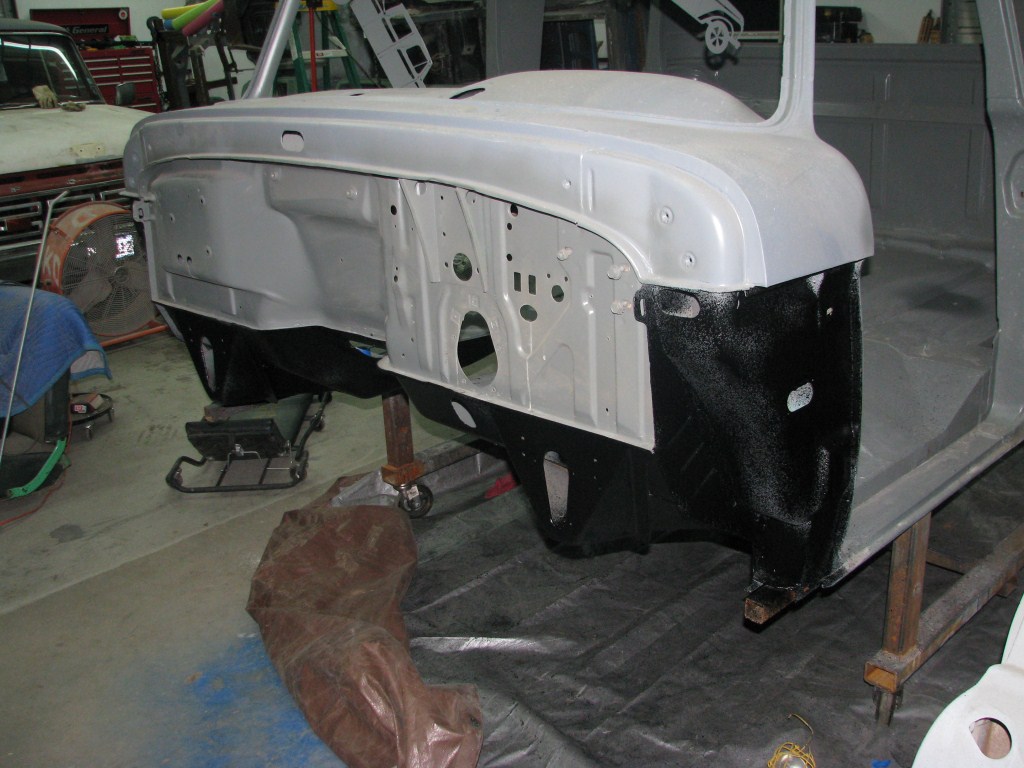
My current status as of July 22 2009 is all but the very top and bottom of the cab is in epoxy primer. I still need to find the 351 FI engine that I will run in the truck so I can get it mocked up on the frame and get the frame down to the powder coaters. I also need to fix the back part of the frame and build it’s bumper. The frame had a small amount of damage because of the bumper, looks like they backed into something and it just bent some of the metal but nothing I can’t fix.
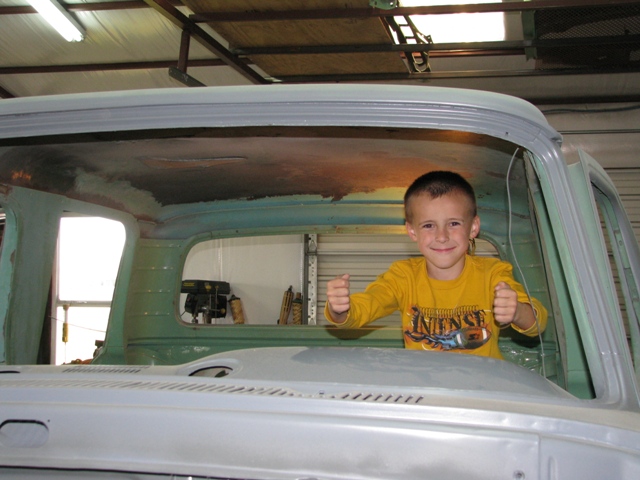
I will end this section with the following picture. This is the current picture on the truck. Look for more updates as I make progress. My plan is to drive this Crew Cab to Slick Stock 4….. August 2010…

Posted: July 22, 2009, 3:09 pm
by dotcentral
Chris, good start. your really making some progress.
Posted: July 22, 2009, 3:11 pm
by Greg D
Nice Job Chris! Looking great!
P.S. (I still like the Green).
Posted: July 22, 2009, 3:34 pm
by AdmiralGregor
Awesome job!. Can't wait to follow your build
Posted: July 22, 2009, 3:54 pm
by thenephilm
sweet truck..i want a crew cab lol
Posted: July 22, 2009, 5:24 pm
by jwh f-100
Looks great Chris!!!!
What power plant you gonna use?? Staying with the 250 chassis???
Posted: July 22, 2009, 5:48 pm
by cavinandpavin
looksl ike it was a pretty strait truck under there, good find and nice build i like the blue, looks alot like the ford twilight blue metalic they used on trucks in the late 80s and 90s
Posted: July 22, 2009, 6:15 pm
by Gritsngumbo
Chris: Looks like you're making good progress. You could have turned the cab over on it's top to sand under the roof

, then you'd have been reaching down and your back would hurt.
Here's a link to purchase the the Roloc Bristle discs you are using. After seeing yours during Slick Stock South during Pate, I located these and bought the $59.99 kit which includes two of each grade.
http://www.sculpt.com/catalog_98/abrasi ... ishing.htm
Haven't used mine yet as my little compressor won't keep. Should have my new big(ger) one next week.
Posted: July 23, 2009, 8:22 am
by PFM-64f100
jwh f-100 wrote:Looks great Chris!!!!
What power plant you gonna use?? Staying with the 250 chassis???
I plan on using a 351FI for a power plant. I would love to find a 351 lightning motor with E40D tranny but knowing my luck I will find one and it will be to expensive to buy.

I will find a 351fi with e40d tranny might not be the supercharged lightning motor but it will be a 351...
I am staying with the F250 Chassis, the 77 donar truck was a F250.
Greg D I know you like the green but it must go it just doesn't fit me...
Grits thanks for the link to the Roloc discs I am about out of my stock pile so I will have to buy more for the rest of the sheet metal.
cavinadpavin - that blue is actually a mid 90's metalic blue from a mustang, I allways like that blue.

Posted: July 23, 2009, 8:31 am
by Max
Awesome progress neighbor! That is going to be one cool, blue truck when it's finished! Can't wait to see it come back together. I plan on continuing a major push on mine from now until Pate.
crew
Posted: July 23, 2009, 10:35 am
by Truckrat
She's real fine lookin' Chris! Gonna be one big ol bitchin Slick goin' down that highway next year. That good buddy that you know in Oklahoma got any more of those little bristle wheels? You ought to hit him up. Like you, being green, especially that color of green is just not my cup o' tea either. I have a color picked out for the wrongbed, so check it out when you can. It'll blind ya! You have a big ol job ahead of you to get that big girl ready. Keep the pics coming, Pal. TR
Posted: July 23, 2009, 10:01 pm
by twistedfreak
looking awesome man like the progress im in the same boat as you and if possible send m that link to the rolocs im in need and smyth is 30 for 20 of the little suckers so its interesting on the price difference or if i can get them in bulk and save a few pennies
Posted: July 24, 2009, 7:52 am
by PFM-64f100
twistedfreak wrote:looking awesome man like the progress im in the same boat as you and if possible send m that link to the rolocs im in need and smyth is 30 for 20 of the little suckers so its interesting on the price difference or if i can get them in bulk and save a few pennies
Grits had the link in his post but here it is again..
http://www.sculpt.com/catalog_98/abrasives/3m_finishing.htm
Posted: September 21, 2009, 8:13 am
by PFM-64f100
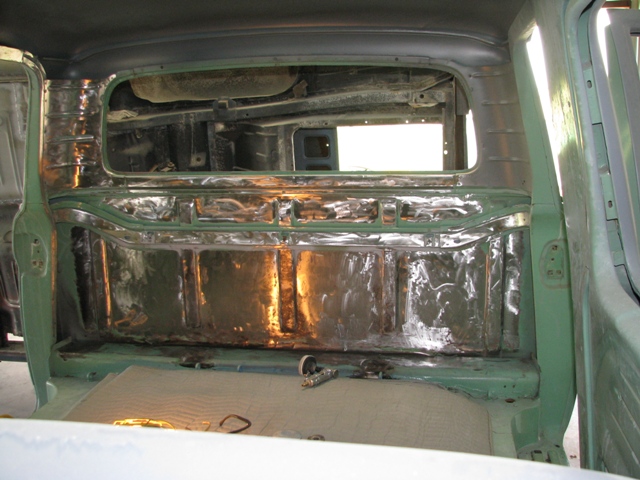
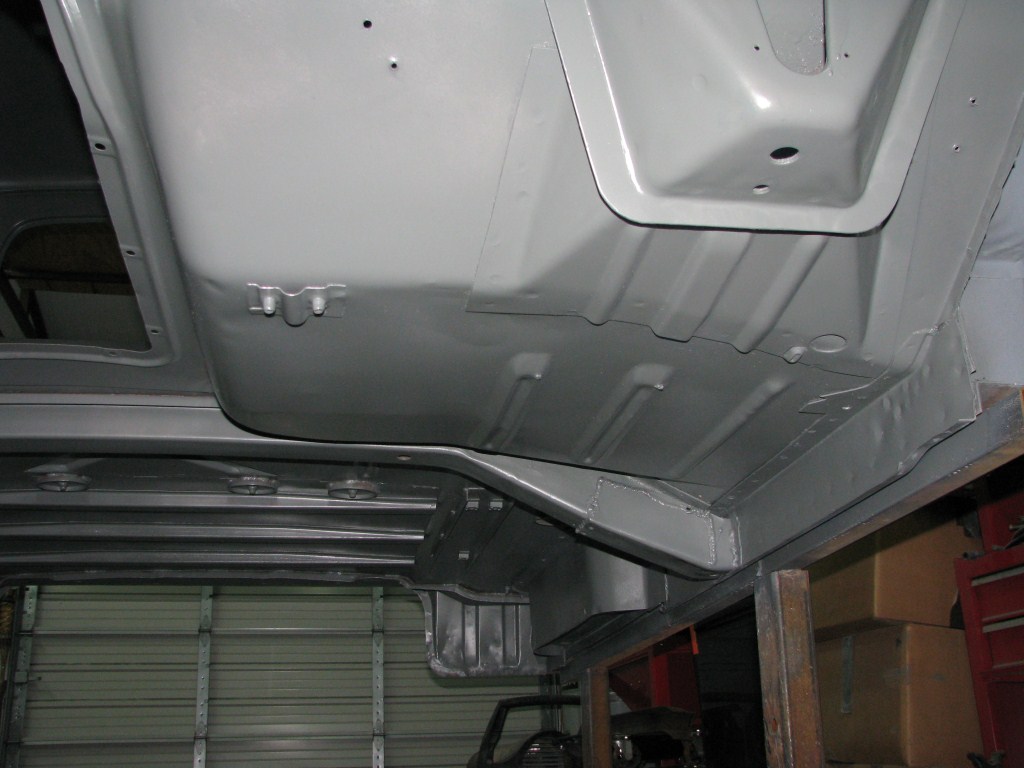
Update time for the Crew. The under side has taken longer than I expected to finish but it 97% done now.
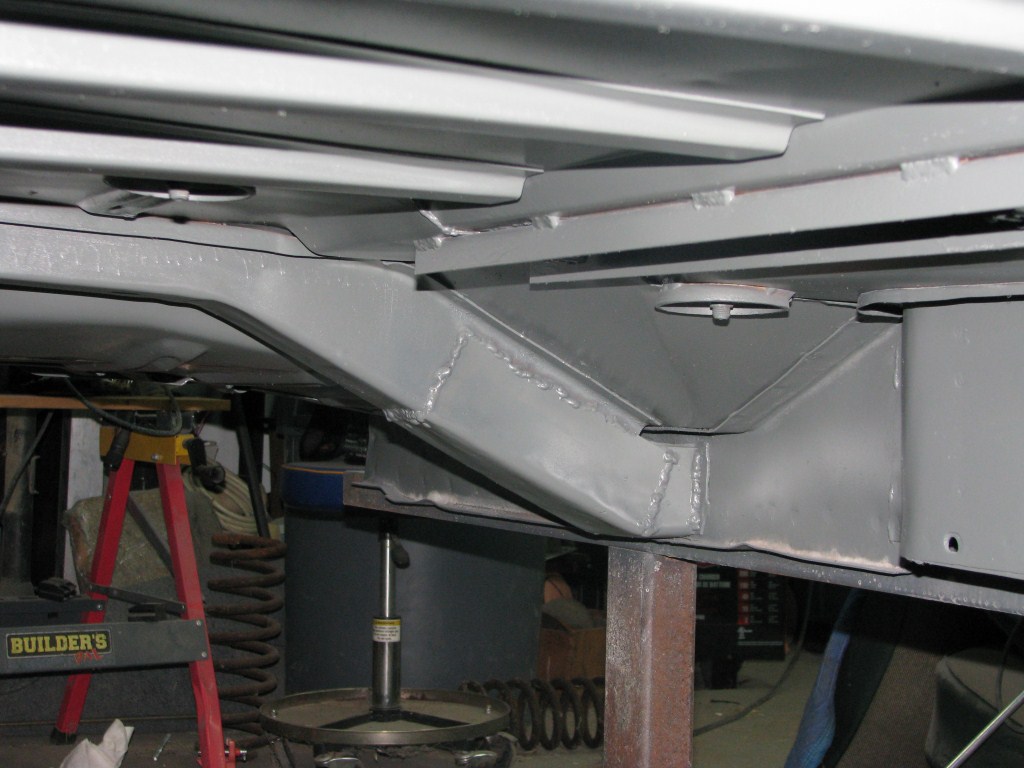
I stripped the paint/rust off the under side of the cab. This did take a while to do. I found about 10 lb of New Mexico/West Texas red dirt on the under side. It turns out that the main cross memeber had dirt pancked inside it thus causing some rusting. I cut out the bad stuff and made a patch along with getting all this dirt out.
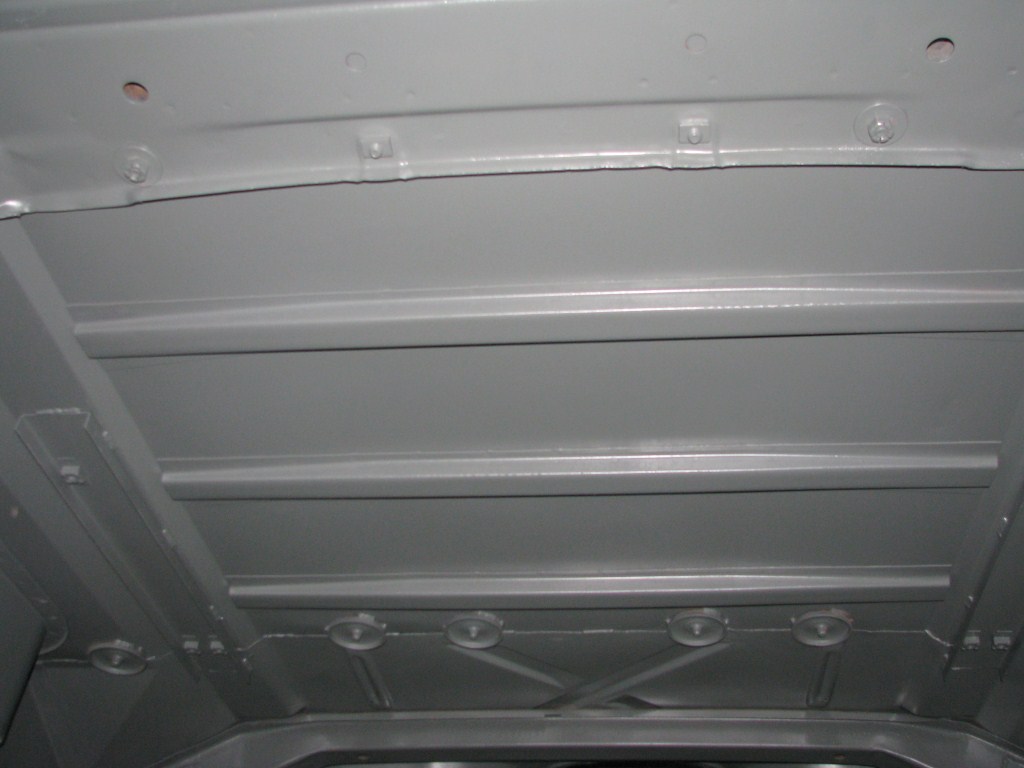
I also found dirt in the back cross bars, I thought I would never get it all out but finally did.
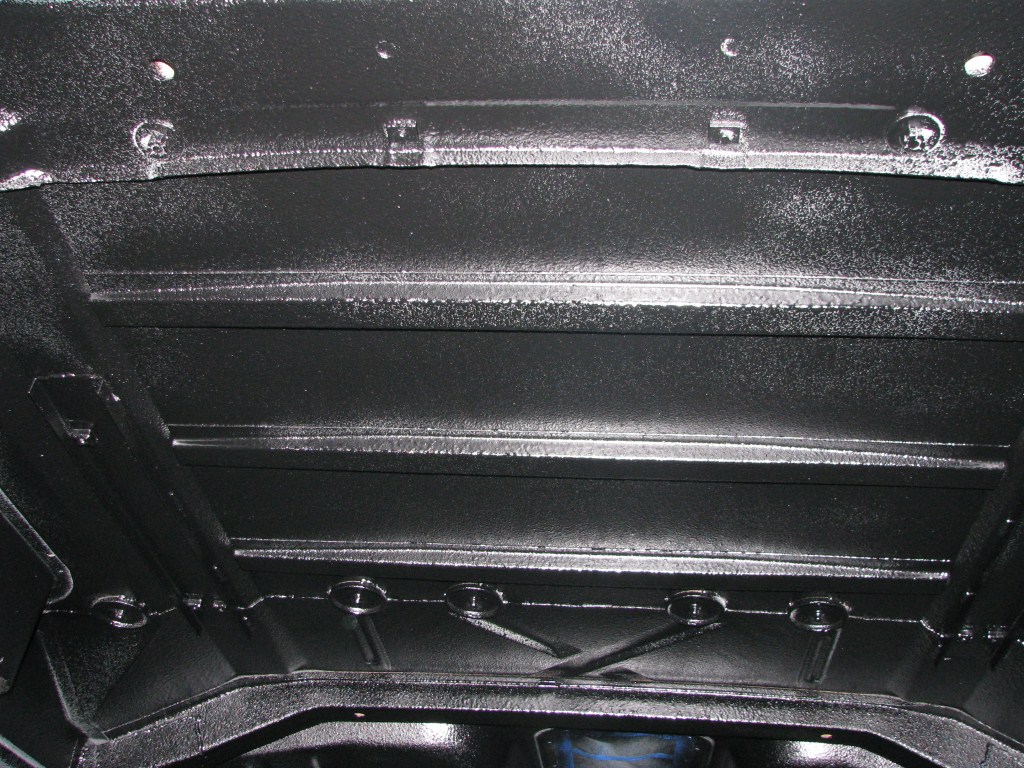
The underside in expoy primer...
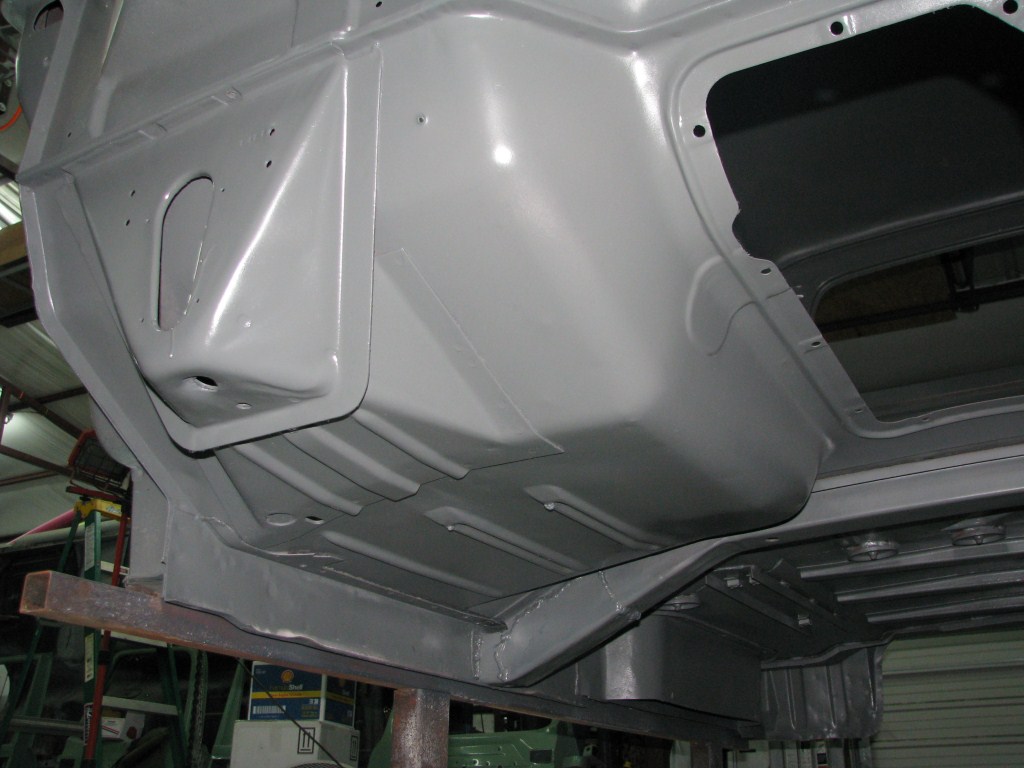
The rear cross bars I was talking about.
My Patch for the main cross bar. Yes I did drill a drain hole because the factory one got covered up.
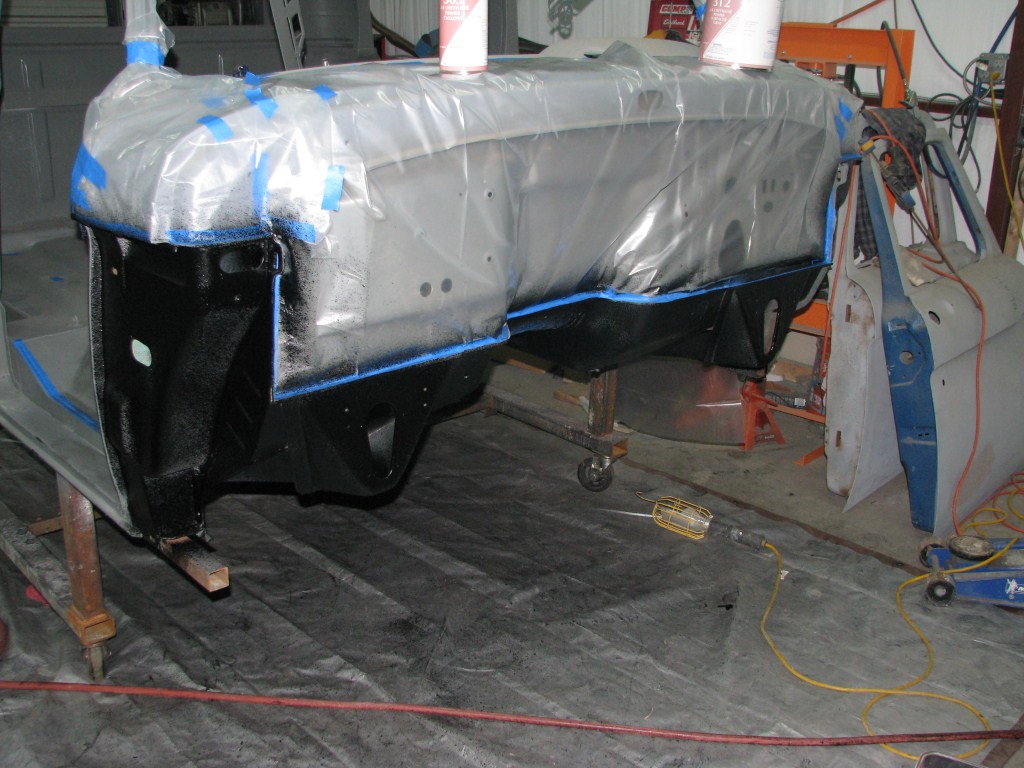
Now for the undercoating. I used the Beliner kit from SPI ]
http://www.southernpolyurethanes.com. It only cost about $133 for a one gallon kit plus had to buy the gun at about $40. This is the first bed linner kit I have ever done and it was failry easy. The gun was easy to use and mixing/spray was easy to. I didn't get the gun adjusted right the first time so it was spraying a lot of product but still covered very good and fast. Also If I haddn't dropped my drop light I could of seen better under there and not had all the lightly sprayed area's. Not to mention where I got some spots a little thick.
I will have to mix up one more can of this and get the small area's that didn't get a good coat (you can see in the pictures the small area's). Other than that I like this stuff. And yes masking is a must this stuff is sticky. I did have a couple little area's that I forgot to mask off so I will have to sand out the over spray but it was all inside the cab. Live and learn that's what it's all about.


Posted: September 21, 2009, 10:37 am
by Greg D
Looking good Chris!
Posted: September 21, 2009, 9:22 pm
by twistedfreak
looks great