
my '66 stepside upgrade

sorry guys, after I posted the pics, I had to leave and didn't get back until really late last night.
LOL, yeah I guess my idea of cold and yours are entirely two different things! I don't think I could handle your kind of cold.ICEMAN6166-i would gladly work outside in your so called "colder months". must be like 50* outside there.
It was very easy. No problems at all. I don't have an engine hoist, so I am using a chain hoist. Just unhooked everything, tied a chain "sling" to the engine, lifted it, and pulled the truck out from under the motor. I pulled the motor and transmission out together. it was easy.jammck66-flying v, how was it to pull the 300? I am planning on maybe doing that today myself here, so just wondering if you ran into any problems..
No, I'm in the "other" Hazlehurst which is about 60 miles north of Waycross. I didn't know until just a few months ago that there actually was a Hazlehurst near Woodbine. Yeah I got a good deal on the 302. I was hesitant about replacing the 300 cause it runs good, but I have been wanting a v-8. Your 460 should set you back into the seat!!Hurk-Are you in Camden county? Nice truck that 302 will be awesome looks like it too. I got a 460 in mine and I can't wait to get it on the road.
I got a little more done to the truck. Got the bed removed, tank removed, done a little more sanding on the cab floor. I want to remove the cab from the frame next. The cab mount bolts are giving me a fit. I'll get'em out somehow. Been buying parts for the truck and equipment for use, on the truck. I used a chain hoist to lift the bed, and then pulled the truck out from underneath it.


Looks great, keep the pics coming..
Try this on your cab mount bolts.. http://fordtruk.com/forums/viewtopic.php?t=4779
Try this on your cab mount bolts.. http://fordtruk.com/forums/viewtopic.php?t=4779
Jason
Beer will change the world.
I don't know how but it will.
Beer will change the world.
I don't know how but it will.
-
coledaddy541
- Posts: 63
- Joined: September 8, 2008, 6:43 pm
- Location: carrollton ga.
cab removed from frame
well I got a little more done. I'm glad the weather is warming up and drying out, being that I have to work on the truck outside. I bought a couple of 2000lbs strength straps, and rigged up some "catches" that would hook underneath the flange at the rear of the cab, and used bolts wedged into the cab mount access at the front. Run the straps to the chain hoist and pulled it right up. Easy as pie! I've got new frame/body bushings, brake shoes, wheel cylinders, bearings, shocks ready to be installed. I've got some por-15 chassis paint to paint the frame with. I have to do some patching at the frame horns first where the radiator mounts rusted out. But.........that's where I'm at.


repaired frame horn rust-out
Cut out the bad section of the frame where the radiator support bolts down. It was rusted out on both sides. Welded in metal pieces and ground down. My dad who was an excellent welder would scoff at what I've done. But, it passed the ball peen hammer test!


-
ezernut9mm

- Posts: 9141
- Joined: July 21, 2006, 9:37 pm
- Location: KCMO

great progress man. i'd like to take mine down that far one day and do everything right.
always
"i believe i've achieved satisfaction".-bubbles
"should i be gettin" baked for this boys?"-bubbles
i could no longer keep "r.i.p.ing" all of our fallen brothers and sisters, so i say here, slick loads of love and much respect to all you beautiful people.
"i believe i've achieved satisfaction".-bubbles
"should i be gettin" baked for this boys?"-bubbles
i could no longer keep "r.i.p.ing" all of our fallen brothers and sisters, so i say here, slick loads of love and much respect to all you beautiful people.


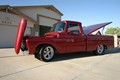
Take lots of pictures as you go along. It will help when you get ready to reassemble. I have referred back to mine many times in the process.
Isn't it a lot of fun doing tear down and assembly?
Kevin
Isn't it a lot of fun doing tear down and assembly?
Kevin
kstones63
_______________________________________
63 F100
29 Ford Sedan Delivery
99 F250 PSD, 4x4, CC
95 F350 Flatbed Dually Diesel
_______________________________________
63 F100
29 Ford Sedan Delivery
99 F250 PSD, 4x4, CC
95 F350 Flatbed Dually Diesel
-
1965fordf100

- Posts: 483
- Joined: February 25, 2008, 3:32 pm
- Location: Reno, NV

1965fordf100 ----I feel ya on hopin you can get it all back together, lol...i've taken tons of pics like kstone said, hopefully they come in handy...
Everything is lookin good!
Thanks guys. I have been taking photos, but probably not near enough. It is fun tearing it down, just wish I had more time to spend on it.kstones63---Take lots of pictures as you go along. It will help when you get ready to reassemble. I have referred back to mine many times in the process.
Isn't it a lot of fun doing tear down and assembly?
To start with, I was gonna just replace the radius arm bushings, but the kit I bought had the bushings for the I-beam pivot points, so I figured I might as well go for it. I had bought new coil springs and I guessed it would be easier to replace those with everything out of the way. Wasn't as bad s I thought it might have been. Pictures are not really well lit.


Got home after being gone all weekend and removed the rear axle and leaf springs. I was able to remove all the u-bolt nuts except 1. It's not coming off, so I have soaked it with penetrating oil and will try to get it off the axle tomorrow evening. Now I can start cleaning the frame and get it painted.


-
Alan Mclennan

- Posts: 9324
- Joined: October 14, 2006, 6:16 pm
- Location: In the shed... Cranebrook NSW

Good progress and great pic`s!, are you going to sand blast the chassis or Gerni it?
Honey, If I say I`ll fix something I will, there`s no need to remind me every 6 months!!
66 f100 tabletop swb 351 Clevo C6 "Beryl"
Slick Stock 3 KCMO
Slick Stock 4 Altoona
Slick Stock 5 KCMO
Slick Stock 6 Altoona
Slick Stock 7 Salina KS
Slick Stock 8..............................
66 f100 tabletop swb 351 Clevo C6 "Beryl"
Slick Stock 3 KCMO
Slick Stock 4 Altoona
Slick Stock 5 KCMO
Slick Stock 6 Altoona
Slick Stock 7 Salina KS
Slick Stock 8..............................
Thanks Alan, I'm not gonna sandblast. I'm just going to remove the loose stuff, and clean, prep, and paint with the POR15 coating. I'm not building a trailer queen, so it doesn't have to be perfect. My original intentions were NEVER going to take me this far into rebuilding the truck, but one thing led to another and here I am! 
-
slickmainer
- Posts: 2555
- Joined: October 8, 2007, 6:41 pm
- Location: Auburn Maine
- Contact:
bought one of the cheap pressure pot sand blasters to clean the smaller parts with. It works a lot better than I thought it would. I also found out that I can use bagged sand used for play areas from Lowe's at 2.89 for 50 lbs. I do have to sift it with a screen first, but it works pretty good. I've been blasting a lot of the smaller parts. Here's a before and after shot of the hood hinges.
before

after

and here is what can happen if your blasting with a short sleeve shirt and accidentally blow sand across your arm. Stings like crazy!! I'm wearing filters and a hood, guess my brain cells didn't tell me to use a little common sense and put some sleeves on. I'll have them on next time!

before
after
and here is what can happen if your blasting with a short sleeve shirt and accidentally blow sand across your arm. Stings like crazy!! I'm wearing filters and a hood, guess my brain cells didn't tell me to use a little common sense and put some sleeves on. I'll have them on next time!
Got my gasoline tank installed today. I used a 16 gal. mustang tank bought new with the sending unit included. Made a frame out of 1'' tubing. I didn't have a good way to miter the corners of the 1" steel, so I just welded it together after squaring it up. I'm planning on sealing the ends with something ( thinking about just screwing a 1" outside corner brace to each corner). I then bolted the whole thing to the truck frame after a little trim work and drilling. I'll be taking it all back off for paint. It's not perfect but I think it'll be ok.
Test fitting the 1" frame.

upside down view after being bolted in.

right side up view. should have plenty of room to adapt filler hose.

Test fitting the 1" frame.
upside down view after being bolted in.
right side up view. should have plenty of room to adapt filler hose.