
Jack's '65
sprayed mine down with PB blaster. Then found a craftsman socket that fit the hole exactly and beat the living hell out of it with a 3 lb short handle sledge. Now the key factor here is the craftsman socket. If you break the darn thing you can take it back in and get a new one, lol. Mine made it through 4 bushings. I doubt mine were in much better shape than yours. The rubber part I just burnt out with my cutting torch. The inner sleave was the only part I had trouble with.
-
1965fordf100
- Posts: 483
- Joined: February 25, 2008, 3:32 pm
- Location: Reno, NV

-
1965fordf100
- Posts: 483
- Joined: February 25, 2008, 3:32 pm
- Location: Reno, NV
Wow!!! I just came home to a heavy box sent USPS from my Uncle Rick, who finally decided to hand over the keys of Grandpa's truck to me 2 years ago...getting something from him really surprised me, what could it be???
I opened the box to find a note that says "Christmas in July, call me when you get this". I would guess there is between $250 to $300 worth of air tools, sanding discs, sheers, drill bits, gloves, and cut off wheels!!! I am extremely blown away and happy right now you wouldn't believe it...anyway I just had to share my excitement!!!


I opened the box to find a note that says "Christmas in July, call me when you get this". I would guess there is between $250 to $300 worth of air tools, sanding discs, sheers, drill bits, gloves, and cut off wheels!!! I am extremely blown away and happy right now you wouldn't believe it...anyway I just had to share my excitement!!!
Phil
-
1965fordf100
- Posts: 483
- Joined: February 25, 2008, 3:32 pm
- Location: Reno, NV
So apparently I had a miscommunication with the spring shop in town...I called them back to double check price on just pressing out old bushing and pressing in the new (not including bushings, since I already had them) and they did the work for $80 plus they gave me 4 new rebound clips, and 2 center bolts to put the springs back together, for the misunderstanding. I guess they priced me out with completely rebuilding my springs for me the first time I called, bushings and all. I will be using these guys for my axle pivot bushings as well. Great Work Johns Spring Shop!!!
Phil

Hey thanks for the info.oldtrucks wrote:1965fordf100
Go to Harbor Freight and buy a balljoint press for about $30.00 You can use it to change the U joints in your drive line too. I've about worn mine out doing all sorts of small press work with it.
You can also rent one from Autozone.
Here they refund your money when you return it.
'01 F150 Lightning
490RWHP
Gas Mileage? What's that?
Jerry
490RWHP
Gas Mileage? What's that?
Jerry
-
1965fordf100
- Posts: 483
- Joined: February 25, 2008, 3:32 pm
- Location: Reno, NV
finally got the differential back from Infinite Velocity Motorsports here in Reno...they rebuilt the diff for me, new bearings seals, etc...Got it painted along with the leaf springs taken apart, cleaned, painted, and new bushings in...it is all ready to go back together...
got some new pics up...not much but it is finally moving along again...
http://photobucket.com/65fordf100
got some new pics up...not much but it is finally moving along again...
http://photobucket.com/65fordf100
Phil
-
1965fordf100
- Posts: 483
- Joined: February 25, 2008, 3:32 pm
- Location: Reno, NV
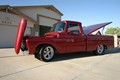
Got the diff back in tonight...Tomorrow night I got to finish mounting the front spring hangers...put on new brake components, and it will about be buttoned up in the back other than brake lines and new shocks...picture isn't all that great, I was in a hurry and used my phone to snap the pic...

Phil
-
Alan Mclennan

- Posts: 9324
- Joined: October 14, 2006, 6:16 pm
- Location: In the shed... Cranebrook NSW

Looking good Phil!, I like the diff centre treatment! 
Honey, If I say I`ll fix something I will, there`s no need to remind me every 6 months!!
66 f100 tabletop swb 351 Clevo C6 "Beryl"
Slick Stock 3 KCMO
Slick Stock 4 Altoona
Slick Stock 5 KCMO
Slick Stock 6 Altoona
Slick Stock 7 Salina KS
Slick Stock 8..............................
66 f100 tabletop swb 351 Clevo C6 "Beryl"
Slick Stock 3 KCMO
Slick Stock 4 Altoona
Slick Stock 5 KCMO
Slick Stock 6 Altoona
Slick Stock 7 Salina KS
Slick Stock 8..............................
-
1965fordf100
- Posts: 483
- Joined: February 25, 2008, 3:32 pm
- Location: Reno, NV
-
1965fordf100
- Posts: 483
- Joined: February 25, 2008, 3:32 pm
- Location: Reno, NV
-
1965fordf100
- Posts: 483
- Joined: February 25, 2008, 3:32 pm
- Location: Reno, NV
finally some progress
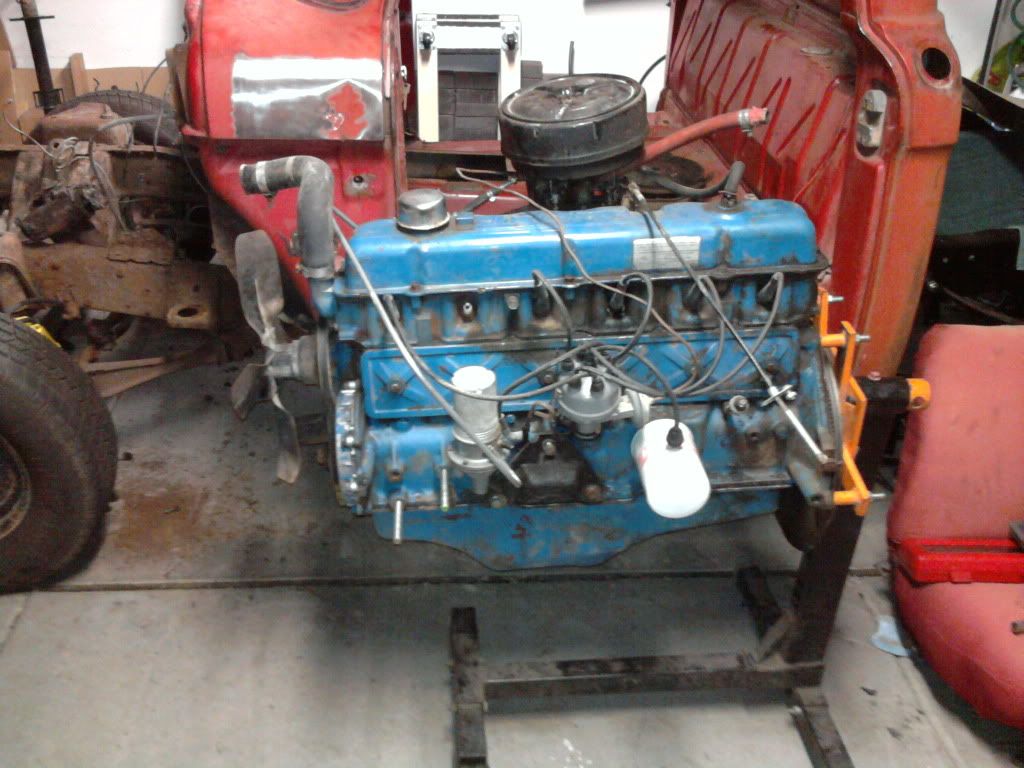
Well I finally got the rear of the frame buttoned up, and just need to run new brake lines. Moved on toward the front of the truck, and moved that cab back on the frame a bit so it would be easier to pull the motor and tranny for new gaskets and paint, and to finish prep and painting the frame. Also before I put the motor and tranny back in I will be putting the disc brake setup from the donor truck. Any way here are some pics of my minor progress.

Here is the mess I had to get into just to remove the doors and hinges...It is gonna be a lot of patch work for sure...and those floors will be replaced soon as well


Here is the mess I had to get into just to remove the doors and hinges...It is gonna be a lot of patch work for sure...and those floors will be replaced soon as well
Phil
Great work so far man. I have been looking for a diagram of the drum brake setup for the rear end the past few days, looked in your photobucket album and found exactly what I was looking for lol. Thanks for taking a picture too lol, keep up the great work!
My 1966 Ford F100 Project http://www.fordtruk.com/forums/viewtopic.php?t=9302
-
1965fordf100
- Posts: 483
- Joined: February 25, 2008, 3:32 pm
- Location: Reno, NV


-
1965fordf100
- Posts: 483
- Joined: February 25, 2008, 3:32 pm
- Location: Reno, NV
Thanks Max! I am pretty motivated to get some work done...the weather is turning really nice right now. The next 2 days will be almost 70 degrees out. Anyway I got some buddies over tonight to help pull the cab off the frame and put it on some mover dollies so I can finish the frame and replace the cab floor. Still waiting on engine parts from the blaster. Here are some pics.

Phil
-
1965fordf100
- Posts: 483
- Joined: February 25, 2008, 3:32 pm
- Location: Reno, NV
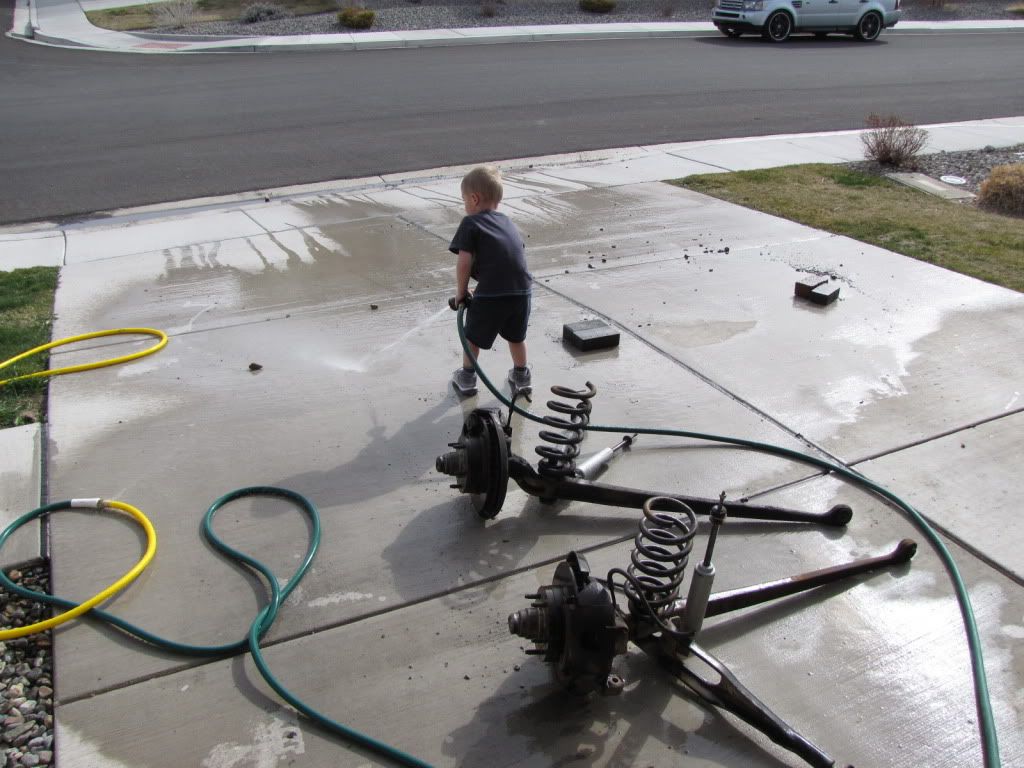
Got my son involved a bit over the last couple of days, he helped wash the frame and the driveway, lol. He had a blast, but got mad when it was nap time and I made him go inside. Of course that is when the real work begun, he is only 2 1/2 yrs old so he can't do much yet! We cleaned, prepped, and got the rust converter brushed on the rest of the frame, it will be ready for paint after curing for 48 hours. I got everything except for the front suspension, mainly because it is coming out for power disc brake upgrade, that will be shortly.


End result...

End result...
Phil
-
Alan Mclennan
- Posts: 9324
- Joined: October 14, 2006, 6:16 pm
- Location: In the shed... Cranebrook NSW
Phil, It looks like the young bloke did a good job while you were having a nap!, looking good mate!
Honey, If I say I`ll fix something I will, there`s no need to remind me every 6 months!!
66 f100 tabletop swb 351 Clevo C6 "Beryl"
Slick Stock 3 KCMO
Slick Stock 4 Altoona
Slick Stock 5 KCMO
Slick Stock 6 Altoona
Slick Stock 7 Salina KS
Slick Stock 8..............................
66 f100 tabletop swb 351 Clevo C6 "Beryl"
Slick Stock 3 KCMO
Slick Stock 4 Altoona
Slick Stock 5 KCMO
Slick Stock 6 Altoona
Slick Stock 7 Salina KS
Slick Stock 8..............................