
put the door back on the hinges with a 1/4" piece of plywood between the door and the sill. line it up with it closed as close as you can. then go inside and put the bolts in snug. then open the door you will be pretty close and can adjust a little more if needed.slickmainer wrote:got the doors off tonight, but I did so only AFTER reading that it's a good idea to drill a hole through the hinge before removing any bolts so it's easier to realign..Live and learn i guess
Slickmainers (Gregg) 65 project
-
ICEMAN6166
- Posts: 11470
- Joined: July 11, 2006, 11:28 am
- Location: Dove Creek, Co. elevation 6842

1966 F250 4x4
1964 Rambler Ambassador 990
Rest in peace departed Slick family members
Cam Milam
Lesley Ferguson
Steve Lopes
John Sutton
1964 Rambler Ambassador 990
Rest in peace departed Slick family members
Cam Milam
Lesley Ferguson
Steve Lopes
John Sutton
-
slickmainer
- Posts: 2555
- Joined: October 8, 2007, 6:41 pm
- Location: Auburn Maine
- Contact:

-
slickmainer
- Posts: 2555
- Joined: October 8, 2007, 6:41 pm
- Location: Auburn Maine
- Contact:
not much to report, just small steps. Got the glove box door, ash trey and mirror repainted, now to apply some clear.
the exterior is marlin blue still since the PO put a decent paint to it. Im doing the inside but doing it from a rattle can. I have to redo the top dash, lower dash, and the floor and the door panel. I haven't decided on the inside cab, but since my seats are getting recovered, i can do pretty much what ever looks good. It's really just a fix till I can get it repainted 3-5 years from now.
the exterior is marlin blue still since the PO put a decent paint to it. Im doing the inside but doing it from a rattle can. I have to redo the top dash, lower dash, and the floor and the door panel. I haven't decided on the inside cab, but since my seats are getting recovered, i can do pretty much what ever looks good. It's really just a fix till I can get it repainted 3-5 years from now.
--Gregg--
you can't get there from here
you can't get there from here
-
slickmainer
- Posts: 2555
- Joined: October 8, 2007, 6:41 pm
- Location: Auburn Maine
- Contact:
-
slickmainer
- Posts: 2555
- Joined: October 8, 2007, 6:41 pm
- Location: Auburn Maine
- Contact:
Here are my glove box, ash tray, mirror and trans cover painted in Dupli-color Wimbledon White, and Dupli-color clear. New 4sp boot ready to go on as well. The lower dash is also getting Dupli-colored. Also going to get the visor done in this color too, but haven't figured out how the cardboard visors come off the posts


--Gregg--
you can't get there from here
you can't get there from here
-
64shortbed
- Posts: 291
- Joined: April 15, 2010, 12:25 am
- Location: Paso Robles, Ca

The sun visor will come off the spindel by twisting it back and forth while pulling it at the same time.
Michelle
Democracy is two wolves and a sheep voting on what to have for dinner. A Republic is a well-armed sheep.
I hope I always stay crazy, because I know if I ever become sane, it will drive me crazy.
Democracy is two wolves and a sheep voting on what to have for dinner. A Republic is a well-armed sheep.
I hope I always stay crazy, because I know if I ever become sane, it will drive me crazy.
I recovered a pair that were falling apart in vinyl, wasn"y too tough. You could probably find vinyl or cloth in a color so close you couldn't tell the difference.
Last edited by Greg D on July 11, 2010, 4:27 pm, edited 1 time in total.
1964 F 100 - I am going to do "something" with it.......
viewtopic.php?f=32&t=15942
1987 Mustang LX Convertible, 2.3 Auto - cruiser.
1994 F 150 XLT 2WD
~ Yes - I adopted another cat..............
Cam L Milan,
You'll be missed my friend.
viewtopic.php?f=32&t=15942
1987 Mustang LX Convertible, 2.3 Auto - cruiser.
1994 F 150 XLT 2WD
~ Yes - I adopted another cat..............
Cam L Milan,
You'll be missed my friend.
-
slickmainer
- Posts: 2555
- Joined: October 8, 2007, 6:41 pm
- Location: Auburn Maine
- Contact:
-
slickmainer
- Posts: 2555
- Joined: October 8, 2007, 6:41 pm
- Location: Auburn Maine
- Contact:
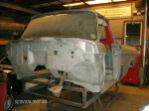
little more work done this weekend.
painted the heater

painted lower dash with duplicolor spray can W.White


Top of roof with hammerite "hammered" black


as you can see I also primed some of the door area and the top of the dash. I need to sand that down and get it ready for marlin blue spray can
painted the heater
painted lower dash with duplicolor spray can W.White
Top of roof with hammerite "hammered" black
as you can see I also primed some of the door area and the top of the dash. I need to sand that down and get it ready for marlin blue spray can
--Gregg--
you can't get there from here
you can't get there from here
-
dotcentral
- Posts: 1341
- Joined: August 18, 2006, 5:13 pm
- Location: Charlotte, NC
-
Thunderboy
- Posts: 335
- Joined: August 26, 2008, 2:24 pm
- Location: Sacramento, California
Looks nice, Gregg. I'm glad you've managed not to get so deep that you can't drive it soon. It is so easy to tear these trucks apart, then not have the time and/or money to put it back together.

I wish I had done it like you are. I have 2 66s, and they are both apart. It seems like I spend lots of time and money, but neither of them are near ready to drive.
I wish I had done it like you are. I have 2 66s, and they are both apart. It seems like I spend lots of time and money, but neither of them are near ready to drive.
Drew
66 F250 Frame swap, EFI 408W, ZF 5-speed swap (still!) in progress
63 Falcon Futura EFI 331W, T5, but not much progress... Slicks First!!!
66 F250 Frame swap, EFI 408W, ZF 5-speed swap (still!) in progress
63 Falcon Futura EFI 331W, T5, but not much progress... Slicks First!!!
-
slickmainer
- Posts: 2555
- Joined: October 8, 2007, 6:41 pm
- Location: Auburn Maine
- Contact:
that was my goal. it was pretty solid and could be driven (short distance) when i got it. a seat, heater, antifreeze, and brakes and it's good to go. I could live the holes in the floor board since I'll put something over them anyway, but figured since all these things were out id do the floor, then button up and drive.
--Gregg--
you can't get there from here
you can't get there from here
-
slickmainer
- Posts: 2555
- Joined: October 8, 2007, 6:41 pm
- Location: Auburn Maine
- Contact:
Not sure about that area yet. couple of options for medotcentral wrote:Looks good Greg. I am working on my cab right now as well.
How are you going to handle the kick panel area? I'm worried about paint holding up over time there.
Hammerite in black like the roof, then spray can blue over it
Hammerite in black and leave it black
cover it with a custom kick panel of sorts.
basically im hoping for a
 moment
--Gregg--
you can't get there from here
you can't get there from here
-
slickmainer
- Posts: 2555
- Joined: October 8, 2007, 6:41 pm
- Location: Auburn Maine
- Contact:
-
slickmainer
- Posts: 2555
- Joined: October 8, 2007, 6:41 pm
- Location: Auburn Maine
- Contact:
New videos. 3 to be exact.
rust on my drivers side cab floor
http://www.youtube.com/user/imaplatlong ... QD5PkCb_is
my door and some parts
http://www.youtube.com/user/imaplatlong ... 0hX6ZpsOmc
some interior parts i painted and bought
http://www.youtube.com/user/imaplatlong ... 56rHkryd84
rust on my drivers side cab floor
http://www.youtube.com/user/imaplatlong ... QD5PkCb_is
my door and some parts
http://www.youtube.com/user/imaplatlong ... 0hX6ZpsOmc
some interior parts i painted and bought
http://www.youtube.com/user/imaplatlong ... 56rHkryd84
--Gregg--
you can't get there from here
you can't get there from here
-
slickmainer
- Posts: 2555
- Joined: October 8, 2007, 6:41 pm
- Location: Auburn Maine
- Contact:
well ive decided to take the money i had set aside for floor pans/welder, and do the brakes and wheel cyl first. I figure, at least with brakes I can drive it, even if it has some holes in the floor. I could spend all that money for the floors and still not be able to drive it!
time for brakes, wheel cyls, front parking brake cable, and 2 new tires
time for brakes, wheel cyls, front parking brake cable, and 2 new tires
--Gregg--
you can't get there from here
you can't get there from here
-
olliesshop
- Posts: 737
- Joined: May 16, 2010, 8:38 am
- Location: Grosse Pointe, Michigan (Detroit Metro)
- Contact:
I just went through your thread again. It sure is coming along nicely!!!
I agree ... getting the brakes working flawlessly is important. I don't think I've been able to drive mine on the street for about 10 years, since the brakes need rebuilding. The pedal goes right to the floor.
Good Luck !!!
I agree ... getting the brakes working flawlessly is important. I don't think I've been able to drive mine on the street for about 10 years, since the brakes need rebuilding. The pedal goes right to the floor.
Good Luck !!!
Tim - 1961 F250 Uni
"Big Red" pictures ... http://olliesshop.smugmug.com/Trucks
Current build thread ... viewtopic.php?f=32&t=29505
"Big Red" pictures ... http://olliesshop.smugmug.com/Trucks
Current build thread ... viewtopic.php?f=32&t=29505