
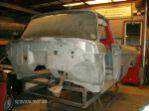
The cab does seem to be going relativley smooth so far, with any luck it will carry on that way.
A good friend of mine has been around a bit and is taking most of the pictures. I know ive only posted 10 or 12 in total but have about 220 pics this month on the truck!
Gonna make a killer slideshow when it's all said and done.
Wife is in town and im just watching the girls right now, but I hope to do a little something to the truck this afternoon.
On a side note, does anyone know how I could get this thread moved into the projects/builds forum ? My own fault, i should have looked things over a little better first. THanks
Japedo
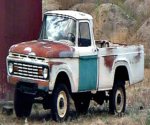
1st truck, 1st ford, 1st build

Welcome from another Washington state slickster. Hey when I see what you guys have to start with rust and all makes me thankful for what the trucks that are from this state still are in.
1963 F250 4x4x292
1965 F100 4x4x352
1998 F150 4x4x4.6
2001 Sport Track 4x4x4.0
In case you are wondering thats Ireland......Freedom is not Free!!!!!!!!
Heritage country Flag
1965 F100 4x4x352
1998 F150 4x4x4.6
2001 Sport Track 4x4x4.0
In case you are wondering thats Ireland......Freedom is not Free!!!!!!!!
Heritage country Flag
HiBoy63 wrote:Welcome from another Washington state slickster. Hey when I see what you guys have to start with rust and all makes me thankful for what the trucks that are from this state still are in.
Thanks for another washington welcome!
I deffinentley agree that the trucks in the maritimes are pretty rusty, make that very rusty.
However I have two volvos that we drive daily and they don't seem to rust like american and japanese vehicles.
Stuff stays in great shape around here if it's only driven summers and garaged winters. But my old custom cab didn't get such treatment.
More progress pics later today
Japedo
-
olliesshop
- Posts: 737
- Joined: May 16, 2010, 8:38 am
- Location: Grosse Pointe, Michigan (Detroit Metro)
- Contact:

How easy was it to take the knobs off in the interior. Was it pretty straightforward? I've never done mine (except for the ignition switch) and I'd like to take them out when I repaint the interior.
BTW ... here's the method (from the Shop Manual) for the ignition switch, since (From the picture) it looked like it was still in.
[albumimg]8372[/albumimg]
BTW ... here's the method (from the Shop Manual) for the ignition switch, since (From the picture) it looked like it was still in.
[albumimg]8372[/albumimg]
Tim - 1961 F250 Uni
"Big Red" pictures ... http://olliesshop.smugmug.com/Trucks
Current build thread ... viewtopic.php?f=32&t=29505
"Big Red" pictures ... http://olliesshop.smugmug.com/Trucks
Current build thread ... viewtopic.php?f=32&t=29505
olliesshop wrote:How easy was it to take the knobs off in the interior. Was it pretty straightforward? I've never done mine (except for the ignition switch) and I'd like to take them out when I repaint the interior.
BTW ... here's the method (from the Shop Manual) for the ignition switch, since (From the picture) it looked like it was still in.
[albumimg]8372[/albumimg]
Pretty straightforward for the switches. Like the wiper switch for instance I just took another look at it. The knob pulls off, then there is a chrome inner nut that can be loosened with a flat screwdriver. Then the wiper switch can be taken out of the back of the dash easily.
I can get a picture if you would like but its pretty simple.
Thanks for the info on the ignition switch removal, my issue is that this truck didn't come with a key. I'll likely have to damage it to get it out and get aanew switch and key.
I have a couple new pieces of steel in the cab and will do my best to get the pictures on here soon.
Thanks again oliesshop, and nice photos on your site!
Japedo


Outstanding!
For a guy who is just an amateur... WOW! Outstanding progress. I don't have the skills to do what you've done, or the patience.
BTW, another greetings from Michigan. My slick also suffers from the cancer. Mine sat for 7 years, but after a few hours, I got it running and drove it home 10 miles!
BTW, another greetings from Michigan. My slick also suffers from the cancer. Mine sat for 7 years, but after a few hours, I got it running and drove it home 10 miles!
"Ernie" 66 F250
"The thing about quotes from the internet is you cannot confirm their validity." - Abraham Lincoln
"The thing about quotes from the internet is you cannot confirm their validity." - Abraham Lincoln
-
Hoofbeat Racer

- Posts: 1782
- Joined: July 6, 2006, 12:22 am
- Location: Rocky Mountains, Alberta


-
64shortbed
- Posts: 291
- Joined: April 15, 2010, 12:25 am
- Location: Paso Robles, Ca
 You seem very motivated, which is what you'll need for a project like that! I look forward to seeing your progress.
progress pictures.
THanks for all the welcomes and positive feedback. The slick crowd seems great.
Here are a few before and after pictures.
Here is a rusted section that was behind the windshield.

Here it is patched and ground down.

Here is a nasty hole in my cowl. As you can see it had a thin patch rivvited over it with some body fill around it. Fancy!!!

I removed the body fill with a wire brush, cut a square section out of the cowl and butt welded in a new piece. I kept the patch slightly lower then it should be to make it easier to body fill.

Here is a little bit of rust from the inside of the cab, notice the section above the dash where the windshield weatherstripping mounts.

And here it is, cancer out new steel in place. However in this picture there is still welding and grinding left to do on the patch.

I installed the last small patch on the cowl support, the small rectangular one near the top. I wire brushed the rest of the support and threw some rust paint on for the time being.
 Sure is looking better then it once did.!!
The cab mounts have been ordered, and I am planning on tearing a crown vic apart in the next 7 days sometime.
I think I may need to dispose of some junk first though.
Japedo
Here are a few before and after pictures.
Here is a rusted section that was behind the windshield.
Here it is patched and ground down.
Here is a nasty hole in my cowl. As you can see it had a thin patch rivvited over it with some body fill around it. Fancy!!!
I removed the body fill with a wire brush, cut a square section out of the cowl and butt welded in a new piece. I kept the patch slightly lower then it should be to make it easier to body fill.
Here is a little bit of rust from the inside of the cab, notice the section above the dash where the windshield weatherstripping mounts.
And here it is, cancer out new steel in place. However in this picture there is still welding and grinding left to do on the patch.
I installed the last small patch on the cowl support, the small rectangular one near the top. I wire brushed the rest of the support and threw some rust paint on for the time being.
Sure is looking better then it once did.!! The cab mounts have been ordered, and I am planning on tearing a crown vic apart in the next 7 days sometime.
I think I may need to dispose of some junk first though.
Japedo
And a patch over the transmission tunnel where someone previously cut a hole with a set of torches for the c4 transmisson shifter. 
 THank god carpet will hide the floors! lol
UNrelated to the slick, but i decided I had better take a break and restore a jeep for my daughters.

Found this 98 fisher price jeep on the side of the road in a garbage pile. All it needed was a battery to be completley functional.
BUt it was ugly so I gave it the 1 hour complete fisher price resto!

Doesn't look like garbage anymore.
All I had for plastic paint was flourecent orange, she has enough pink stuff anyway.
Japedo
THank god carpet will hide the floors! lol UNrelated to the slick, but i decided I had better take a break and restore a jeep for my daughters.
Found this 98 fisher price jeep on the side of the road in a garbage pile. All it needed was a battery to be completley functional.
BUt it was ugly so I gave it the 1 hour complete fisher price resto!
Doesn't look like garbage anymore.
All I had for plastic paint was flourecent orange, she has enough pink stuff anyway.
Japedo
I also patched the gas cap yesterday. I was thinking about bending it slightly but decided to just weld in a flat circular patch. Which will require some body fill.

As you can see I also cut out the rear cab corner on that side, ang guess what........ it was rusty in their to Didnt see that one coming. lol
Japedo
As you can see I also cut out the rear cab corner on that side, ang guess what........ it was rusty in their to
Didnt see that one coming. lol Japedo
-
olliesshop
- Posts: 737
- Joined: May 16, 2010, 8:38 am
- Location: Grosse Pointe, Michigan (Detroit Metro)
- Contact:
Man, you're really cranking!!! Keep up the good work and of course the great pictures.
All the best!!!
All the best!!!
Tim - 1961 F250 Uni
"Big Red" pictures ... http://olliesshop.smugmug.com/Trucks
Current build thread ... viewtopic.php?f=32&t=29505
"Big Red" pictures ... http://olliesshop.smugmug.com/Trucks
Current build thread ... viewtopic.php?f=32&t=29505
olliesshop wrote:Man, you're really cranking!!! Keep up the good work and of course the great pictures.
All the best!!!
THanks for the encouragment. With my work schedule I work 24hrs on and then 3 days off. Even with wathcing the kids when my wife is working it still leaves time for a project like this.
JApedo
-
Uncle Skip

- Posts: 4695
- Joined: July 15, 2006, 8:30 pm
- Location: Pearland, Texas
Removing the light switch is a little different.
There is a small tab on the body of the switch; press it down and pull the entire knob and shaft out the front. Then unscrew the bezel and you're golden.
U@ss
There is a small tab on the body of the switch; press it down and pull the entire knob and shaft out the front. Then unscrew the bezel and you're golden.
U@ss
I'm not arguing with you. I'm just explaining why I'm right.
Pardon me. Does your deaug bite?
Pardon me. Does your deaug bite?
Hello everyone, I am wondering if someone could help me out with something.
On my dash just to the left of the steering column was a little red push button with an aluminum bezel. The button had a "S" on it. What was that for starting it?
Also a black push button above the ignition, which I don't know what it was for.
My friend was the one that took that stuff apart when we were stripping the cab, so I din't really get to good a look at it. BUt all the wireing was inbad shape and had to go.
There is a picture of the dash with the switches still in place further up on this page.
Thanks in advance fella's.
Japedo
On my dash just to the left of the steering column was a little red push button with an aluminum bezel. The button had a "S" on it. What was that for starting it?
Also a black push button above the ignition, which I don't know what it was for.
My friend was the one that took that stuff apart when we were stripping the cab, so I din't really get to good a look at it. BUt all the wireing was inbad shape and had to go.
There is a picture of the dash with the switches still in place further up on this page.
Thanks in advance fella's.
Japedo

The black button above the ignition switch is for the windshield washer.japedo wrote:Hello everyone, I am wondering if someone could help me out with something.
On my dash just to the left of the steering column was a little red push button with an aluminum bezel. The button had a "S" on it. What was that for starting it? :?
Also a black push button above the ignition, which I don't know what it was for.
My friend was the one that took that stuff apart when we were stripping the cab, so I din't really get to good a look at it. BUt all the wireing was inbad shape and had to go.
There is a picture of the dash with the switches still in place further up on this page.
Thanks in advance fella's.
Japedo
Steve F
1965 Mustang Coupe
1966 F-100 Shortbed CC/Ranger
2010 Mustang GT Convertible
2010 Shelby GT500 Convertible
1965 Mustang Coupe
1966 F-100 Shortbed CC/Ranger
2010 Mustang GT Convertible
2010 Shelby GT500 Convertible